
The Professional OSINT Practitioner
From Foundations to Advanced Attribution


This is not a theoretical course. It is a practical, hands-on deep dive into the mindset and methodologies of a professional OSINT investigator. Every module is designed to answer not just the “what,” but the “how” and the “why,” with a strict focus on legal, ethical, and operational security (OPSEC) considerations. The goal is to transform a student from a curious beginner into a capable, analytical investigator.
Volume 1: Foundations, Geospatial, & Target Footprint Analysis
Core Syllabus Index
Module 0: The OSINT Foundation & Ethical Framework
Lecture 0.1: What OSINT Is and Is Not
Lecture 0.2: A Brief, Practical History
Lecture 0.3: The OSINT Trinity: Ethics, Law, and OPSEC
Module 1: Advanced Search Engine Mastery & The Art of the Google Dork
Lecture 1.1: How Search Engines Index the World
Lecture 1.2: The Dorking Syntax Bible (Operators & Practical Application)
Module 2: Image Intelligence (IMINT): Geolocation, Verification, and Metadata
Lecture 2.1: The Art and Science of Image Geolocation
Lecture 2.2: Reverse Image Search Tradecraft (Crop First, Search Second)
Lecture 2.3: EXIF, the Hidden Storyteller
Practical Assignment: The "Where in the World" Geolocation Capstone*
Module 3: Email & Username Intelligence: The Digital Skeleton
Lecture 3.1: Email Deconstruction & Intelligence
Lecture 3.2: The Forgotten Art of Verification & Password Reset Intel
Lecture 3.3: Username-Driven Attribution (Permutation Logic)
Practical Assignment: Operation SHADOW TRACE
Module 4: Social Media Intelligence (SOCMINT): Platform Deep Dives
Lecture 4.1 to 4.11: Advanced Target Enumeration & Verification on Facebook, LinkedIn, Instagram, Reddit, X (Twitter), GitHub, TikTok, Bluesky, and Discord.
Module 0: The OSINT Foundation & Ethical Framework
Before you open a single tool, before you run a single search, before you touch any data, you need to understand what you are doing, why you are doing it, and how to do it without destroying yourself in the process. This module sets the baseline. Everyone starts here.
Lecture 0.1: What OSINT Is and Is Not
OSINT is Open Source Intelligence. The official definition is simple: intelligence produced from publicly available information that is collected, exploited, and disseminated in a timely manner to an appropriate audience.
Let me break that down
Publicly available means the information is accessible without special access. No passwords. No breaches. No hacking. If you need to log in, bypass a paywall, or exploit a vulnerability, that is not OSINT. That is something else entirely.
Collected, exploited, and disseminated means you do not just find data. You process it. You analyze it. You turn it into something actionable. Then you deliver it to someone who can use it. Raw data is not intelligence. Intelligence is data that has been verified, contextualized, and presented with meaning.
The Intelligence Cycle Applied to OSINT
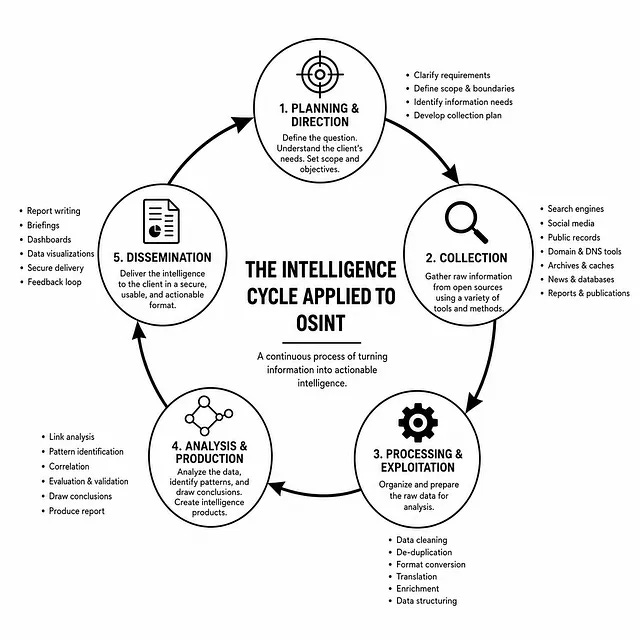
Every professional investigation follows a cycle. Skip a step, and your product suffers.
Planning & Direction: What is the question? What does the client actually need? Define your scope before you start, or you will drown in data.
Collection: Gather the raw information. Search engines, social media, public records, domain tools, archives.
Processing & Exploitation: Organize the raw data. Strip out noise. Convert formats. Prepare for analysis.
Analysis & Production: Connect the dots. Identify patterns. Draw conclusions. Produce a report that answers the original question.
Dissemination: Deliver the finished intelligence to the client in a format they can use.
Distinguishing OSINT from Adjacent Disciplines
OSINT is one intelligence discipline among many. Do not confuse them.
HUMINT — is human intelligence. Talking to people. Recruiting sources. Running informants. That is not OSINT.
SIGINT — is signals intelligence. Intercepting communications. That is not OSINT.
GEOINT — is geospatial intelligence. Satellite imagery analysis. OSINT can include GEOINT when the satellite data is publicly available, but the classified stuff is not OSINT.
What OSINT Is Not
Let me be absolutely clear on this.
OSINT is not hacking. You do not bypass security. You do not exploit vulnerabilities. You do not access systems without authorization.
OSINT is not doxxing. Doxxing is publishing private information with malicious intent. OSINT is collecting and analyzing publicly available information for legitimate purposes. The difference is intent, consent, and dissemination.
OSINT is not illegal access. If a file is publicly accessible on a server but the server owner did not intend for it to be public, accessing it may still be legal in some jurisdictions. That does not make it ethical. We will cover this boundary in depth.
If you want to be a hacker, this is the wrong course. If you want to be a professional investigator who operates within the law and maintains ethical standards, you are in the right place.
Lecture 0.2: A Brief, Practical History
OSINT sounds new. It is not. Governments have been doing this for over eighty years.
The Early Days
During World War II, the United States created the Foreign Broadcast Information Service, or FBIS. Their job was simple. Monitor foreign radio broadcasts. Transcribe them. Translate them. Analyze them. This was open source intelligence before the term existed.
The BBC performed a similar function for the United Kingdom. Both organizations understood that publicly available information, when systematically collected and analyzed, produces intelligence as valuable as anything from a spy.
The Digital Revolution
The commercial internet changed everything. Suddenly, information that used to require a physical presence to access became available to anyone with a modem. Search engines organized it. Forums and early social media created new sources of human behavior data.
The 2010s saw the rise of platforms like Facebook, Twitter, YouTube, and LinkedIn. Billions of people began voluntarily publishing their locations, relationships, opinions, and activities. For an intelligence analyst, this was unprecedented.
The Open Source Revolution
The 2020s marked a turning point. The conflict in Ukraine demonstrated that open source intelligence had matured into a primary intelligence discipline. Civilian analysts using commercial satellite imagery, social media posts, and public flight tracking data were able to document military movements, verify attacks, and expose disinformation in near real-time.
This was not a niche hobby. It was a strategic capability. Governments, corporations, and investigative organizations now recognize OSINT as essential. That is the world you are entering.
Lecture 0.3: The OSINT Trinity: Ethics, Law, and OPSEC
Three things govern every investigation you will ever conduct. Ethics. Law. Operational Security. Ignore any one of them, and you are not a professional. You are a liability.
Ethics
Ethics is not the same as law. Something can be legal and still be wrong. Your ethical framework is what separates you from a stalker, a harasser, or a vigilante.
Key principles:
Respect for privacy — Just because information is publicly available does not mean the person intended for it to be public. Consider context. A photo posted to a public Facebook group is public. A photo extracted from an unsecured cloud storage bucket is also technically public, but the subject did not consent to its distribution. Understand the difference.
Data minimization — Collect only what you need for the investigation. Do not hoard personal data. When the investigation is complete, securely dispose of what you no longer require.
Intent — Ask yourself why you are investigating. Is the purpose legitimate? Due diligence for a business partnership? Locating a missing person? Supporting a legal case? These are legitimate purposes. Investigating an ex-partner out of jealousy? That is stalking.
When does investigation become stalking? When the purpose is personal rather than professional. When the collection is obsessive rather than systematic. When the subject has a reasonable expectation of privacy and you violate it. If you are not sure, ask a colleague. If you cannot explain your purpose to a third party without sounding creepy, stop.
Law
Laws vary by jurisdiction, but some principles apply broadly.
GDPR — (General Data Protection Regulation) governs the processing of personal data in the European Union and the UK. It applies even if you are outside the EU but processing data about EU residents. Understand the basics. Public availability is not an automatic defense.
CFAA — (Computer Fraud and Abuse Act) in the United States makes it illegal to access a computer system without authorization. If a site has terms of service and you violate them, you may be committing a federal crime. Read terms of service. Know what you are agreeing to.
Terms of service are legally binding contracts — If a platform prohibits automated scraping, and you automate scraping, you are in violation. This may be civil rather than criminal, but it can still get you sued or banned.
Publicly available does not mean legal to collect or process — This is the most important legal lesson in this course. A document sitting on an open server is publicly available. If you access it for a legitimate purpose, you may be fine. If you download it, republish it, or use it for harassment, you may be committing crimes. Context and jurisdiction matter. When in doubt, consult a lawyer.
Operational Security (OPSEC)
Your own security is your first priority. If your investigation exposes you, you become the story. Your target may retaliate. The platform may ban you. Your employer may face legal consequences.
Practical Setup: The Investigation Environment
Every investigation starts with a clean, isolated environment.
Virtual Machine (VM): Use VirtualBox or VMware. Install a clean operating system. This VM is only for investigations. Nothing personal lives here.
Dedicated Browser: Use Firefox or Brave within the VM. Configure privacy settings. Disable telemetry. Install essential extensions only.
VPN or Dedicated Connection: Your investigation traffic should not originate from your home IP address. Use a VPN with a kill switch, or a dedicated mobile hotspot.
No Cross-Contamination: Never log into personal accounts from your investigation VM. Never check your email. Never browse social media. This VM touches the target. Nothing else.
Sock Puppets, Not Sloppy Puppets
A sock puppet is a fabricated online identity used for investigation. Done right, it is a professional tool. Done wrong, it is a liability that exposes you in seconds.
Creating a credible sock puppet requires:
A believable backstory: The persona needs a name, a location, an occupation, and a plausible history. Do not invent a neurosurgeon if you do not know what a neurosurgeon does. Keep it simple. Keep it close to what you actually know.
Aged accounts: Create accounts and let them sit. A brand-new account with zero friends, zero posts, and zero history is immediately suspicious. Build the persona over weeks or months before using it for investigation.
Consistent activity: Post occasionally. Follow people. Build a presence. The account should look lived-in.
Dedicated infrastructure: Each sock puppet gets its own email address, its own phone number (for verification), and its own profile picture. Never reuse details across puppets.
Browser fingerprinting countermeasures: Websites track your browser fingerprint, a combination of your screen resolution, installed fonts, timezone, language settings, and more. Use anti-fingerprinting browser extensions or dedicated tools like the Brave browser’s fingerprinting protection. Your sock puppet’s fingerprint must not match your real fingerprint.
VM escape risks: If malware on the target’s site breaks out of your VM and reaches your host machine, you are compromised. Keep your VM software updated. Do not download files from suspicious sites directly. Use a sandbox.
Canary tokens: These are hidden trackers you can embed in documents or links. If someone opens a file you planted, the token alerts you. This is how you detect if your sock puppet has been discovered and someone is investigating you back.
Module 1: Advanced Search Engine Mastery & The Art of the Google Dork
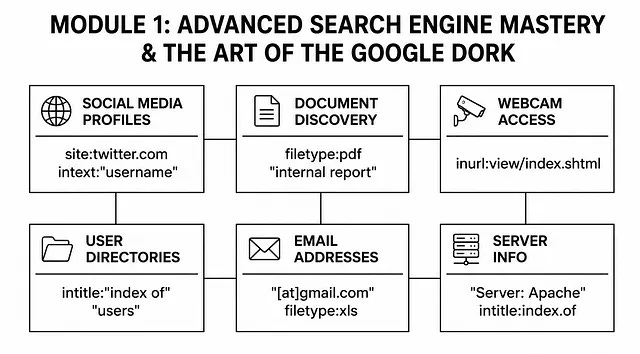
This module moves beyond simple search into the syntax-based exploitation of search engine indexes.
Lecture 1.1: How Search Engines Index the World
Search engines like Google, Yandex, Bing, and others are far more than everyday query tools. For the OSINT investigator, they are the primary gateway to an immense, continuously updated repository of publicly available intelligence. These platforms systematically crawl, index, and organize billions of web pages, documents, and exposed directories, often surfacing data that website owners never intended to be discoverable.
Security analysts and professional investigators have long recognized this power. For years, they have relied on search engines not merely for casual research, but as precision instruments to gather actionable intelligence and uncover evidence. Whether the task involves mapping the digital footprint of a person of interest, tracing infrastructure in a cybercrime investigation, or conducting comprehensive due diligence on a corporation, mastery of search engine mechanics separates the professional from the amateur. This lecture establishes the foundational understanding of how that indexing process works because you cannot exploit what you do not understand.
Understanding crawlers, indexes, and why dorks work.
Let us get one thing straight before we touch any dork or type any command: you need to understand what happens behind the scenes when a search engine does its job. If you skip this part, you will just be memorizing syntax without knowing why it works, and that is not how a real investigator operates.
Search engines use automated bots, often called crawlers or spiders. These bots are constantly moving across the web, jumping from one link to another, downloading page content, and following new paths wherever they lead. They are not smart. They are just fast and relentless. They land on a page, read the text, the titles, the links, the file names, and then they move on. Whatever they find, they take back to the search engine’s main database, which we call the index.
Now, the index is basically a gigantic, constantly updating library of everything the crawlers have seen. But here is the part most people miss: crawlers do not just index the obvious stuff. They also index things like directory listings that someone forgot to secure, backup files with weird extensions, server error messages that leak software versions, and even login portals that were never meant to be found through a simple search. They just crawl and capture. They do not judge whether something should be public or not. That is where we come in.
This brings us to Dorks
A Google dork is not some magic hack. It is simply a search query that uses advanced operators to tell the search engine exactly what we want from that massive index. Think of it like this: the index holds everything the crawler saw. Most people just type random words and hope for the best. We, on the other hand, use operators to filter out the noise and pull back only what is valuable. We are not breaking anything. We are not accessing anything illegally. We are simply asking the search engine a smarter question.
So when you use a dork like intitle:"index of", you are basically telling Google: “Hey, from your entire index, show me only pages where the title tag literally says ‘index of’.” That is it. The power does not come from the tool. It comes from you understanding how the data got there in the first place and knowing how to ask for it properly.
This is the foundation. Once you internalize this, every operator, every filter, every combination will make sense because you will know what you are actually doing under the hood.
Lecture 1.2: The Dorking Syntax Bible
Now we get to the part everyone thinks they already know. Most people can type `site:` into Google and feel like a hacker. But there is a massive difference between knowing a few operators and truly understanding how to combine them for precise, repeatable results. That is what this lecture is about.
Let us break down the core operators one by one, not just as definitions, but as tools with specific intelligence purposes
site:
This one restricts your search to a single domain or top-level domain. Sounds simple, right? But here is what most people miss. `site:example.com` searches that domain and all its subdomains. So if you are investigating a company, you are not just searching their main website. You are also pulling results from their support portal, their dev environment, their staging server, whatever is publicly exposed and indexed. You can also flip this. `site:gov` restricts results to government domains. `site:edu` targets educational institutions. For an investigator, this operator is your scope control. Use it first, then layer everything else on top.
intitle:
This operator searches only within the HTML title tag of a page, the text that appears on your browser tab. Why is this important? Because the title tag often contains the most descriptive, structured information about what a page actually is. Directory listings have “Index of” in the title. Login pages often have “Login” or “Sign In.” Camera feeds have the device model. When you use `intitle:`, you are not just searching for words on a page. You are searching for the page’s identity.
inurl:
This one hunts inside the URL itself. URLs carry structure. They reveal file paths, directory names, parameters, and sometimes even usernames. If you see `/admin/` in a URL, you know what that likely points to. If you see `/uploads/`, you know files might be sitting there openly. The `inurl:` operator lets you target those structural clues directly. This is how you find login portals, exposed admin panels, and configuration files that were never meant to be public.
intext:
This searches only within the body text of a page. It ignores titles, URLs, and metadata. Why does this matter? Because sometimes the thing you are looking for, like a password, an internal project name, or a specific phrase from a leaked document, only exists in the body content. `intext:` lets you cut straight to it without getting distracted by pages that merely mention your keyword in a title or link.
Combining Operators
Here is where the real skill comes in. Any amateur can use one operator. A professional combines them to build a precise query that returns exactly what they need and nothing else.
Let me give you an example. Say you are doing a corporate investigation and you want to find Excel files on the target’s domain that contain the word “confidential.”
You do not just type “confidential” into Google. You build this:
`filetype:xlsx site:company.com intext:”confidential”`
Now let us break down what this does. `site:company.com` locks your search to their domain. `filetype:xlsx` tells Google you only want Excel spreadsheets. `intext:”confidential”` instructs it to look inside the body of those spreadsheets for that specific word. Three operators, one query, and suddenly you are looking at documents that were probably meant to stay internal.
That is the mindset. Every operator is a filter, and your job is to stack filters until only the gold remains.
The Often-Overlooked Operators
Nobody talks about these enough, and that is a mistake.
`daterange:` lets you restrict results to a specific time period using Julian date format. This is critical for investigations where you need to see what was indexed during a particular time-frame, like before a company claimed they removed certain content, or during the period when a cyberattack was happening.
Number ranges, accessed through the numrange operator or simply by using two dots between numbers, are another underused weapon. Let us say you are looking for a specific model of a vulnerable IoT device. Instead of guessing, you can search for a range of serial numbers or firmware versions that are known to be exploitable. This turns a broad search into a surgical strike.
`filetype:` we already touched on, but understand how deep this goes. Beyond `xlsx` and `pdf`, you can hunt for `.sql` database backups, `.env` configuration files, `.log` server logs, `.bak` backup files, and more. Each file type tells a different story. A `.sql` file might contain user credentials. A `.env` file might leak API keys. A `.log` file might expose internal IP addresses and server paths.
Practical Application
Let me give you real scenarios so you understand how this plays out in actual investigations.
Finding Exposed Directories:
When a web server has directory listing enabled, it creates a page titled “Index of” showing every file in that folder like a file explorer. To find these, you use:
`intitle:”index of” site:target.com`
This returns every open directory on the target’s domain. From there, you browse manually and look for interesting filenames. I have found internal strategy documents, employee photos, database backups, etc using this dorks.
Finding Specific File Types:
Maybe you are looking for PDF reports a company published but never meant to be easily discovered. You would use:
`filetype:pdf site:target.com intitle:”internal”`
Or you are hunting for exposed spreadsheets:
`filetype:xlsx site:target.com intext:”salary”`
Every combination tells a different story and targets a different type of exposed data.
Finding Login Portals:
Many organizations expose login pages to the internet without realizing how easily they can be discovered. Try this:
`inurl:admin site:target.com intitle:”login”`
Or for network devices:
`inurl:/cgi-bin/ site:target.com`
These queries surface routers, cameras, and management interfaces that might still be using default credentials.
Finding IoT Devices and Vulnerable Software:
Shodan is great, but Google also indexes device interfaces. Cameras, printers, and other IoT devices often have web-based control panels. You can find them with queries like:
`intitle:”webcam” inurl:/view/`
Or for a specific vulnerable version of software:
`intext:”Powered by phpMyAdmin 4.7” site:target.com`
This tells you exactly which version is running, and from there you can cross-reference known vulnerabilities.
The Mindset
Do not memorize dorks. That is a beginner’s game. Understand what each operator does, then think logically about what kind of page would contain the information you are looking for. What would its title be? What would its URL look like? What file type would the data live in? Answer those questions, translate them into operators, and you will be able to build dorks for any situation, not just the ones someone else gave you.
Going Deeper: A Resource I Wrote for You
Before we close out this lecture on dorking syntax, I want to point you toward a resource I created specifically to deepen your understanding of what we just covered.
I wrote an article called The Art Of The Query, and I did not write it to give you a list of dorks to memorize. I wrote it to teach you how to think. How to approach a target with logic instead of guesswork. How to see operators not as commands, but as building blocks you can combine and recombine based on what you’re hunting for.
In that piece, I break down the mental framework behind crafting queries that surface what others miss. I walk through real examples and show the thought process behind each query, because once you internalize that process, you stop needing cheat sheets. You start building your own dorks on the fly, tailored to whatever investigation is in front of you.
If you want to go beyond what we covered today and really sharpen your search game, take the time to study it.
Here is the link: https://medium.com/p/ab129564af38
Read it carefully. Practice the techniques. That is how you move from knowing about dorks to mastering them.
Module 2: Image Intelligence (IMINT): Geolocation, Verification, and Metadata
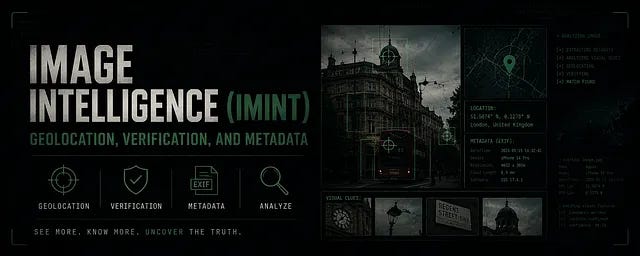
If there is one skill set that has defined modern OSINT investigations, it is image intelligence. We have all seen it play out in real time. An image surfaces online, and within hours, sometimes minutes, investigators have pinpointed the exact location where it was taken. That is not luck. That is not some secret tool. That is a trained, systematic approach to extracting every possible clue from an image.
This module is where you learn to do exactly that. We are covering geolocation, verification, and metadata, not as separate concepts, but as parts of a single investigative workflow. By the end, you will not just look at images. You will dissect them.
Lecture 2.1: The Art and Science of Image Geolocation
Let me start by telling you what geolocation is not. It is not guessing. It is not scrolling around Google Earth hoping to stumble across a matching building. That is what amateurs do, and amateurs burn hours for nothing.
Professional geolocation is a methodical, checklist-driven process. You move from the big picture down to the smallest detail, and you document every single step along the way. You never, ever guess. If you can not prove it, you do not have it yet.
I am going to break this into two phases:
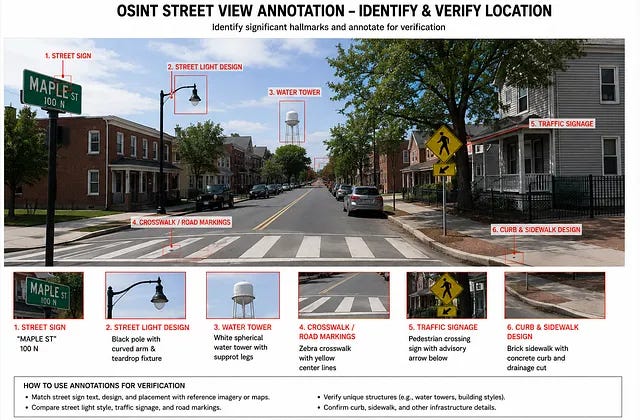
Foreground analysis and Background analysis. In practice, you will jump between both as clues present themselves, but understanding them separately builds the mental framework.
Foreground Analysis
The foreground is everything close to the camera. This is often where the richest clues live, so start here.
Signage is your best friend (as illustrated in the image above). A store name, a street sign, a billboard, even a warning label on a piece of equipment. Every sign tells you something. A shop name gives you a business to search. A street sign gives you an intersection. A warning label in a specific language narrows your geographic region instantly. Do not just read the sign. Ask what the sign implies. A sign in French does not just mean France. It could be Belgium, Switzerland, Senegal, or parts of Canada. That distinction is where the real work begins.
Language is another immediate filter. Text visible in the image, whether on signs, products, or clothing, can narrow your search to a handful of countries. But go deeper. Is it Brazilian Portuguese or European Portuguese? Simplified or Traditional Chinese? These distinctions matter, and a trained investigator learns to spot them.
Flags seem obvious, but be careful. A flag tells you what someone wants you to see. It does not always tell you where the image was actually taken. I have seen images with Russian flags that were geolocated to Ukraine, and images with American flags taken in the Middle East. Use flags as a starting point, not a conclusion.
License plates are pure gold when you can see them clearly. Even a partial plate, combined with the color and format of the plate itself, can narrow a location to a specific country or even a specific region within that country. Different countries use different colors for commercial versus private vehicles. Some regions have unique formats. Learn to recognize these patterns.
Architecture tells a story too. Building materials, window styles, roof types, and construction methods vary dramatically across the world. A building with thick stone walls and small windows suggests a hot climate. A steep, snow-shedding roof suggests northern winters. Balconies, shutters, brick patterns, all of these are regional fingerprints.
Vegetation is another clue most beginners ignore. Palm trees narrow things down, but which palm trees? A coconut palm and a date palm grow in very different environments. Deciduous trees versus evergreens tell you about climate. The color of the soil, the type of crops in a field, even the weeds growing through a crack in the pavement can provide hints.
People in the image also provide clues, but you have to be careful here too. Clothing styles, uniforms, and traditional dress can indicate region. Face masks during certain periods pointed toward countries with specific public health policies. But people travel. People immigrate. A person’s appearance is a clue, not a confirmation.
Background Analysis
Once you have exhausted the foreground, you move to what is behind the subject. This is background analysis, and for many investigators, this is where the real challenge begins.
Skyline analysis is one of the most powerful techniques we have. If you can see a city skyline, you can often match the silhouette of buildings to known locations. But even without a full skyline, individual structures help. A distinctive church spire, a uniquely shaped skyscraper, a water tower on a hill. These are landmarks, and landmarks are searchable.
Topography is the shape of the land itself. Is the location flat or hilly? Are there mountains in the distance? If so, what do they look like? Rounded, ancient mountains versus sharp, young peaks. The presence of snow on peaks in summer tells you about elevation and latitude. You can use tools like PeakVisor to identify mountain profiles from a single ridgeline.
Mountain profiles are particularly useful in rural or wilderness areas. If you have a clear view of a mountain range, you can often match the skyline to topographic data and pinpoint your location with surprising accuracy. I have seen investigators geolocate a photo taken in the middle of nowhere based entirely on the shape of a distant peak.
Utility poles and power lines are forensic gold. Different countries, and sometimes different regions within countries, use distinct pole designs, insulator types, and wiring configurations. Japan’s utility poles look different from Germany’s. Even the number of crossarms and the way wires are arranged can narrow your search. This is a niche skill, but once you learn it, you will never unsee it.
Road markings are equally valuable. The color of lane lines, the pattern of dashed versus solid, the font used on road signs, the design of guardrails. All of these differ by country and sometimes by state or province. A yellow center line means something very different in North America versus Europe. Learn these standards.
Annotation for Verification
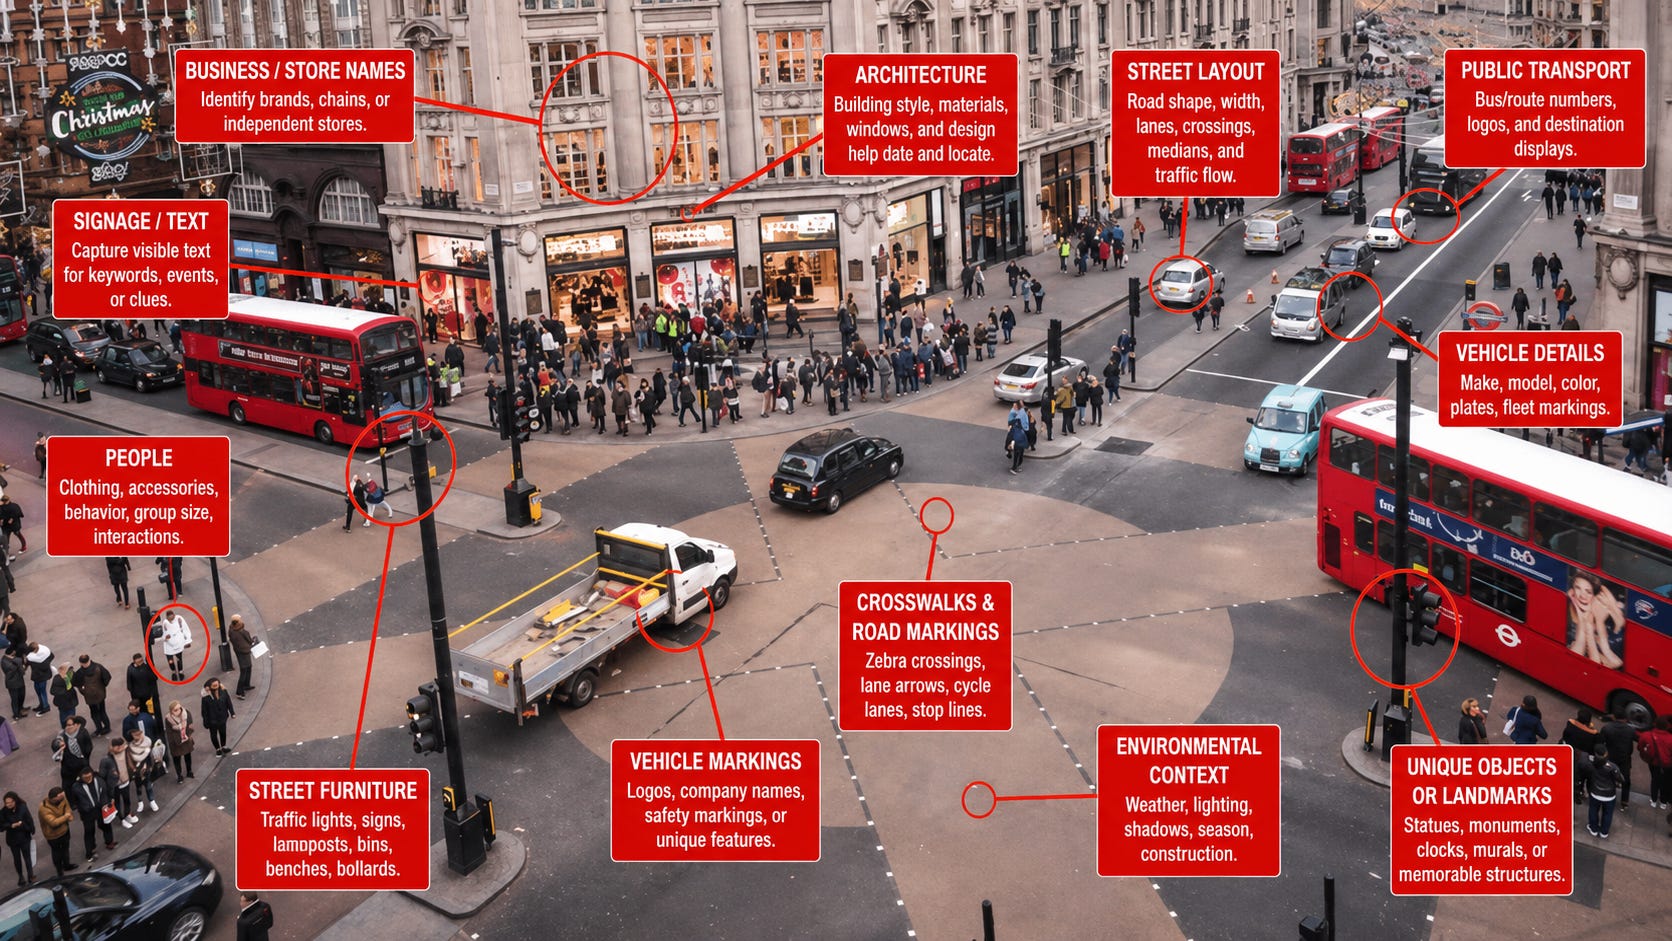
Now we come to the most important part of this entire lecture, and I need you to take this seriously.
Finding a location is only half the job. A professional investigator proves their finding. You do this through annotation, which is simply the process of visually demonstrating the correlation between your source image and your reference imagery.
Here is what this looks like in practice
You have an image from social media. You have identified a potential location. You now open Google Earth Pro or QGIS and you capture a screenshot of that location from the same approximate angle. Then, using any basic tool that lets you draw on images, you highlight the points of correlation.
You draw an arrow to the distinctive crack in the pavement visible in both images. You circle the unique arrangement of windows on a building. You highlight the matching street sign. You annotate every single point that proves your case.
Why is this so important?
Two reasons. First, it forces you to verify your own work. If you can not clearly highlight multiple matching points, you are not done yet. Second, this is how you present findings to clients, to colleagues, or in a report. You do not just say “this photo was taken at these coordinates.” You show them, with visual proof, exactly how you know.
The tools for this do not need to be fancy. QGIS is free and powerful. Google Earth Pro is free and familiar. Even basic screenshot tools with markup capabilities work fine. What matters is the rigor of your process, not the price of your software.
This is the standard. No guesses. No assumptions. Just methodical analysis documented with clear, visual proof. That is what separates a professional geolocator from someone playing around on Google Maps.
Lecture 2.2: Reverse Image Search is a Starting Point, Not a Conclusion
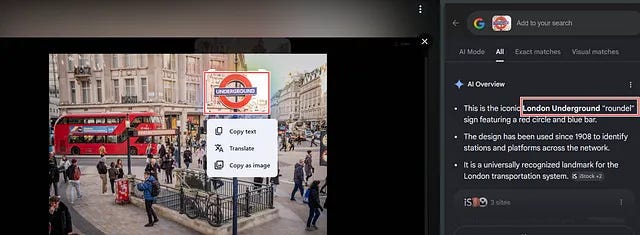
Let me be blunt. Most people think reverse image search is the entire game. You drop an image into Google Images, see if it pops up somewhere else, and call it a day. That is not investigation. That is step one.
Reverse image search is a starting point. It tells you where else an image has appeared. It can help you find a higher resolution version, an uncropped version, or an earlier posting date. All of that is useful. But it does not confirm anything on its own. You still need to verify what you find.
Now, the tool landscape for this is broader than most people realize. Each engine sees a different slice of the internet.
Google Lens and Google Images are the obvious starting points. Google’s index is massive, and Lens in particular has gotten good at identifying objects within images, not just matching the whole frame. If you have a photo of a building, Lens might tell you what building it is without needing to find that exact photo elsewhere. That is powerful.
Yandex is, in my experience, often superior to Google for facial matching and for finding images that originated in Eastern Europe or Russia. Yandex’s index covers parts of the web that Google does not crawl as deeply. If you are investigating something with a Russian or Eastern European connection, you check Yandex. No exceptions.
Bing is the underdog nobody talks about enough. Its image matching algorithm sometimes catches results that Google misses entirely. I do not know why. I just know I have found crucial matches on Bing that appeared nowhere else. Use it.
TinEye is old but still useful, especially for tracking when an image first appeared. TinEye indexes images and tracks their first appearance date, which helps with timeline analysis. The downside is its index is smaller than the big players, but for certain investigations, that timestamp data is worth the extra step.
Baidu is essential if your investigation touches China. Baidu’s image search covers the Chinese internet ecosystem, which is largely invisible to Western search engines. If your image might have originated on Weibo, WeChat, or Chinese forums, Baidu is where you go.
Here is a practical technique that will immediately improve your results: crop first, search second.
Most people drop an entire image into the search engine and hope for the best. That works sometimes. But when it does not, you need to isolate unique details. Crop the image down to a specific lamp post. A distinct logo on a shirt. A unique architectural feature. A piece of graffiti. Then search that cropped section alone.
Why does this work? Because the search engine stops getting distracted by the whole scene and focuses entirely on matching that one distinctive element. I have cracked cases by cropping an image down to a single street sign that was barely visible in the corner of the original photo. The full image returned nothing. The cropped sign returned an exact match.
Remember, reverse image search is a tool, not a result. Use it. Exhaust it. But do not stop there.
Lecture 2.3: EXIF, the Hidden Storyteller
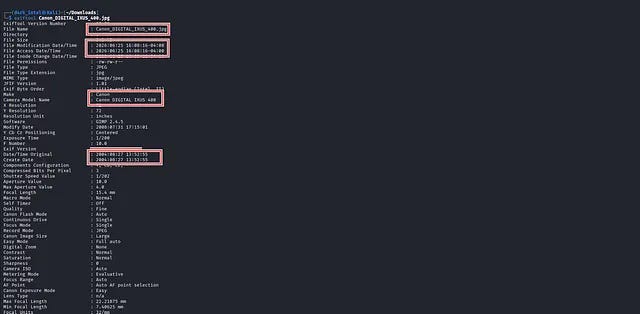
Now we get into something that separates serious investigators from everyone else. EXIF data.
Every time a digital camera or smartphone takes a photo, it embeds information into the file. This is called metadata, and EXIF, which stands for Exchangeable Image File Format, is the standard that defines what gets stored. Most people have no idea this data exists. You are about to become someone who exploits it.
Let us talk about what metadata actually is. It is a data dictionary attached to the image file. Think of it as a hidden document that describes the photo in detail. And I do not just mean GPS coordinates, though those are obviously valuable. The full picture is much bigger.
Metadata can include the make and model of the device, the software version the device was running, the exact date and time the photo was taken, whether the flash fired, the shutter speed, the aperture, the ISO, and sometimes even the direction the camera was pointing if the device had a compass. It can tell you if the image was edited, what software was used to edit it, and when that edit happened.
Here is why this matters for an investigator
Let us say someone posts a photo online claiming it was taken on an iPhone last week. You extract the metadata and discover the device was actually a Samsung Galaxy from three years ago and the photo was modified in Photoshop last month. That is a deception you just caught, and you caught it because you checked what the file itself had to say.
Practical Extraction and Analysis
The tool for this job is ExifTool by Phil Harvey. It is command-line based, it is free, and it is the gold standard for metadata extraction. Every investigator should have it installed and know how to use it.
Basic usage is straightforward. You point ExifTool at an image file, and it dumps everything it finds. Here is what that looks like:
exiftool image.jpg
{ Note: Kali Linux is case-sensitive. Gaining proficiency at it will help you a lot in utilizing these command-line tools effectively }
That single command spits out every metadata field embedded in that file. The output can be overwhelming at first, but you will learn to scan it for the fields that matter most.
Make and Model — tell you what device captured the image. This is useful for attribution. If a suspect claims they do not own a particular phone model, but every image they post comes from that exact model, you have got a problem for them.
Software version is often overlooked — It tells you what operating system or firmware the device was running. This can help you identify if a device was jailbroken, if it was running outdated software with known vulnerabilities, or if the version matches a device known to be used by a particular individual.
Timestamps are critical for timeline analysis — The Date/Time Original field tells you exactly when the shutter was pressed. Compare this against alibis, against other events, against when the image was actually posted. Time gaps between capture and posting can be revealing.
Modify Date — tells you if and when the file was altered. If the modify date is different from the capture date, someone edited that image. Dig deeper.
GPS coordinates — are the obvious prize, and when they are present, they can give you an exact location. But here is what most people do not consider. Even without GPS, the timestamp alone can help with geolocation. If you know the photo was taken at 3 PM local time and you can see the position of shadows, you can estimate longitude. Combine that with other visual clues, and you are narrowing the map.
The Serial Number OSINT Trick
This is a technique that does not get enough attention, and it is incredibly powerful once you understand it.
Some camera manufacturers embed the device serial number directly into the EXIF data. This is not a bug. It is a feature for tracking and warranty purposes. But for an investigator, it is a gift.
Here is why
If you extract the serial number from one photo, you can then search for that exact serial number across other images. And because it is a unique identifier tied to a specific physical device, you can now link multiple photos to the same camera, even if those photos were posted across different platforms, under different usernames, at different times.
Think about what that means — A target posts photos on Instagram under one name, on a forum under another name, and on a dark web marketplace under a third name. If all those photos came from the same camera and the serial number is embedded, you have just connected three separate online personas to one physical device. That is attribution.
This is not theoretical. I have done it. Others in this field have done it. It is a technique that produces hard, undeniable links between seemingly unconnected accounts.
Case Study: The Smartphone and the Seized Laptop
Let me walk you through a real-world scenario so you understand how this plays out in an actual investigation.
Authorities seized a laptop from a suspect involved in a cybercrime case. On that laptop, they found a photo that appeared to be a screenshot of something incriminating. The suspect claimed the laptop was not his and he had no idea how that photo got there.
Investigators extracted the EXIF data from that photo. It was not a screenshot at all. It was a photo taken with a smartphone, and the metadata revealed the exact make, model, and serial number of the device.
They then obtained the suspect’s smartphone, extracted its internal serial number, and matched it to the serial number embedded in the photo. It was the same device. The photo had been taken with that specific phone, then transferred to the laptop. The suspect’s story fell apart immediately.
That is the power of metadata. It tells the story the suspect does not want told. Your job is to listen to what the file is saying.
Practical Exercise: The “Where in the World” Geolocation Capstone
Alright. You have absorbed the theory. You understand foreground analysis, background analysis, the checklist approach, and the annotation standard. Now it is time to prove you can actually do this.
This exercise is not a quiz. It is a simulation of what a real investigation demands. You are going to receive an image. Your job is to answer three questions with absolute precision. But more importantly, your job is to show your work.
The Scenario
An image has surfaced on an obscure forum. The user who posted it claims it was taken “somewhere in Europe” and offers no further details. The image itself appears to show a scene of some significance. Your task is to determine exactly where this image was captured, identify what incident is connected to that location, establish the timestamp of that incident, and confirm the country.
But here is the thing. Anyone can guess a country. Anyone can drop a pin randomly and hope it lands close. That is not what we do.
Your Deliverables
You will produce a concise intelligence report containing the following:
1. The Exact Location
Provide coordinates. Not a neighborhood. Not a city. I want latitude and longitude. The kind you can paste into Google Earth and land directly on the spot where the photographer stood. If you give me a city name without coordinates, you have not finished the job.
2. The Incident Behind the Image
This location has a story. Something happened there. It might be a crime scene. It might be the site of a protest. It might be connected to a historical event. Your job is to research the location and identify the specific incident that makes this image relevant. What happened at this place? Why does it matter? Provide a brief, factual summary with sources.
3. The Timestamp of the Incident
When did this incident occur? I want a date, and if the information is available, a time. Not when the image was posted. Not when someone wrote an article about it. The actual date and time the event took place. If you can not find an exact time, explain why, but give me the most precise date you can confirm.
4. The Country
This should be straightforward after everything above, but state it clearly. No ambiguity.
The Annotation Requirement
This is non-negotiable.
Alongside your written answers, you will provide an annotated comparison image. Take a screenshot of the original image and a screenshot of the same location from Google Earth Pro, Google Street View, or satellite imagery. Place them side by side. Then, using any markup tool you have, highlight the points of correlation.
Draw arrows. Circle matching structures. Label distinctive features. Show me the crack in the pavement visible in both. Show me the unique roofline. Show me the arrangement of windows. Show me at least three distinct matching points that prove your geolocation is correct.
If you submit coordinates without an annotated verification image, your work is incomplete.
What I am Looking For
I am not just testing your ability to find a location. I am testing your process. Your annotation tells me whether you actually worked through the clues or just got lucky. Your incident research tells me whether you understand that geolocation is only valuable when it provides context. Your timestamp tells me whether you can distinguish between when an image was captured and when an event occurred.
This is what a client would expect. This is what a court would demand. This is the standard.
The Image:

Submission Format
Your submission should follow this structure:
Location Coordinates: [Latitude, Longitude]
Country: [Country Name]
Incident Description: [Brief, factual summary with sources cited]
Incident Timestamp: [Date and time, with explanation of source]
Annotated Verification: [Side-by-side image with correlation points clearly marked]
Report to be submitted to cybershieldmentor@gmail.com
Take your time. Be methodical. Check your work. And remember, if you can not prove it, you do not have it yet.
Module 3: Email & Username Intelligence: The Digital Skeleton
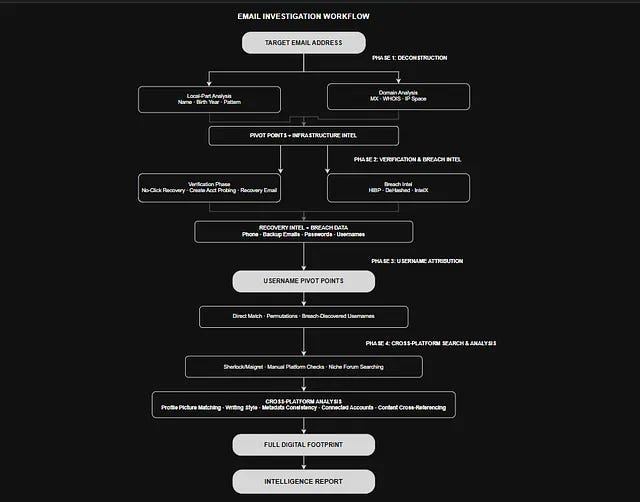
If you have been paying attention so far, you know that every investigation needs a starting point. Sometimes you have a name. Sometimes you have a phone number. But very often, what you actually have is an email address or a username. And here is the thing most investigators do not fully appreciate: an email address is not just a way to contact someone. It is a skeleton key. Woven into that single string of characters is an entire digital life waiting to be mapped.
This module is about extracting every possible drop of intelligence from an email address or a username. We will start with the address itself, breaking it down to understand what it tells us before we even run a single search. Then we will move into verification techniques that reveal hidden recovery details without alerting the target. Finally, we’ll tackle username-driven attribution, where a single pseudonym becomes the thread that unravels a person’s entire online presence.
By the end of this module, you will not look at an email address the same way again.
Lecture 3.1: Email Deconstruction & Intelligence
Before you plug an email into any tool, any database, any search engine, stop. Look at the address itself. The structure of an email contains intelligence, and if you skip this step, you are leaving free information on the table.
Every email address has two parts: the local part, which is everything before the @ symbol, and the domain part, which is everything after it. Let us break both down.
Local-Part Analysis
The local part is chosen by the user or assigned by an organization. It is personal. It often reflects how the person sees themselves or how they want to be seen. That makes it a behavioral artifact, and behavioral artifacts are intelligence.
Start by categorizing what you are looking at
Is it a name-based pattern? Something like john.doe@, jdoe@, doe.john@, john.doe84@. If so, you now have a probable first name, last name, and possibly a birth year or significant number. Right out of the gate, with zero tools, you have extracted personal identifiers. Document everything. John. Doe. Possibly born in 1984. These become your pivot points later.
Is it a profession or interest-based handle? Something like cyberwolf.security@ or tokyo.photographer@. This tells you how the person identifies. They see themselves as a security professional or a photographer based in Tokyo. Whether that is true or aspirational does not matter yet. What matters is this gives you keywords to search, forums to check, and a psychological profile to build.
Is it a random alphanumeric string? Something like xz17q42@. This often indicates a throwaway account, a service-generated address, or someone with operational security awareness. Random strings do not happen by accident. If someone is using an address with no personal connection, ask yourself why. What are they trying to hide?
Is it a combination? Maybe john.xz17q42@. That is interesting. The local part starts personal, then becomes random. This could indicate a corporate naming convention mixed with an employee ID, or it could indicate someone who started with their real name and added obfuscation. Either way, it is a pattern worth noting.
Here is a practical example
You are investigating a phishing email that came from sarah.consulting.2023@. Right away, you know a few things. The name Sarah is likely fake or the operator’s real name. The word “consulting“ suggests a business facade. The number 2023 suggests the account was created that year. This tells you the account is likely purpose-built and recent. You are not dealing with someone’s decade-old personal inbox. You are dealing with a disposable operational asset. That is valuable context before you have run a single search.
Domain Analysis
Now shift your attention to the domain part. This tells you where the email lives, and that opens up a whole new investigation path.
Start simple. Is it a free provider like Gmail, Yahoo, Protonmail, or Outlook? If so, the domain itself will not tell you much about the user’s affiliation, but the choice of provider can. Protonmail suggests privacy consciousness. A legacy Yahoo address suggests an older account or an older user. Gmail is the default for most. These are small signals, but signals add up.
If the domain is custom, like @companyname.com, you now have an organizational affiliation. That is huge. You can investigate the company itself, find employees, map the corporate structure, and potentially identify your target through organizational context alone.
Now dig deeper into that domain. The first technical step is checking MX records, which stands for Mail Exchange records. These DNS records tell you which servers handle email for that domain. This can reveal whether the domain uses Google Workspace, Microsoft 365, or a self-hosted mail server. A self-hosted server might expose the organization’s IP address range, server software, and potential vulnerabilities. Even knowing they use Google Workspace tells you their login portal is at a standard URL, which can be useful later.
To check MX records, you can use command-line tools like dig or nslookup, or you can use any online MX lookup tool. The command is simple:
dig mx targetdomain.com
The output shows you the mail servers and their priority order. Read it. Understand it. Add it to your intelligence file.
Next, WHOIS history. Current WHOIS data is often redacted due to privacy protections, but historical WHOIS records are a different story. Tools like whois.domaintools.com let you look up historical registration data for a domain. You might find the name, address, phone number, and email of the person who registered the domain years ago, before privacy protections were in place or before they thought to enable them.
I have found personal phone numbers in WHOIS records from 2015 that still worked in 2024. People change their numbers less often than you would think. I have found home addresses. I have found alternative email addresses used during registration that led to entirely new investigation paths.
Associated IP address space is the final piece. When you look up a domain, find the IP addresses it resolves to. Then check what other domains are hosted on those same IPs. Reverse IP lookup tools can show you every website sharing that server. A target might have one domain you know about and five others you do not, all sitting on the same IP. That is how you uncover hidden infrastructure.
Lecture 3.2: The Forgotten Art of Verification & Password Reset Intel
Now let us talk about something most courses skip entirely. Before you dive into massive automated searches across hundreds of platforms, there is a quiet, precise, and extremely effective technique you need to master. I call it the “no-click” method, and it is all about using the password reset and account recovery flows built into major email providers to extract intelligence without ever alerting your target.
The “No-Click” Dork for Google and Yahoo
Here is how it works. When you go to Google’s account recovery page and enter an email address, Google asks you to confirm your identity. But before you do anything, Google often displays a partially obscured recovery email or phone number associated with that account. You will see something like j*****e@gmail.com or a phone number ending in **23.
You have not clicked anything. You have not triggered any notification. The target has no idea you are doing this. Yet you have just learned that their recovery email starts with a J and ends with an E, or that their phone number ends in 23. That is intelligence.
Now take it further. If you see j*****e@gmail.com, and you already suspect the target’s name is John Doe, you can make an educated guess that the recovery email is something like johndoe@gmail.com. You can then investigate that address separately. You have just pivoted from one email to another without sending a single alert.
Yahoo’s recovery flow works similarly. Microsoft’s does too, though they have tightened things in recent years. The key is to approach the recovery page, observe everything displayed on the screen, and document it carefully. You are not bypassing security. You are reading what the page voluntarily shows you before you authenticate. That is passive intelligence gathering at its finest.
A practical walkthrough
You have a target email: unknownuser@gmail.com. You navigate to Google’s account recovery page at accounts.google.com/signin/recovery. You enter the email. The next page shows “Get a verification code” with options to send to a recovery email or phone. The recovery email is partially redacted: m*****l@yahoo.com. You now know the target’s backup email is a Yahoo address, and you can see the first and last characters. If you know the target’s name is Michael, you just confirmed a connection. If you did not know the name, you now have a strong lead.
“Create Account” Probing
This is a related technique that works across virtually every platform. When you attempt to create a new account using a target email address, most sites will tell you if that email is already registered. They do this to prevent duplicate accounts, but for an investigator, it’s a presence checker.
The process is simple
Go to a site’s sign-up page. Enter the target email. If the site throws an error like “An account with this email already exists,” you have just confirmed the target has an account there. If it proceeds to the next step asking for a password, the email is not registered.
Now, I need to be clear about the ethical boundary here. This should be done manually, sparingly, and only on major platforms relevant to your investigation. You are not running a script that tests 500 sites. You are checking a handful of key providers like Facebook, LinkedIn, Instagram, Twitter, Amazon, and a few others based on your investigative needs. This is about targeted intelligence, not mass data harvesting.
Why does this matter?
Because if you discover your target has an Amazon account under an email that seems otherwise inactive, you now have another platform to investigate. If they have a LinkedIn account, you have professional history. If they have an Instagram account, you have personal photos and social connections. Each confirmed registration is a new door to walk through.
Lecture 3.3: Username-Driven Attribution
Now we shift from email to usernames. This is where the investigation often becomes truly expansive, because while people might have a few email addresses, they often have dozens of accounts scattered across the internet, many of them tied to a single username or a predictable set of variations.
The Single Username is the Key
People are creatures of habit. When someone creates an online identity, they tend to reuse the same username or small set of usernames across multiple platforms. This is not laziness. It is human psychology. We like consistency. We like being recognizable. We like not having to remember fifty different login names.
This means a single username can unlock an entire digital footprint. But you need to understand how people create these names in the first place.
Some usernames are identity-based — john.doe, john_doe84, doe.john. These directly reflect the person’s real name. If you already know the target’s name from email analysis or other sources, generating these variations is straightforward.
Some usernames are persona-based — silentwolf, night_crawler_adventures, cyber_panther. These reflect an interest, a self-image, or a subculture affiliation. A username like silentwolf might indicate interest in wolves, nature, or a particular gaming community. cyber_panther suggests an interest in hacking culture or cybersecurity. These keywords become additional search terms and community indicators.
Some usernames are hybrid — john.silentwolf. This combines a real name with a persona. These are especially valuable because they bridge the gap between someone’s real identity and their chosen online persona.
When you encounter a username, spend time thinking about it before you start searching. What does this name say about the person who chose it? What communities might they belong to? What other variations might they use?
Permutation Engines: The Logic Behind the Script
This is where we move from theory to practice. If a target uses silentwolf_adventures on one platform, they might use silentwolf, silent.wolf, silent_w0lf, silentwolf_hiker, or the_silent_wolf on others. These are not random guesses. They follow predictable patterns.
Let me teach you the logic so you understand what a permutation engine is actually doing, whether you build one yourself or use an existing tool.
The patterns fall into categories
Character substitution — is replacing letters with similar-looking numbers or symbols. o becomes 0. e becomes 3. a becomes 4. i becomes 1. So silentwolf could become silentw0lf, s1lentwolf, or silentw0lf.
Separator variation — is changing how words connect. Underscores become periods become hyphens become nothing. silent_wolf becomes silent.wolf, silent-wolf, silentwolf.
Suffix and prefix addition — is appending or prepending numbers, years, or keywords. silentwolf becomes silentwolf84, the_silentwolf, silentwolf_official, silentwolf_adventures.
Word order reversal — is flipping the sequence. silentwolf becomes wolfsilent.
Truncation and abbreviation — is shortening the name. silentwolf becomes silent, swolf, silentw
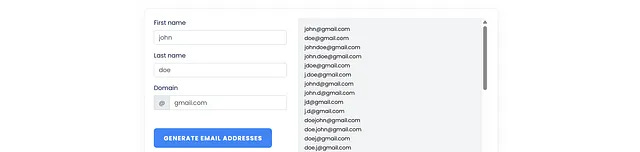
A proper permutation engine applies these rules systematically to generate a list of candidate usernames — https://mailmeteor.com/email-permutator. The logic is rule-based, not random, because human creativity follows patterns. Once you understand the patterns, you can predict what variations a target is likely to use.
Here is a practical example. Target username: dark_phoenix_88
Immediate observations: “dark” and “phoenix” are persona words, likely indicating interest in mythology, gaming, or hacker culture. “88” is likely a birth year or a significant number. The underscores suggest the user is comfortable with that separator style.
Permutations to check:
darkphoenix88, dark.phoenix.88, dark-phoenix-88, darkphoenix1988, dark_phoenix, phoenix_dark_88, d4rk_phoenix_88, dark_ph03nix_88, the_dark_phoenix, dark_phoenix_official.
Each of those is a query waiting to happen. You can generate these manually, but the process is repetitive and eats time you should be spending on analysis. The smarter approach is to split the target username into its base components, feed them into a permutation engine or an LLM with a structured prompt, and let it generate the full list of rule-based variations for you.
Example given below:
Using the email permutation web-based tool — MailMeteor: https://mailmeteor.com/email-permutator
Using LLM: Gemini, ChatGPT, etc
Target Identity Email Permutation Analysis — simple logic
“As an OSINT investigator, I require a comprehensive email permutation matrix for the target identity ‘Chris Evans’ across major providers like Gmail and Yahoo to map and uncover the subject’s digital footprint.”
You can adjust the above to fit the context of your investigation.
OUTPUTS:
1. Core Structural Permutations
These patterns use standard naming conventions with common separators (., _, -, or no separator).
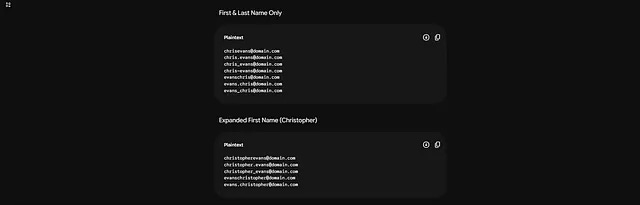
2. Common Appendices (Year / Numbers)
If the baseline names are taken, users frequently append birth years, graduation years, or sequential numbers.
Common Year Formats (Assuming 1970–2005 range)
Replacing YY with 2-digit years (e.g., 81, 92, 00) and YYYY with 4-digit years (e.g., 1981, 1995).

Once you have the output, your job is to run those usernames through your search tools { Epieos, Intelbase, BehindTheEmail }, and manually verify each hit for intelligence value. The machine generates the possibilities. You do the investigative thinking.
Practical Tooling: Going Beyond the Button
Now, there are tools that automate username searching across platforms. Sherlock, Maigret, WhatsMyName.app. These are useful, but I need you to understand something critical. The tool is not the investigator. You are!
Sherlock takes a username and checks it against a list of sites. Maigret does the same with more advanced features and better reporting. WhatsMyName.app is a web-based alternative with a large database of sites to check.
Here is the problem with how most people use these tools. They type a username, press enter, and then scroll through the results looking for green checkmarks. They find a list of “found” profiles and call it done. That is not analysis. That is data collection.
When you run one of these tools and get results, your real work is just beginning. You need to parse the output manually. Visit each found profile. Look at the content. Does the writing style match your target? Are the interests consistent? Are the profile pictures the same or similar? When was the account created? When was it last active? Does it link to other accounts or platforms?
A tool might tell you silentwolf exists on Reddit, Twitter, Instagram, and a hiking forum. That is a list. Your job is to determine whether those accounts all belong to the same person, and if so, what the connections are between them.
The tool saves you the time of manually typing silentwolf into fifty different signup pages. That is valuable. But the analysis, the attribution, the link-building. That is all you.
Practical Exercise: Operation SHADOW TRACE
Now it is time to put everything from this module into practice. This exercise is designed to test your ability to start with almost nothing and build a complete attribution picture.
Classification: TRAINING EXERCISE // OSINT-2026–042
Threat Vector: Anonymous Harassment / Cyberstalking
Target: Public Figure (Victim)
Subject: @Allen123 / @Allen3sop1 (Threat Actor)
Objective: Identify the real-world identity and location of the threat actor through progressive open-source intelligence techniques.
Intelligence Brief
A public figure has received a direct message from the locked X (Twitter) account @Allen123 containing the following threat:
“Last warning. Stop your public appearances, or I’ll make sure your next morning walk ends differently.”
The account presents a dead end for standard social media review. It is locked. It has zero followers. The profile image is a generic cartoon avatar. The bio reads: “My main account Allen123 got banned. Follow me on my new account.” The account follows only five others.
Intelligence further indicates the subject has become aware of investigative scrutiny. As a counter-surveillance measure, the active username has been rotated to @Allen3sop1. Despite this operational security maneuver, enumeration efforts have successfully leveraged the legacy handle Allen123 as the primary pivot point for historical cross-platform correlation.
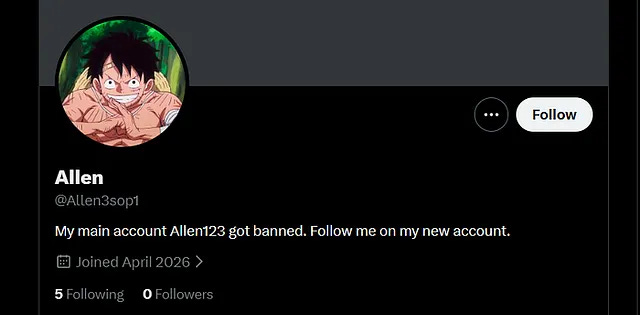
“Digital breadcrumbs are the unintentional map of a person’s online life. Enumerating these accounts allows us to connect the dots between anonymous aliases and real-world identities, ensuring no part of the target’s digital presence remains siloed.”
Your task is to unmask this individual
Phase 1: Initial Reconnaissance
An anonymous account with no public engagement and a locked profile offers nothing through standard review. You must collect foundational metadata passively, without interaction or authentication requests.
Mission: Enumerate the account’s unique numeric ID and exact creation timestamp to establish a temporal baseline.
Flag Format: OSINT{account_id_account_creation_timestamp}
Phase 2: Username Pivot & Cross-Platform Enumeration
Threat actors frequently recycle handles or variations across services. The suffix “123” may indicate a birth year, a significant date, or padding to secure a unique username.
Mission: Search major social platforms, forums, and code repositories for all profiles utilizing the string “Allen123” or logical derivatives.
Flag Format: OSINT{target_platforms_found_@handles}
Phase 3: Visual Intelligence & Travel Pattern Analysis
Content from alternative platforms reveals the subject has inadvertently shared geolocatable imagery.
Mission: Analyze public media uploads to identify:
The specific park or trail where the subject habitually takes a “morning walk.”
The name of the hotel the subject booked and the prominent landmark visible directly opposite their room window.
Flag Format: OSINT{trail_location_coordinates_hotel_name_landmark_name}
Phase 4: Geospatial Analysis
A photograph taken from inside the subject’s hotel room provides a clear line of sight to a distinct architectural structure.
Mission: Using Google Earth Pro or QGIS, establish a precise visual line-of-sight between the hotel coordinates and the identified landmark. Calculate the straight-line ground distance from the subject’s observation point to the structure.
Flag Format: OSINT{hotel_name_distance}
Phase 5: Target Email Lookup
A clue left in a comment section suggests the subject maintains a personal blog or manifesto site expressing political views outside their main social channels.
Mission: Conduct deep web searches to uncover the personal email address associated with the subject’s alternative online presence.
Hint: The target email is encoded with a Caesar cipher. Decode it to reveal the real address — (target email domain is gmail.com).
Flag Format: OSINT{target_email_address}
Phase 6: Property Records & Identity Attribution
With the subject’s real name obtained, shift to public government records to confirm physical presence and demographic data.
Mission: Cross-reference the name against public record aggregators to establish a comprehensive identity profile.
Flag Format: OSINT{target_real_name_current_address_age_phone_number_property_relative}
Phase 7: Social Media Attribution & Visual Confirmation
A concrete link between the anonymous persona and the identified individual requires irrefutable visual or content-based correlation.
Mission: Compile a short-form evidence correlation report.
Correlation Sample — Example:
The cartoon image used as @Allen123’s profile header on X matches the SHA-1 hash and EXIF thumbnail data of a photograph posted to [Subject Name]’s Facebook timeline dated [Date]. This constitutes direct visual attribution; the subject reused proprietary personal imagery across both anonymous and verified accounts.
Report:
Evidence Item 1: ____________________________________
Evidence Item 2: ____________________________________
Evidence Item 3: ____________________________________
Phase 8: Timeline Synthesis & Attribution Report
Finalize the investigation into a coherent, evidence-based narrative suitable for legal or internal security referral.
Mission: Construct a chronological synthesis of events and produce a final attribution statement.
Timeline Synthesis:
Date____________________Event
_______________________________________________
_______________________________________________
Final Attribution Statement:
The anonymous X account @Allen123 is operated by [Subject Full Legal Name], DOB [MM/DD/YYYY], residing at [Full Address]. Attribution is established through: (1) Cross-platform username correlation linking X to [Alternative Platform], (2) Geospatial analysis confirming travel history consistent with hotel booking records, (3) Public property and voter registration records confirming identity and residence, and (4) Visual match of specific imagery between the anonymous account and the subject’s verified personal accounts.
Final Flag:
OSINT{target_real_name_country_current_location_account_handles_found_relative}
Intelligence Summary
Field_______________________Value
Subject Name ____________
Country of Residence ______________________
Current Location _____________________
Anonymous Handle ___ @Allen123
Linked Accounts ______________
Time to Attribution ___________________
Legal Status ___ Pending Referral
Submission Requirements
Completed phase flags (Phases 1–8).
Evidence correlation report (Phase 7).
Timeline synthesis and final attribution statement (Phase 8).
Entity graph visualization (link chart) mapping all discovered accounts and their connections to the identified individual.
Submit all deliverables via secure training email:
cybershieldmentor@gmail.com
Disclaimer
This OSINT challenge is designed for educational and training purposes only. All scenarios, entities, email addresses, domains, and geospatial references are either fictional, reconstructed from publicly available information, or used solely as instructional examples within a controlled environment.
Happy ethical hunting, analysts.
Going Deeper: A Resource I Wrote for You
Before we close out this lecture on dorking syntax, I want to point you toward a resource I created specifically to deepen your understanding of what we just covered.
I wrote an article called How To Investigate A Person Of Interest In 2026, and I did not write it to give you a list of tools to memorize. I wrote it to teach you how to think. How to approach a target with logic instead of guesswork. How to see tools and operators not as commands, but as building blocks you can combine and recombine for effective intelligence collection.
In that piece, I break down the mental framework behind investigating a person of interest that surface what others miss. I walk through real examples and show the thought process behind each tools, because once you internalize that process, you stop needing cheat sheets. You start building your own methodologies, techniques, and tools tailored to whatever investigation is in front of you.
If you want to go beyond what we covered today and really sharpen your search game, take the time to study it.
Here is the link: https://preciousvincentct.medium.com/how-to-investigate-a-person-of-interest-in-2026-77dfaadbe7e7
Read it carefully. Practice the techniques. That is how you move from knowing merely about tools to mastering them for effective intelligence collection.
Module 4: Social Media Intelligence (SOCMINT): Deep Dive & Platform-Specific Tactics
Social media is where people live their lives out loud. They post their opinions, their locations, their relationships, their frustrations, their achievements. For an investigator, this is not just data. This is behavioral gold. Every platform has its own architecture, its own quirks, its own hidden data layers. Knowing how to exploit each one individually is what separates a SOCMINT operator from someone who just scrolls through profiles.
This module is built for mastery. We go platform by platform, covering exact techniques for user ID extraction, attribution, search methodology, and evidence collection. No theory without practice. No tool without understanding what it’s doing under the hood.
By the end, you will not need a checklist. You will know where to look because you understand how each platform structures its data and how users behave within it.
Lecture 4.1: Facebook — The Graph API and Beyond
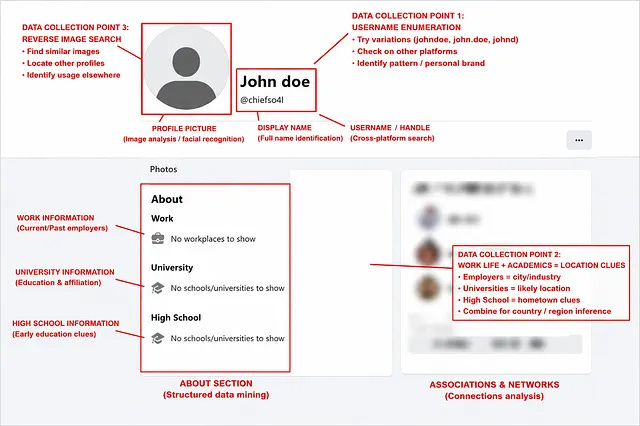
Facebook is the most data-rich platform on the planet for OSINT investigators, and most people only scratch the surface. The key to Facebook intelligence is understanding that every users on the platform has a numeric ID, and that ID is globally unique, unchangeable, and often exposed in places users never check.
User ID Extraction: The Core Technique
Every Facebook profile, page, group, photo, comment, and like has a numeric ID. This ID never changes, even if the user changes their vanity URL, their name, or their profile picture. If you capture the ID once, you can track that entity forever.
Method One: View Page Source technique

Navigate to any Facebook profile. Right-click and select View Page Source. Inside that HTML, press Ctrl + F and search for profile_id or userID or simply "id":". You will find something like "profile_id":"100000123456789" { Example given in the image above }. That number is the target’s unchangeable Facebook ID. Copy it. Document it. It will outlast any username change.
Method Two: Vanity URL
This works when you only have a vanity URL. Facebook allows custom URLs like facebook.com/john.doe. Behind that friendly name is still a numeric ID. Use the Facebook ID finder tools available online {https://lookup-id.com} to automate this process, or use a simple API call to graph.facebook.com/john.doe which returns a JSON object containing the numeric ID. This is passive, and unfortunately, it is no longer working as before.

Method Three: Profile Picture URL Analysis — Explained with Examples
Let me walk you through exactly how to extract intelligence from a Facebook profile picture URL. This method works because Facebook stores images on its Content Delivery Network, and the file-naming structure embeds identifiers that are unique to each user. You just need to know how to read them.
Step 1: Open the Profile Picture
Method A: Right-Click (Quick, When Available)
Go to any public Facebook profile. Right-click directly on the profile picture and select “Open image in new tab.” Do not right-click and save. Do not screenshot. You want the direct URL to the image file itself, not a download, not a screen capture. If the option appears, click it, and the image will open in its own tab with the full CDN URL visible in the address bar. Copy that URL. That is your data.
Method B: Inspect Element (The Reliable Fallback)
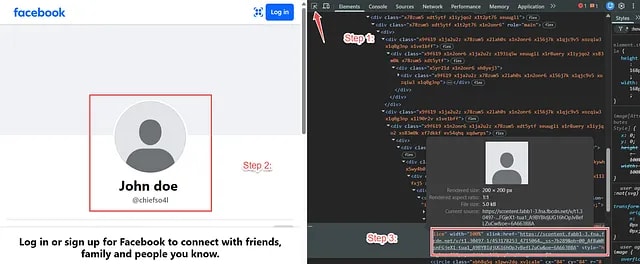
Sometimes Facebook’s front-end code blocks the right-click option or overlays interactive elements on top of the profile picture. When that happens, the Inspect Element method gets you there anyway. Here is how.
First, right-click anywhere on the page background, not on the image itself. Select “Inspect” or “Inspect Element” from the menu. This opens the browser’s developer tools panel.
Now, look at the top left corner of that developer tools panel. You will see a small icon that looks like a dotted square with a cursor arrow. This is the element selector tool. You can also activate it with the keyboard shortcut Ctrl + Shift + C. Click that icon once. Your cursor is now in inspection mode.
Move your cursor over the target’s profile picture and click on it. The developer tools panel will jump to the specific line of HTML code that renders that image. You are looking for an attribute called xlink:href within an <image> tag, or a standard src attribute within an <img> tag. It will look something like this:
xlink:href=”https://scontent.flos5-1.fna.fbcdn.net/v/t39.30808-6/456789012_1016123456789_987654321_n.jpg?_nc_cat=111...”Double-click the URL inside the quotation marks to select it fully. Copy it. That is your direct CDN link. Open it in a new tab, and you will see the exact same image file, isolated, with the full URL visible in the address bar. This is the URL you will analyze in Step 2.
Why This Method Matters
The Inspect Element approach bypasses any right-click restrictions Facebook might implement. It also gives you the raw URL directly from the page source, including any parameters Facebook appends. You do not need to rely on the browser’s context menu. You go straight to the code and pull what you need. That is the investigator’s mindset. When one path closes, you find the one the developers left open.
Step 2: Read the URL Structure
The URL you get will look something like this:
https://scontent.flos5-1.fna.fbcdn.net/v/t39.30808-6/456789012_1016123456789_987654321_n.jpg?_nc_cat=111&ccb=1-7&_nc_sid=abc123&_nc_ohc=xyz789&_nc_ht=scontent.flos5-1.fna&oh=00_AQHDKSLSJDKEI...I know it looks like a mess. Let me break it down.
The Base URL Before the Question Mark:
https://scontent.flos5-1.fna.fbcdn.net/v/t39.30808-6/456789012_1016123456789_987654321_n.jpgThis is the important part. Everything after the question mark is tracking and session parameters. You can strip those. The core filename is:
You can strip those. The core filename is:
456789012_1016123456789_987654321_n.jpgStep 3: Decode the Filename Structure
Facebook profile picture filenames follow a pattern of three numeric segments separated by underscores, ending with _n.jpg.
Let me use a real example from a test profile. Here is an actual Facebook profile picture filename:
123456789_987654321098765_654321098765432_n.jpgBreak it down
The first segment, 123456789, is the most valuable. In many cases, this is one of three things:
The user’s Facebook numeric ID directly.
A hash derived from the user’s ID that Facebook uses for CDN routing.
The photo’s unique object ID assigned by Facebook’s storage system.
The second segment, 987654321098765, is a random or sequential identifier Facebook assigns to the specific image crop or resolution version.
The third segment, 654321098765432, is another internal identifier tied to the CDN node or image processing batch.
The _n suffix indicates it is a normalized, processed version of the original upload.
Step 4: The Practical Application
Now, here is why this matters for an investigation.
Say you are tracking a target who uses different names across platforms. On Facebook they are “John Doe.” On Instagram they are “vintage_bike_77.” You suspect they are the same person, but you need evidence.
You extract the Facebook profile picture URL and get the filename:
100000987654321_456123789012345_789012345678901_n.jpgYou extract the Instagram profile picture using a tool like imginn.com {https://imginn.com}or by inspecting the page source for the property=”og:image” field. The Instagram CDN filename is:
100000987654321_456123789012345_789012345678901_n.jpgThey match. Exactly. Not similar. Not “looks alike.” The same file, same CDN, same internal identifiers. That is not coincidence. That is the same Facebook account linked to an Instagram profile. The user connected their Instagram to their Facebook account, and Facebook stores the profile picture across both platforms using the same internal object ID.
In some cases, that first numeric segment is the user’s raw Facebook ID. Let me show you how to verify this.
Take the first segment from the filename: 100000987654321. Now, construct a Facebook profile URL using that number directly:
facebook.com/100000987654321

OR

https://www.facebook.com/100000987654321

OR

https://www.facebook.com/profile.php?id=100000987654321
If it redirects to the target’s vanity URL or profile page, you just confirmed the ID. If the user ever changes their vanity URL, deletes their account and returns, or blocks you, you still have this numeric link. You can still track them.
Even if Facebook changes the CDN structure tomorrow, the logic remains the same. Files stored on a CDN carry identifiers. Those identifiers connect back to the uploader. Learn to read them, and you add another passive extraction method to your toolkit.
Step 6: Documenting the Evidence
For your investigation report, capture the following:
The full CDN URL with timestamp of extraction.
The filename segments broken down and annotated.
If cross-platform, the matching filename from the second platform side by side.
Screenshot of both URLs with the matching segments highlighted.
This is not circumstantial. This is technical evidence. The same file hash, same CDN path, same internal object ID appearing on two separate platforms proves the accounts share a single upload source. That is attribution.
One More Thing
This technique also works for Facebook Pages and Groups. When you open the profile picture of a Page, the same filename structure appears. If an anonymous Page is spreading disinformation, extracting the profile picture filename and cross-referencing it with other known assets can tie that Page back to an individual operator. I have used this. It works.
Search Capabilities
Facebook’s internal search is deliberately limited. Google, Yandex, etc is your external search engines for Facebook. Use the dork site:facebook.com "public profile" "works at" to find profiles associated with specific companies. Layer additional operators. site:facebook.com "public profile" "lives in London" "works at Barclays". This pulls profiles that Facebook’s own search might hide.
The About section is a transparency goldmine. Facebook logs the history of username changes, profile picture updates, and contact information. The “Recent Profile Pictures” album is particularly important because it is undeletable. Even if a user removes all their current photos, the “Recent Profile Pictures” album retains every profile picture they have ever used, in chronological order. This is a behavioral timeline sitting in plain sight.
Practical Methodology:
Always extract the numeric ID first. It is your anchor.
Check the About section for transparency history and contact info.
Review “Recent Profile Pictures” for historical imagery.
Use Google dorks with
site:facebook.comfor external search.Check public groups the target belongs to. Group membership is often visible and reveals interests, locations, and associations.
Lecture 4.2: LinkedIn — The Corporate Org Chart
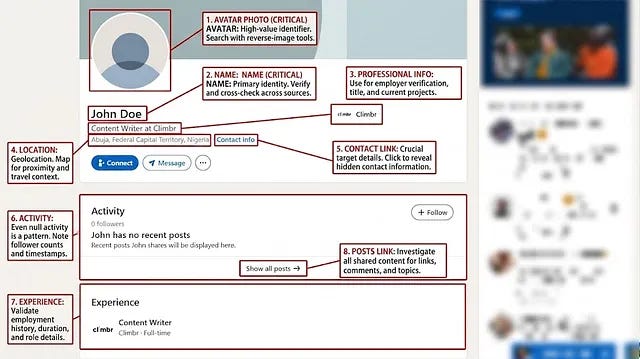
LinkedIn is not a social network. Not for us. LinkedIn is an organizational mapping tool that happens to have a newsfeed. Every profile is a data point. Every job change is a timestamp. Every comment is a window into internal team dynamics and individual expertise.
Most investigators use LinkedIn wrong. They search a name, scroll the profile, and move on. That is surface-level. The real intelligence is in the hidden identifiers, the activity patterns, the cross-platform bridges, and the contact discovery tools that extract what LinkedIn tries to hide behind premium paywalls.
I am going to walk you through every technique, tool, and method you need to extract maximum intelligence from LinkedIn. Pay attention. This is dense, and every piece matters.
Part 1: Discrete Search via Google
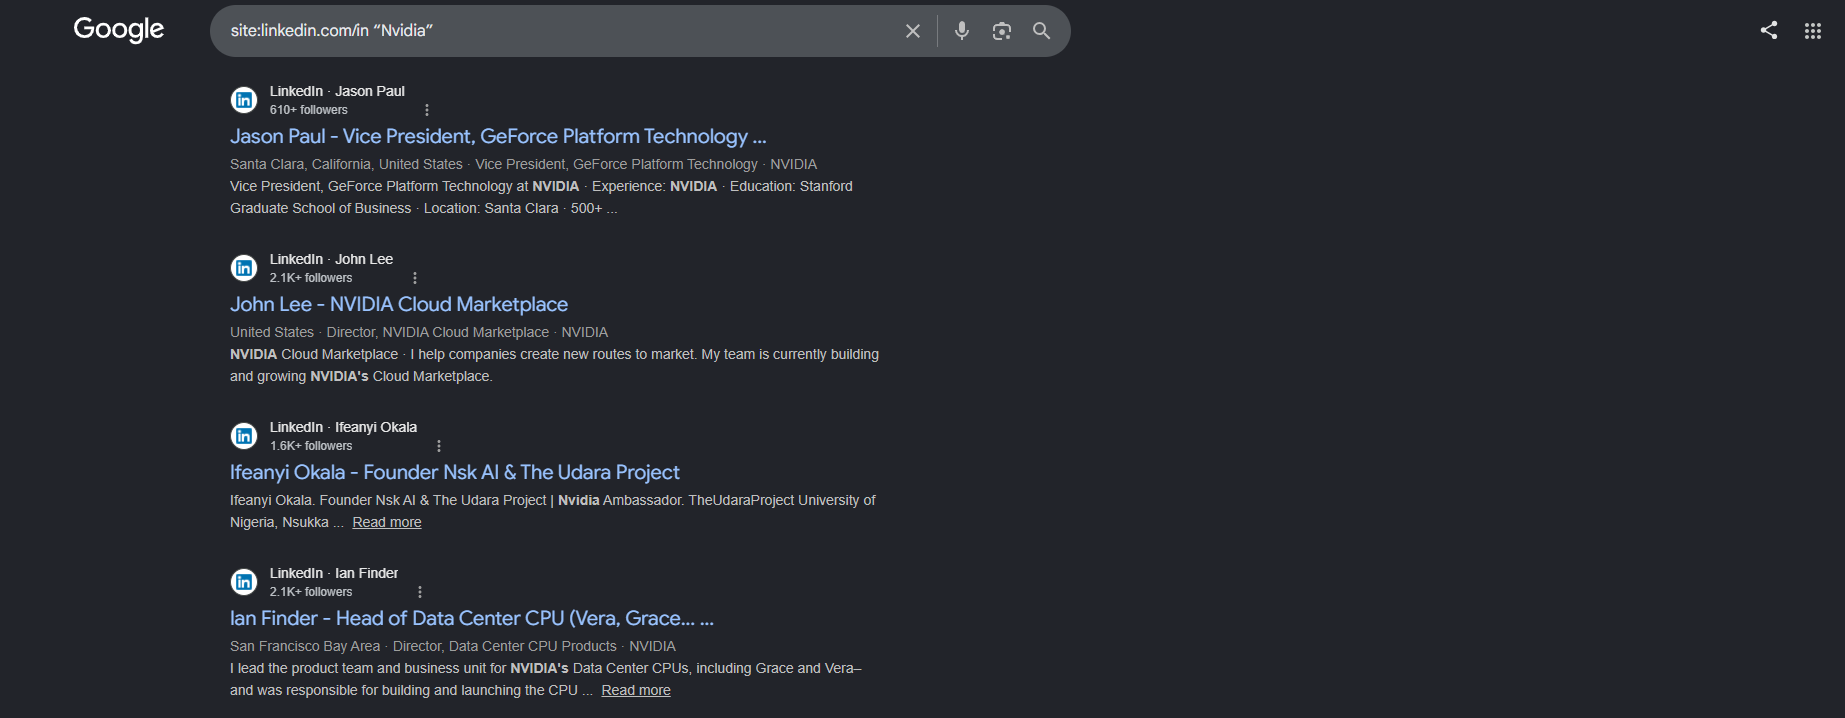
LinkedIn limits what you see if you do not pay. They cap search results. They hide profiles outside your network. They notify users when you view them if you are logged in. Google does none of these things.
The Google dork is your external search engine for LinkedIn. The base query is:
site:linkedin.com/in “company name”
This returns every public LinkedIn profile associated with that company, current and former, without hitting LinkedIn’s internal search limits and without generating any profile view notifications. You are not on LinkedIn when you do this. You are on Google. That is passive.
Now refine. Add a title:
site:linkedin.com/in “company name” “security engineer”
Add a location:
site:linkedin.com/in “company name” “security engineer” “London”
Add a date range using Google’s date filter under Tools. This catches profiles that were indexed during a specific period, which can help you find people who recently joined or left.
Add boolean logic to broaden the net:
site:linkedin.com/in “company name” AND (“security” OR “cyber” OR “infosec”)
This returns anyone in the security space at that company, regardless of exact title wording.
The key insight here is that you are not searching people. You are searching Google’s index of LinkedIn. Google crawled those profiles. Google stored them. You are just asking Google to show you what it already has. This is not hacking. This is not bypassing. This is using the tool that LinkedIn itself allowed to index its public profiles.
Part 2: LinkedIn User ID Extraction
Every LinkedIn profile has a unique identifier embedded in the page source. This ID is not the vanity URL. It is not the public profile link. It is a numeric or alphanumeric string that LinkedIn assigns internally. Extracting this ID allows you to track a profile even if the user changes their name, vanity URL, or headline.
Here is the method
Navigate to any public LinkedIn profile. Right-click on the page background, not on any image or button. Select “Inspect” or “Inspect Element” to open the browser’s developer tools.
Now, inside the developer tools panel, press Ctrl + F to open the search bar within the HTML source. Search for the term urn:li:member: — You are looking for a line that contains something like:
“member”:”123456789”
OR
urn:li:fsd_profile:ACoAABc12345
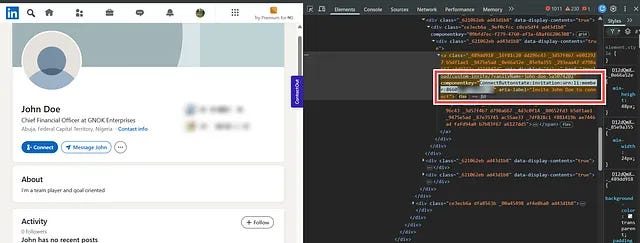
The number after member or the string after urn:li:fsd_profile: is the internal LinkedIn profile ID. This ID is globally unique. It never changes. If the user deletes their account and recreates it with the same name, this ID will be different. But for the life of that profile, this ID is constant.
Another method is to look at the page source for objectUrn. Search for:
“objectUrn”:”urn:li:member:123456789”
The numeric portion is the member ID.
However, there are a few things to keep in mind:
The exact field name is not fixed. Depending on LinkedIn’s frontend version and the endpoint, you might see
objectUrn,entityUrn,trackingUrn,profileUrn, or other URN fields.LinkedIn frequently changes its frontend implementation, so a field that exists today may not exist tomorrow.
Not every
objectUrnyou find refers to the profile you’re viewing. Some may identify posts, companies, comments, connection invitations, or other objects. You need to inspect the surrounding JSON to determine what object the URN represents.
For OSINT or debugging purposes, the approach is generally:
Open the profile you are authorized to view.
Inspect the page source or browser developer tools.
Search for terms like:
"objectUrn""entityUrn""profileUrn""urn:li:member:""urn:li:fsd_profile:"
4. Verify from the surrounding data (such as the profile’s name, headline, or other attributes) that the URN corresponds to the profile you’re examining.
Why does this matter? Because many third-party LinkedIn tools and APIs use this internal ID rather than the public profile URL. If you are building a target list, storing the internal ID ensures you can always reference the correct profile, even if the vanity URL breaks.
Part 3: LinkedIn Comment and Post ID Extraction
When a target comments on a LinkedIn post, that comment has its own unique ID. Extracting this allows you to track specific interactions, monitor threads, and map relationship networks.
Find a public post where the target has commented. Scroll to their comment. Right-click on the timestamp of the comment, the small text that says “3 days ago” or “1 week ago.” Select “Inspect Element.”
Inside the HTML, look for an attribute called data-urn or search for urn:li:activity: or urn:li:comment:. You will see something like:
urn:li:comment:(activity:7123456789,123456789)The first number after activity: is the post ID. The second number is the comment ID. This tells you exactly which post they commented on and uniquely identifies that comment.
If you are tracking a disinformation campaign, these IDs let you map which accounts are commenting on which posts, whether they are interacting with each other, and whether they are amplifying specific narratives in coordination. You are not guessing. You are pulling hard identifiers.
Part 3 (Addendum): Converting LinkedIn Comment and Post IDs to Readable Timestamps
You extracted the comment ID. You have the post ID. That tells you who commented where. But there is another piece of intelligence embedded directly inside those numeric IDs that most investigators miss entirely: the timestamp.
LinkedIn encodes the creation time of posts and comments directly into their numeric IDs using the Unix epoch format in milliseconds. If you know how to extract and convert that number, you know exactly when that content was created, down to the millisecond.
Here is how it works
Step 1: Extract the Numeric ID
You already know how to find the comment ID from the HTML. You will have something like:
urn:li:comment:(activity:7123456789,123456789)The second number, 123456789, is the comment ID. The first number, 7123456789, is the post ID. Both are numeric. Both encode a timestamp.
Step 2: Understand the Encoding
LinkedIn uses a format called “snowflake” or a variation of it, similar to how Twitter and Discord generate unique IDs. The ID is a 64-bit integer, and a portion of those bits represents the timestamp in Unix milliseconds.
The practical takeaway is this: you can extract the first 41 bits of the ID to get the timestamp. But you do not need to do bitwise math yourself. The simpler method works for most LinkedIn IDs because they are large enough to contain the timestamp in the higher-order bits.
Step 3: The Conversion Method
Take the numeric ID. Let us use a real-world example from a public LinkedIn comment:
Comment ID: 7256123456789012345To extract the timestamp, you need to apply a bit shift operation that LinkedIn uses. The formula is:
Timestamp (Unix milliseconds) = ID >> 17Then add the LinkedIn epoch offset. LinkedIn’s epoch starts at a different base than standard Unix epoch. The standard Unix epoch starts at January 1, 1970. LinkedIn’s internal epoch starts at January 1, 2017. This means you need to add the difference.
Here is the full formula:
Unix Timestamp (milliseconds) = (ID >> 17) + 1483228800000Where 1483228800000 is the Unix timestamp in milliseconds for January 1, 2017, 00:00:00 UTC.
Step 4: Practical Conversion Without Manual Math
You do not need to do this by hand. There are tools that automate this.
One method is to create a Python script to run this for you.
Step 5: Manual Conversion Using Online Tools
If you do not want to run a script, use a browser-based approach.
First, go to a website that performs the bit shift calculation. You can use any online tool that supports bitwise operations. Enter the LinkedIn ID, apply >> 17, and note the result.
Then, add 1483228800000 to that result.
Now take the final number and go to a Unix timestamp converter like epochconverter.com. Paste the number in milliseconds. The site converts it to a human-readable date and time in UTC.
Step 6: Why This Matters
This technique gives you the exact creation time of a post or comment, not the relative “3 days ago” display that LinkedIn shows. Relative timestamps are vague. “3 days ago” does not tell you if the post was made at 2 PM or 2 AM. The Unix timestamp does.
In a disinformation investigation, you can now:
Establish the exact sequence of posts and comments across multiple accounts.
Identify coordinated activity by finding comments posted within seconds of each other from different accounts.
Reconstruct the timeline of a narrative as it was amplified.
Compare the creation timestamp against other known events to establish context.
This is not a rough estimate. This is forensic-level precision extracted from an ID that LinkedIn hands you in the page source.
Practical Example: Full Walkthrough
A target comments on a LinkedIn post. You inspect the element and find:
urn:li:comment:(activity:7123456789012345678,7256123456789012345)The comment ID is 7256123456789012345.
You run the Python script or do the manual math:
ID: 7256123456789012345
ID >> 17: 55371093750000 (approximate)
Add epoch offset: 55371093750000 + 1483228800000 = 56854322550000
Convert 56854322550000 milliseconds to a date. It resolves to:
August 15, 2025, 14:32:30 UTCYou now know this comment was posted on August 15, 2025, at 2:32 PM UTC. Not “several months ago.” Not “around mid-August.” The exact second.
That is how you turn a numeric ID into a timestamp. Document it. Add it to your timeline. This is the level of precision professionals operate at.
Part 4: Activity Feed Analysis
The Activity feed on a LinkedIn profile is a behavioral goldmine. Every post, like, comment, and share is logged with a timestamp. This feed is often public even when other parts of the profile are restricted.
Open the target’s profile and click on “Activity” or scroll to the “Activity” section. Click “See all activity.” You now have a chronological feed of everything this person has done on LinkedIn.
First, analyze the timestamps. If someone consistently posts or comments between 11 PM and 4 AM Eastern Standard Time, they are either a night owl in North America or they are operating from a different timezone entirely. Cross-reference this with their stated location. Discrepancies are intelligence.
Second, analyze the content. Look at the technical depth of their comments. Someone who writes “Great insights!” on every post is not a practitioner. Someone who writes a paragraph about the specifics of AWS Lambda cold starts or the nuances of a particular NIST framework is revealing their actual hands-on knowledge. This tells you their real skill level.
Third, map the relationships. Click on the posts the target comments on. Who wrote the original post? Is it a colleague? A competitor? An industry influencer? Note who responds to the target’s comments. Note the tone. Supportive? Combative? Familiar? You are mapping internal team structures and external professional relationships from public interactions alone.
Part 5: Internal Team Mapping and Organizational Friction
When multiple employees from the same company comment on each other’s posts, you can infer reporting structures and team dynamics. A manager who consistently praises a specific employee’s posts is signaling mentorship or favoritism. An employee who never interacts with their supposed team lead is signaling distance or friction.
Comment chains where two employees from the same company disagree, especially on technical or strategic topics, reveal internal divisions. Note the language. Is the disagreement respectful or dismissive? Is one party pulling rank? These are signals about company culture, internal politics, and potential insider threat vectors.
This is not gossip. This is organizational intelligence. If you are investigating a company for fraud, for due diligence, or for insider threat assessment, knowing who is aligned with whom and where the fractures are is actionable intelligence.
Part 6: Email and Phone Number Discovery with ContactOut and SignalHire
LinkedIn does not want you to have direct contact information without a premium subscription. But the data exists elsewhere. ContactOut and SignalHire are two tools that aggregate publicly available contact data and link it to LinkedIn profiles.
ContactOut
ContactOut is a browser extension that overlays email addresses and phone numbers onto LinkedIn profiles. It works by cross-referencing the profile you are viewing against its database of publicly sourced contact information. When you install the extension and visit a LinkedIn profile, ContactOut displays any email addresses and phone numbers it has associated with that person.
The data comes from public sources. Corporate websites. Conference attendee lists. Academic publications. Press releases. Patent filings. SEC documents. All of it is open source. ContactOut just aggregates and surfaces it.
How To Use ContactOut
Install the extension on your investigation browser. Navigate to the target’s LinkedIn profile. Look for the ContactOut sidebar or icon. If data is available, it will display. Copy it. Verify it. Document where you found it.
SignalHire
SignalHire operates similarly but with a stronger focus on internal company data. It aggregates email patterns and phone numbers based on company domain formats. If a company uses the format firstname.lastname@company.com, SignalHire can often generate or verify the target’s email address based on that pattern.
SignalHire also provides a dashboard for managing multiple leads and exporting data. For an investigator building a target list across an organization, this is more efficient than looking up profiles one at a time.
Both tools have free tiers with limited lookups. Paid tiers unlock more data. For professional investigative work, the paid tier is a necessary operational expense.
Important Note on Methodology
These tools do not access private data. They do not breach LinkedIn’s security. They aggregate information that is already public, just scattered across the internet. Your job as an investigator is to verify everything they return. If ContactOut gives you an email, send a test email from a disposable address to see if it bounces. If SignalHire gives you a phone number, run it through a carrier lookup to confirm it is active and associated with the target’s geography.
The tool is the starting point, analyst. Verification is the work!
Part 7: Practical Methodology Summary
Here is your LinkedIn investigation workflow, step by step.
Google Dork the Organization. Start with
site:linkedin.com/in "company name"and refine by title, location, and boolean combinations. Collect every relevant profile URL into a spreadsheet.Extract the Internal ID. For each profile, open the page source or Inspect Element and extract the
memberID. Store it alongside the public URL. This is your permanent identifier.Analyze the Activity Feed. For high-value targets, review their activity chronologically. Note posting times for timezone analysis. Note comment content for technical skill assessment. Note interaction patterns for relationship mapping.
Map the Organization. Build a visual org chart based on titles, reporting relationships inferred from interactions, and tenure data from profile start dates.
Extract Contact Information. Run ContactOut and SignalHire on key profiles. Verify every email and phone number returned.
Cross-Reference Skills. Take the skills listed on the LinkedIn profile and search for matching usernames, forum posts, GitHub repositories, and subreddit activity. This bridges LinkedIn to the wider digital footprint.
Document Everything. Every ID, every email, every timestamp, every inferred relationship. If it is not documented, it did not happen.
Lecture 4.3: Instagram — The Locational and Relational Graph
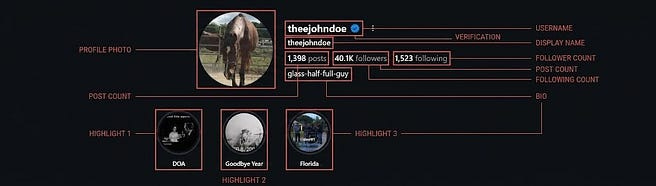
Instagram looks simple. Photos, videos, stories that disappear. Most people scroll through it without thinking. You are not most people. To an investigator, Instagram is a mapping tool. It maps where someone goes, who they know, what they care about, and how they present themselves to different audiences.
The intelligence is not just in what they post. It is in the connections they do not realize they are exposing. The tagged photos they forgot about. The bio link that bridges to another platform. The profile picture that hashes to the same image on a LinkedIn account under their real name. The location tag on a story that places them in a city they claimed they never visited.
This lecture is about extracting every drop of that intelligence. I will walk you through each step as if you have never opened Instagram before. Follow this process, and you will never look at an Instagram profile the same way again.
Phase 1: Initial Reconnaissance and Documentation
Before you do anything else, open the target Instagram profile. Do not scroll yet. Do not click on photos. Just look at what is in front of you and document everything.
Open a blank document or your investigation notebook. Record the following:
Username exactly as displayed.
Display name (this can be different from the username and changed anytime).
Profile picture. Screenshot it. Save the image file separately.
Bio text. Copy it word for word, including emojis and line breaks.
Any links in the bio. Copy the full URL.
Number of posts, followers, and following at the time of your visit.
Whether the account is public or private.
Any highlights covers visible on the profile.
This takes sixty seconds. It creates a snapshot of the account at this moment in time. If the target later changes their bio, removes a link, or goes private, you have the original state documented. This is basic, and most people skip it. Do not skip it.
Phase 2: Bio Link Extraction and Cross-Platform Bridging
The bio link is one of the most valuable pieces of data on an Instagram profile. Instagram only allows one clickable link in the bio. Users get around this by using link aggregation services like Linktree, Beacons, or Milkshake, or they link directly to a single external platform.
Click the link. If it goes to a Linktree page, document every link on that Linktree. Users often list their YouTube, TikTok, OnlyFans, personal website, Discord server, and other platforms there. Each of those is a new investigation path.
If the link goes directly to a YouTube channel, you now have a Google account associated with the Instagram profile. Subscribe to that channel from a sock puppet account. Analyze the video content, the posting frequency, the comments the target leaves on their own videos.
If the link goes to a personal website, run a WHOIS lookup on the domain. Check the Wayback Machine for historical versions of the site. Look for contact pages, about pages, and any embedded email addresses.
If the link goes to an OnlyFans or similar subscription platform, note the username format. It may match or resemble the Instagram handle, or it may be a completely different alias. Either way, it is another pivot point.
Document every external platform you discover through the bio link. Each one is a new source of intelligence.
Phase 3: Profile Picture Extraction and Perceptual Hash Matching
The profile picture is small on Instagram. You cannot right-click and save it at full resolution through normal means. But you need the highest quality version available because you are going to run it through perceptual hash matching against other platforms.
Here is how to extract it
The profile picture on Instagram is displayed small. You cannot right-click and save it at full resolution through normal browser actions. But you need the highest quality version available because you are going to run it through perceptual hash matching against other platforms. Instagram stores the full-resolution profile picture URL directly in the page source. Your job is to pull it out.
Here Are Two Ways To Do It
Method A: Direct Source Search (Faster and More Reliable)
Open the target’s Instagram profile in a browser. Right-click anywhere on the page background and select “Inspect” or “Inspect Element” to open the developer tools panel.
Once the panel is open, press Ctrl + F to open the search bar within the HTML source. Type profile_pic_url and hit Enter. Instagram embeds the full-resolution profile picture URL in a JavaScript object within the page source. You will see a line that looks something like this:
“profile_pic_url”:”https://instagram.fxxx1-1.fna.fbcdn.net/v/t51.2885-19/123456789_0123456789_987654321_n.jpg”Copy the entire URL inside the quotation marks. Open it in a new browser tab. The image loads at its highest available resolution. Right-click and save it to your investigation folder. Name the file with the target’s username and the date of extraction.
This method is faster because you go directly to the data you need without manually hunting through HTML elements.
Method B: Element Selector (Use When Source Search Fails)
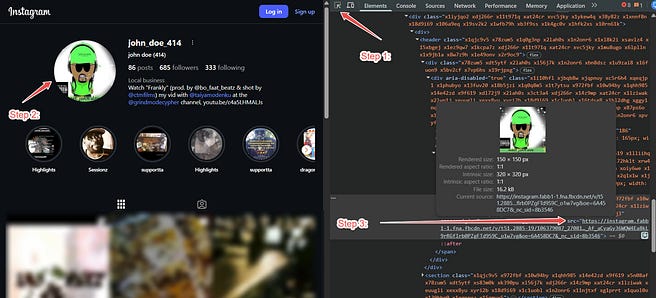
If the profile_pic_url search does not return results, or if Instagram has restructured how they embed the image, the element selector method works as a fallback.
With the developer tools panel still open, look at the top left corner of that panel. You will see a small icon that looks like a dotted square with a cursor arrow. This is the element selector tool. You can also activate it with the keyboard shortcut Ctrl + Shift + C. Click that icon once. Your cursor is now in inspection mode.
Move your cursor over the target’s profile picture and click on it. The developer tools panel jumps to the specific line of HTML code that renders that image. You are looking for an attribute called src within an <img> tag. It will look something like:
<img src=”https://instagram.fxxx1-1.fna.fbcdn.net/v/t51.2885-19/123456789_0123456789_987654321_n.jpg”>Copy the full URL from the src attribute. Open it in a new tab. Save the image.
What You Do With the Image
Once you have the profile picture saved, you generate a perceptual hash. Install the required Python library if you have not already:
pip install imagehash pillowThen run this script:
from PIL import Image
import imagehash

# Load the saved profile picture
img = Image.open(”target_username_profile.jpg”)

# Generate perceptual hash
phash = imagehash.phash(img)

print(f”Perceptual Hash: {phash}”)
The output is a short alphanumeric string. This hash represents the visual fingerprint of the image. It survives resizing, minor cropping, and slight edits. If the same image appears on Facebook, LinkedIn, Twitter, or any other platform, the hash will match or be extremely close.
Now take that hash and compare it against profile pictures extracted from other suspected accounts. If the Instagram profile picture hashes to the same value as a LinkedIn profile picture under a real name, you just linked an anonymous Instagram account to a verified professional identity. That is attribution.
Phase 4: Tagged Photos — The Goldmine
Most investigators jump straight to the main profile grid. That is a mistake. The tagged photos section is separate from the main posts. It contains photos and videos that other users posted and tagged the target in. The target cannot delete these. They can only untag themselves, and most people forget to do that.
To access tagged photos on a desktop browser, go to the target’s profile and look at the tabs below the bio. You will see “Posts,” “Reels,” and a small icon that looks like a person inside a frame. That is the tagged photos tab. Click it.
On mobile, the tagged tab is located below the bio next to the posts grid, represented by the same person-in-frame icon.
Scroll through every tagged photo. For each one, ask yourself:
Who posted this? Is the uploader’s profile public?
Where was this taken? Is there a location tag?
When was this taken? Is there a timestamp or date reference in the caption or comments?
What is the target doing? Who else is in the photo?
Does the background reveal anything about the target’s habits, relationships, or locations?
I once found a target’s home address through a tagged photo. The target was careful. Their own profile had zero location tags. But a friend posted a group dinner photo, tagged the target, and added a location tag for the restaurant. That restaurant was two blocks from the target’s apartment. The friend’s caption mentioned “walking back to ****’s place after dinner.” The target never posted a single thing about that evening. They did not have to. Their friend did the work for me.
Tagged photos are the backdoor into a target’s real life. Use them.
Phase 5: Location Tag Analysis and Pattern-of-Life Mapping
Every Instagram post and story can carry a location tag. Even if the target does not manually add one, Instagram suggests locations based on GPS data. Many users accept these suggestions without thinking.
Go through the target’s posts one by one. For each post, check if there is a location tag below the username at the top of the post. Click that location tag. Instagram opens a page showing all public posts tagged at that location. This gives you two things.
First, it confirms the target was at that location at a specific time. The post timestamp tells you when.
Second, it shows you who else posts from that location. These are potential associates. People who frequent the same gym, the same coffee shop, the same park. Note their usernames. Check if the target follows them or interacts with their posts.
Now map the locations. Take every location tag and plot it on Google Earth or a simple map. Look for clusters. Does the target post frequently from a specific neighborhood? That is likely their home area. Do they post from a specific office building every weekday? That is likely their workplace. Do they post from a specific bar every Friday night? That is a pattern-of-life marker.
Combine this with the timestamps. If someone posts from a gym every weekday at 7 AM, you know their morning routine. If they post from an airport every other week, you know they travel frequently. Each location tag is a dot. Connect the dots, and you have a behavioral map.
Phase 6: Story Analysis and Temporary Content
Instagram Stories disappear after 24 hours. But highlights are saved Stories that the user chose to keep permanently visible on their profile. These are often organized into categories like “Travel,” “Food,” “Work,” or “Friends.”
Click through every highlight. Treat each highlight as a curated collection the target wants you to see. Look for:
Locations visible in the background.
Other people who appear regularly.
Screenshots of conversations or posts the target found important.
Events like birthdays, weddings, or work functions.
If the target has an active Story at the time of your investigation, view it from a sock puppet account that does not follow the target, if the account is public. If the account is private, you will need a sock puppet that the target has accepted as a follower. Never view a Story from your real account. Always use a properly maintained sock puppet.
Document the Story content quickly. Screenshot it. Stories vanish, and you may only have one chance.
Phase 7: Comment Analysis and Relationship Mapping
Comments are conversations. They reveal who the target interacts with, how they speak to different people, and what topics trigger engagement.
Go through the target’s posts. Read the comments. Note every user who comments regularly. These are the target’s inner circle. Note the tone. Is it friendly? Flirtatious? Professional? Argumentative?
Click on the profiles of frequent commenters. Are their accounts public? Do they post photos with the target? Do they share the same locations? You are mapping the target’s social graph through their interactions.
Also, read the comments the target leaves on other people’s posts. Instagram allows you to see comments someone has made on public posts through third-party tools or manual searching. If the target has a consistent commenting pattern on certain accounts, those accounts are part of their social orbit.
Phase 8: Instagram User ID Extraction & Validation
Every Instagram account has a permanent numeric User ID. The username can change. The display name can change. The User ID stays the same forever. If you capture this ID once, you can track the account through any rebranding.
Method 1: Page Source Extraction
Open the target’s Instagram profile. Right-click anywhere on the page background and select “View Page Source.” Press Ctrl + F and search for profilePage_. You are looking for a string like:

The number after the underscore is the User ID. Copy it. Store it.
Method 2: Using the Custom Instagram Parser Tool
I built a custom Python tool that automates this entire process. You feed it the Instagram page source code, and it extracts the User ID, profile picture URL, bio, external links, follower counts, business details, and more. It is faster than manual extraction and produces a structured JSON report for your evidence folder.
The tool is not included with this course, nevertheless:
python3 instagram_parser.py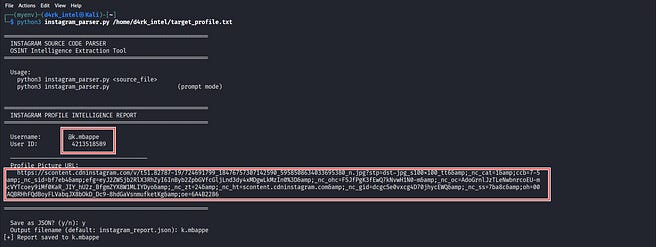
Enter the path to your saved source code file. The tool outputs a complete intelligence report including the User ID.
Why the User ID Matters
The User ID is your permanent anchor. If the target changes their username from @oldhandle to @newhandle, you lose them if you are tracking by username alone. But if you have the numeric ID, you can verify the new handle belongs to the same account. You can also use the ID to pull profile data programmatically, track the account across time, and cross-reference against breach databases that include Instagram numeric IDs.
Phase 9: Google Dorking for Instagram — Finding What the Platform Hides
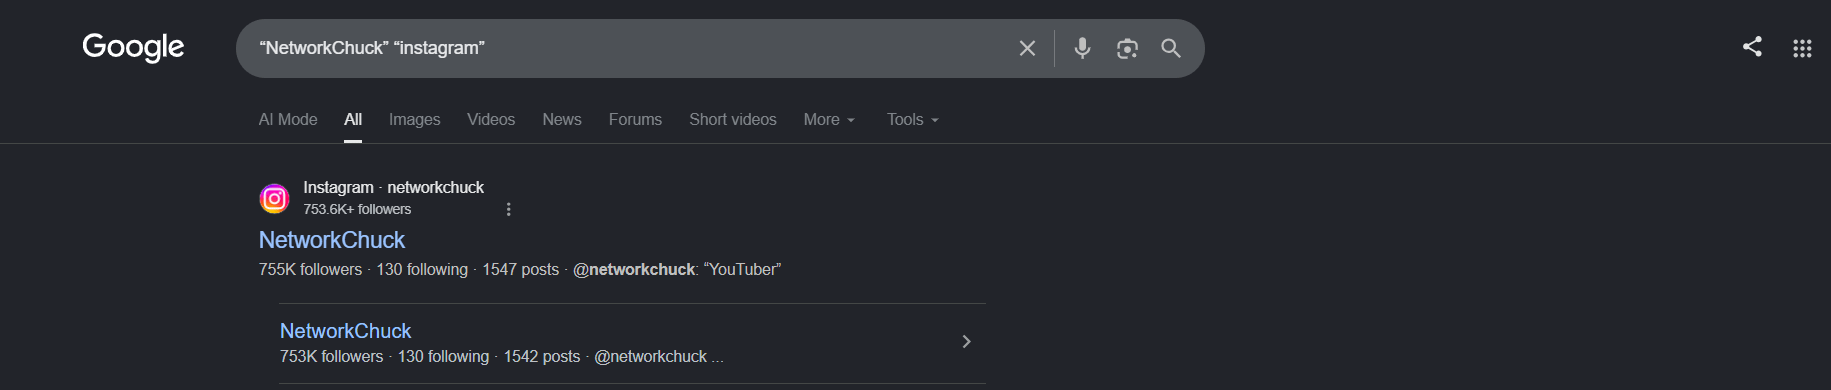
Let me be direct. There is no Google dork that bypasses Instagram’s privacy settings. You cannot type a query and magically see a private profile’s posts, messages, or internal account data. Anyone who tells you otherwise is either lying or confused about what a dork actually does.
What you can do is use Google dorks to find the public footprints that surround an Instagram account. When someone creates an online presence, they leave trails across multiple platforms. A bio link that leads to a personal website. A username that appears in a forum signature. An email address buried in an old blog comment. These are the threads Google can pull, and these threads lead you to intelligence Instagram itself will never show you.
The Dork Chain: Finding Public Footprints
The methodology is simple. You are not searching Instagram for private data. You are searching the entire indexed web for places where the target’s Instagram identity overlaps with other information.
Start with the username. If the target is @vintage_bike_77, the username itself is your first search term. But do not stop at searching the bare handle. People link their Instagram accounts in bios, forum signatures, blog posts, and comment sections. They write things like “Follow me on Instagram @vintage_bike_77“ or “DM me on IG: vintage_bike_77.”
Use These Dorks To Find Those Mentions:
“vintage_bike_77” “instagram”
“vintage_bike_77” “ig”
“vintage_bike_77” “DM me”
“vintage_bike_77” “follow me”
These queries return pages where the target’s Instagram handle is mentioned alongside those common phrases. You might find a forum profile, a blog comment, a Reddit post, or a YouTube channel description. Each result is a new platform to investigate.
Now, find public bios and links. Instagram profiles often include an email address in the bio for business inquiries. Even if the current bio does not show one, an older version might have been indexed by Google before the target removed it.
Use These Dorks:
site:instagram.com “vintage_bike_77” “gmail.com”
site:instagram.com “vintage_bike_77” “yahoo.com”
site:instagram.com “vintage_bike_77” “protonmail.com”
site:instagram.com “vintage_bike_77” “outlook.com”
These queries restrict Google’s search to Instagram’s domain and look for the username paired with common email domains. If the target ever included an email in their bio, and Google indexed that version of the page, it will appear in the results.
Extend This To Other Contact Information:
site:instagram.com “vintage_bike_77” “contact”
site:instagram.com “vintage_bike_77” “business”
site:instagram.com “vintage_bike_77” “WhatsApp”
site:instagram.com “vintage_bike_77” “Telegram”
Each query looks for a different type of contact detail the target might have publicly listed. Business inquiries. WhatsApp numbers. Telegram handles. Not everyone includes these, but when they do, you have just pulled contact information without ever interacting with the Instagram platform directly.
Cross-Platform Username Search
Instagram usernames are often reused across other platforms. A target who is @vintage_bike_77 on Instagram might use the same handle on Twitter, Reddit, GitHub, or niche forums. Google can find these faster than manually checking each platform.
Use This Dork To Search For The Exact Username Outside Of Instagram:
“vintage_bike_77” -site:instagram.comThe -site:instagram.com operator excludes Instagram results. What remains are pages on other platforms where that exact string appears. It could be a Twitter profile, a Reddit post, a GitHub commit, a forum signature, or a Pinterest board. Every result is a new lead.
Refine Further By Targeting Specific Platforms:
site:twitter.com “vintage_bike_77”
site:reddit.com “vintage_bike_77”
site:github.com “vintage_bike_77”
site:youtube.com “vintage_bike_77”
site:tiktok.com “vintage_bike_77”
These queries return results from individual platforms, giving you a cross-platform footprint map built entirely through Google.
Finding Indexed Comments and Interactions
Instagram comments are not easily searchable through Google, but if a target leaves comments on public blog posts, news articles, or forums using their Instagram handle as their display name, those comments get indexed.
Use This Dork:
“vintage_bike_77” “comment”
“posted by vintage_bike_77”
These queries surface comment sections where the target’s handle appears. You might find them debating on a news article, reviewing a product, or posting on a motorcycle forum. Each comment is a window into their interests, writing style, and sometimes their location.
Practical Workflow for Instagram Dorking
Here is the sequence I run for every new Instagram target:
"username" "instagram"— Find all pages mentioning the account.site:instagram.com "username" "gmail.com"— Check for indexed email addresses.site:instagram.com "username" "contact"— Check for other contact details."username" -site:instagram.com— Find cross-platform appearances.site:targetplatform.com "username"— Drill into specific platforms where the handle appears."username" "comment"— Surface indexed comments and interactions.
Document every result. Even a single email address found through these dorks can become the pivot point for an entire email investigation, which you already know how to run from Module 3. The Instagram account is the starting point. Google dorks are how you find everything connected to it.
Phase 10: Tools for Instagram Investigation
You can do everything manually. But tools speed up the collection process. Here are the ones I use and trust.
Imginn.com is a web-based Instagram viewer. You paste a username, and it displays the profile, posts, stories, and tagged photos without requiring a login. It is useful for quick, passive viewing of public profiles. It also allows you to download images and videos directly.
Instasave.io lets you download individual Instagram photos and videos by pasting the post URL. Use this to preserve evidence before a target deletes a post.
4K Stogram is a desktop application that downloads entire Instagram profiles, including posts, stories, and highlights. It requires a login, so use a sock puppet account. It is useful for bulk evidence preservation.
Osintgram is a Python-based tool that runs in your terminal. It pulls profile data, followers, following lists, and location tags, and outputs structured reports. It requires a valid Instagram session, so again, use a sock puppet.
ExifTool should be used on every image you download. Even though Instagram strips most EXIF data on upload, sometimes metadata survives in screenshots or images shared via direct message. Always check.
Phase 11: Practical Investigation Workflow Summary
Here is the step-by-step process for every Instagram investigation.
Document the profile. Username, display name, bio, link, follower count, following count. Screenshot everything.
Extract the profile picture URL from the page source. Save the image. Generate a perceptual hash.
Extract the numeric User ID from the page source or using the custom Instagram parser tool. Validate it via multiple sources.
Follow the bio link. Document every external platform it connects to.
Open the tagged photos tab. Review every photo. Note uploaders, locations, and timestamps.
Review all highlights. Treat them as permanent curated content.
Analyze each post for location tags. Plot them on a map.
Read comments on the target’s posts. Identify frequent interactors.
Read comments the target leaves on other public posts. Map their social orbit.
Use tools like Imginn for passive viewing and 4K Stogram for bulk archiving.
Cross-reference everything with other platforms. The bio link, the profile picture hash, the locations, the writing style.
If you do all of this, you will know the target better than they know themselves. Not because you hacked anything. Because you paid attention to what they left in the open.
Lecture 4.4: Reddit — The Unfiltered Psyche
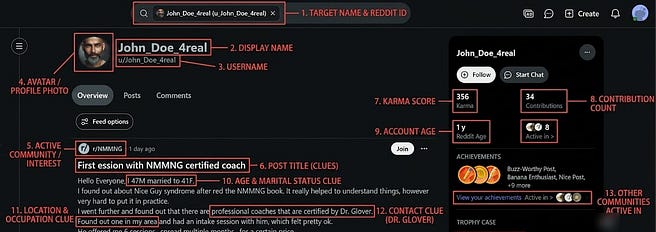
Reddit is different from every other platform we cover. Facebook is where people present their curated life. LinkedIn is where they wear their professional mask. Instagram is where they perform. Reddit is where the mask comes off.
On Reddit, people discuss their real problems. Their niche hobbies. Their financial struggles. Their unpopular opinions. They do this under usernames that are often completely disconnected from their real identities. This makes Reddit a psychological goldmine and an attribution challenge rolled into one.
The intelligence value is not in finding a name. It is in finding the person behind the username by mapping their interests, their writing patterns, their schedule, and their emotional state across months or years of unfiltered posting.
This lecture walks you through Reddit investigation from start to finish. Every tool, every technique, every step.
Phase 1: Initial Profile Reconnaissance
You have a username. Before you dive into archives and deleted content, you need to understand what is visible on the surface right now.
Open the target’s Reddit profile by navigating to reddit.com/user/USERNAME. Document everything you see.
Account Creation Date — Getting the Exact Timestamp
Reddit displays the account creation date in the sidebar as a relative or formatted date, something like “Created August 15, 2019” or “6 years ago.” That is useful, but it is not precise. You want the exact timestamp. Reddit stores it in the page source. Here is how to pull it.
Right-click anywhere on the page background, not on any image or button. Select “Inspect” or “Inspect Element” from the menu. This opens the browser’s developer tools panel.
Now, look at the top left corner of that developer tools panel. You will see a small icon that looks like a dotted square with a cursor arrow. This is the element selector tool. You can also activate it with the keyboard shortcut Ctrl + Shift + C. Click that icon once. Your cursor is now in inspection mode.
Move your cursor over the account creation date displayed in the sidebar and click on it. The developer tools panel will jump to the specific line of HTML code that renders that text. You are looking for a time tag or an attribute called datetime within the surrounding markup. It will look something like this:
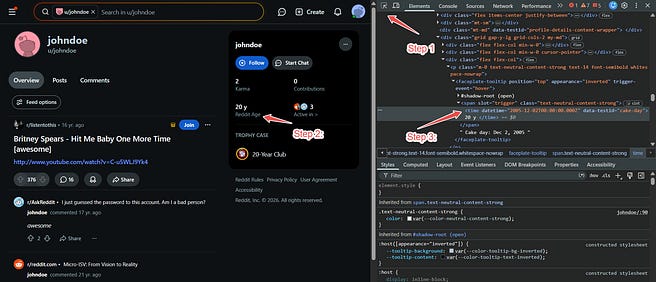
The datetime attribute contains the exact UTC timestamp (Cake Day) of account creation: 2019-08-15T14:32:30.000Z. That is the precise second this account came into existence.
Here is how to decode that specific format, which is known as ISO 8601 UTC time:
2005-12-02: The date (YYYY-MM-DD), which matches December 2, 2005.T: The separator that indicates the Time portion is about to start.00:00:00.000: The exact time (Hours:Minutes:Seconds.Milliseconds). Because it is exactly midnight, it usually means Reddit’s database recorded the date but did not preserve the specific hour/minute of creation for that older account, or it defaulted to midnight.Z: Stands for Zulu Time, which means Coordinated Universal Time (UTC).
Why does this level of precision matter? Because sometimes the exact creation time correlates with other events. An account created three minutes after another account was banned suggests the same operator. An account created during a specific incident window suggests it was purpose-built for that event. “Six years ago” does not give you that. 2019-08-15T14:32:30.000Z does.
What the Creation Date Tells You
An account created six years ago with consistent activity is an established persona. This is someone’s real online identity. They have invested time in it. They care about it.
An account created last week with zero karma is a burner. It was made for a specific purpose. Figure out what that purpose was by looking at where they posted.
An account created years ago but with no activity until recently is a sleeper. Someone created it, sat on it, and activated it later. That is a deliberate operational choice. Ask yourself why.
Document the exact timestamp. Note what it implies. Add it to your timeline.
Look at the total karma. This is the sum of post karma and comment karma. Low karma with high activity suggests the user is controversial or argumentative. High karma with moderate activity suggests the user posts content that resonates with communities.
Look at the trophy case. Reddit awards trophies for account milestones, verified email status, and participation in specific events. A verified email trophy confirms the user linked an email address to the account. That does not expose the email to you, but it tells you one exists and is tied to this persona.
Look at the active communities. The sidebar shows a list of subreddits the user is active in, sorted by engagement. Document every one. These are interest indicators.
Now, scroll through the visible posts and comments. Note the writing style. Is the user articulate or sloppy? Do they use proper punctuation or type in lowercase fragments? Do they use slang specific to a region? Do they mention their age, gender, location, occupation, or relationship status anywhere? Redditors leak personal details constantly, often buried in unrelated comments.
Document everything you find in this initial pass. This is your baseline.
Phase 2: Profile Analysis Tools
Manual scrolling gives you the surface. Profile analysis tools give you the patterns.
Redective is your first stop. Go to redective.com and enter the target username. Redective pulls the account creation date, total karma breakdown, submission history, comment history, most-used words, and hourly activity distribution. The hourly activity chart is particularly valuable. It shows you when the user is most active, broken down by hour. A user who posts exclusively between 9 AM and 5 PM US Eastern time on weekdays has a desk job in that timezone. A user who posts at 3 AM consistently might work night shifts or live in a different timezone than they claim.
Redditmetis is your second stop. Go to redditmetis.com and enter the username. This tool provides sentiment scoring across the user’s comment history, activity heatmaps by day and hour, and a breakdown of which subreddits receive the most engagement. The sentiment analysis tells you whether the user is generally positive, negative, or neutral in their interactions. The heatmap visualizes their posting schedule. A consistent Monday through Friday pattern with evenings and weekends free is the signature of someone posting during work hours.
Run both tools. Save the results. These are your pattern-of-life baselines.
Phase 3: Deep Post and Comment Search
Reddit’s native search is limited. It does not let you filter by date, score, or specific keywords within a user’s history. External tools close this gap.
Samac.io is a Reddit search engine. You can search by author, subreddit, keyword, score threshold, and date range. Use this to find specific comments the target made months or years ago that might not surface in a manual scroll. If you know the target is interested in motorcycles, search their username plus the keyword “Honda” to find every comment where they discussed that specific topic.
Reddit Comment Search at redditcommentsearch.com focuses specifically on comment history. Enter the target username and a keyword. The tool returns every comment the user has made containing that word, with direct links and timestamps. This is useful for finding every instance where the target mentioned a location, a person, or an event.
Better Reddit Search at better.redditsearch.io provides enhanced post search with filters for subreddit, flair, author, and date. Use this to search within specific subreddits for posts by the target that Reddit’s native search would miss.
The key with these search tools is to be specific. Do not just search a username and scroll. Search the username plus keywords related to your investigation: Locations. Hobbies. Political views. Employers. Products. Every keyword is a thread to pull.
Phase 4: Deleted Content Recovery — The Time Machine
This is where Reddit investigation gets powerful. Users delete posts and comments for a reason. They said something they regret. They revealed something they should not have. They got into an argument and tried to erase it. The deletion itself is a signal.
Reveddit at reveddit.com shows content removed by moderators or Reddit’s automated filters. This is not user-deleted content. This is content that someone else decided should not be visible. To use it, navigate to reveddit.com/user/USERNAME. Reveddit displays posts and comments that were removed, color-coded by removal type. Moderator removals appear in blue. Auto-mod removals appear in red. This tells you what the target posted that was deemed unacceptable, which is often exactly what you want to see.
PullPush.io is the heavy hitter. It maintains an archive of Reddit content that was indexed before deletion. When a user deletes a comment, PullPush often still has it. To search, use the API endpoint directly or the web interface. The format for searching comments by author is:
https://pullpush.io/search/comments?author=USERNAMEReplace USERNAME with the target. The results include the full comment text, the subreddit, the timestamp, and the post it was attached to, even if the comment is no longer visible on Reddit. This is how you recover what someone tried to hide.
Arctic Shift (Photon) at arctic-shift.photon-reddit.com is another historical archive. It allows searching by post ID, comment ID, or author. If you have a specific post URL that was deleted, Arctic Shift can often retrieve the original content.
Reddit Archive at redditarchive.com provides multi-filter archive access including deleted and banned posts.
For all deleted content recovery tools, the workflow is the same. Enter the username. Browse the recovered content. Read every deleted post and comment. Document anything that contradicts the target’s current narrative, reveals personal information, or connects to other platforms.
Phase 5: Scam and Threat Detection
If your investigation involves fraud, scamming, or malicious activity, Reddit has specific tools for checking a user’s reputation.
Universal Scammer List at universalscammerlist.com is a database of known Reddit scammers. Enter the target username or profile URL. If the user is listed, you will see the subreddit that banned them, the reason for the ban, and any associated alt accounts. This is critical for marketplace investigations or any case involving financial transactions on Reddit.
Snooper at snooper.reddit.com analyzes comment activity distribution to detect automation. Bots and spam accounts have different posting patterns than humans. Snooper flags accounts that exhibit bot-like behavior, which helps you determine whether you are investigating a real person or an automated persona.
Always run a scammer check if the target has any involvement in trading, selling, or financial discussions. Even if they are not the primary subject of your investigation, a scammer flag provides context about their credibility and behavior.
Phase 6: Subreddit Discovery and Interest Mapping
The subreddits a user participates in are the most direct indicators of their interests, and interests are what you cross-reference across platforms.
Subreddit at Subreddits.org is a searchable directory of over 3,000 subreddits. If the target mentions an interest but you do not know the relevant subreddit, search here. Find the community. Then search that community for the target’s username or writing patterns.
Reddit List at redditlist.com is a curated directory of popular and niche subreddits organized by category. Use this to understand the landscape of communities related to the target’s interests.
When you have mapped the target’s subreddits, categorize them. Group them by theme. Gaming subreddits. Finance subreddits. Location-specific subreddits. Relationship advice subreddits. Health-related subreddits. Each category tells you something about the person’s life.
Now cross-reference these categories against other platforms. If the target posts on r/cybersecurity and their LinkedIn lists a security role, that is a correlation. If they post on r/Manchester and their Instagram location tags are all in Manchester, that is a correlation. If they post on r/motorcycles and a forum you found through username search has the same user discussing carburetors, that is a correlation.
Each overlapping interest is one link in your attribution chain.
Phase 7: Timestamp and Timezone Analysis
Reddit timestamps are in Coordinated Universal Time. Every post and comment carries an exact UTC timestamp visible by hovering over the relative time display. “Posted 3 hours ago” becomes “2025–08–15 14:32:30 UTC” when you hover.
Collect timestamps across the target’s activity. Plot them on a 24-hour clock. Look for the active hours. A user who posts consistently between 8 AM and 4 PM UTC is likely in the UK or Western Europe. A user who posts between 2 PM and 10 PM UTC is likely on the US East Coast. A user who posts between 6 PM and 2 AM UTC is likely on the US West Coast.
Compare this against any stated location. If a user claims to live in New York but their posting hours align with London, something is inconsistent. Inconsistency is intelligence.
Phase 8: Cross-Platform Attribution
Reddit attribution is rarely direct. You will not find a Reddit profile that says “My name is John Doe and I work at Acme Corp.” What you will find is a pattern of interests, a writing style, a posting schedule, and occasional personal details that collectively point to one individual.
Here is the attribution workflow
Map all subreddits the target participates in.
Extract every personal detail mentioned across all posts and comments. Age, gender, location, occupation, education, relationship status, pets, vehicles, health conditions, everything.
Identify the target’s writing style. Sentence length, punctuation habits, common phrases, misspellings, slang.
Determine the target’s active hours from timestamp analysis.
Take all of this and cross-reference against LinkedIn, Facebook, Instagram, forums, and GitHub.
Look for a profile that matches in at least three categories: interests, writing style, and schedule.
When you find a candidate, look for a single piece of hard evidence. A Reddit comment mentioning a specific photo that appears on Instagram. A Reddit post about a work project that matches a LinkedIn job description. A Reddit username that matches a GitHub handle.
One match is a coincidence. Three matches is a pattern. Five matches is attribution.
Phase 9: Google Dorking for Reddit — Finding What Reddit’s Search Misses
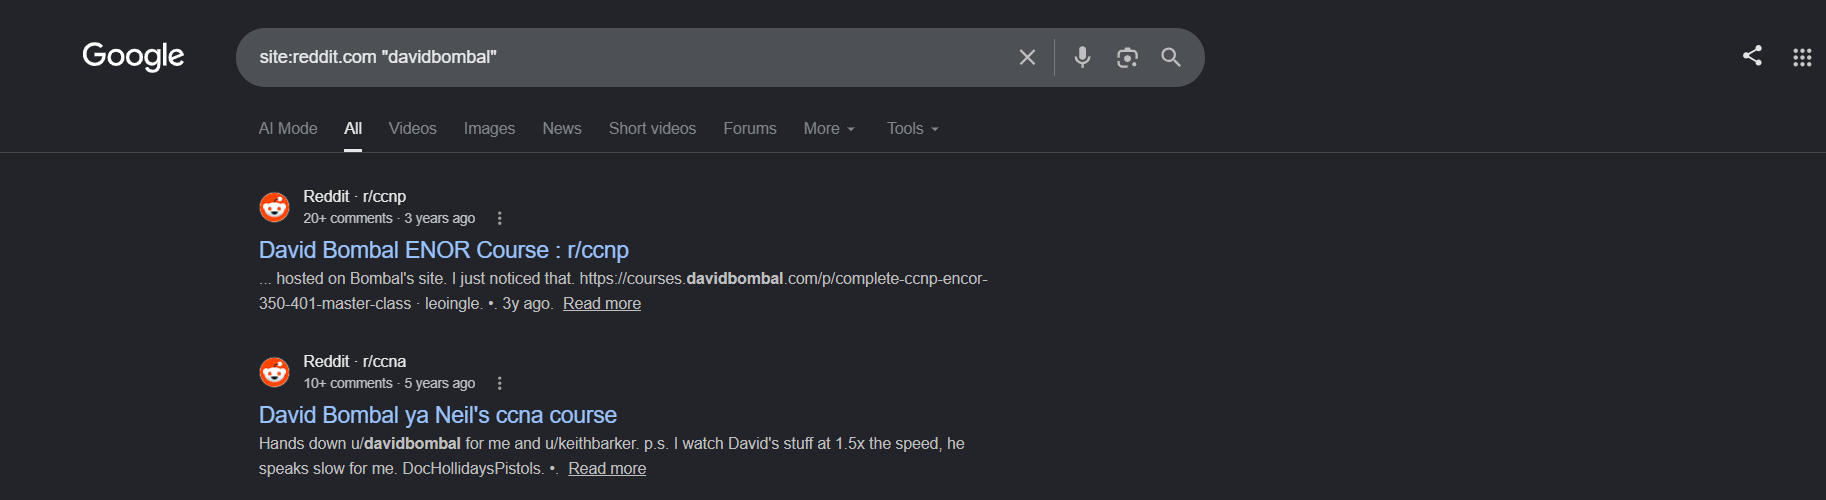
Reddit has its own search. You already know the tools. Redective, Camas, PullPush. But those tools search Reddit’s internal data. Google searches Reddit from the outside, and it often finds things Reddit’s own engine buries or ignores.
Google indexes Reddit aggressively. Every public post, every public comment, every user profile page that was visible long enough gets crawled and stored. The advantage Google gives you is that its ranking algorithm surfaces content based on relevance, not just chronology. A Reddit comment from three years ago that Reddit’s search would bury on page fifty might appear on page one of Google because it matches your query exactly.
The dorking approach for Reddit is straightforward. You are using the site: operator to restrict results to Reddit’s domain, then layering keywords and operators to find specific content.
Finding A User’s Digital Footprint Across Reddit
Start with the username. If the target is wrench_rider_77, the basic dork is:
site:reddit.com “wrench_rider_77”This returns every indexed page on Reddit where that exact string appears. That includes their profile page, their posts, their comments, and any post where someone else mentioned their username. This is broader than Reddit’s own user search, which only shows the profile and activity. Google shows you who is talking about them too.
Now, Exclude Their Own Profile To Find Mentions By Others:
site:reddit.com “wrench_rider_77” -inurl:user -inurl:uThe -inurl:user and -inurl:u operators remove the target’s own profile page and user directory from results. What remains are posts and comments where other users referenced their handle. Someone calling them out in an argument. Someone thanking them for advice. Someone linking to one of their posts. These are relationship indicators.
Finding Specific Content By A User
If you want to find posts or comments the target made containing specific keywords, combine the username with a search term:
site:reddit.com “wrench_rider_77” “Honda”
site:reddit.com “wrench_rider_77” “carburetor”
site:reddit.com “wrench_rider_77” “London”
Each query returns Reddit pages where the target’s username and the keyword both appear. This is functionally the same as using Reddit Comment Search, but Google’s index sometimes captures content that specialized tools miss, especially older content that was indexed before deletion.
Finding Deleted Content Via Google Cache
This is the most valuable Google dorking technique for Reddit. When a user deletes a post or comment, Reddit removes it from their servers. But if Google crawled that page before the deletion, the cached version still exists.
If you have a specific Reddit post URL that is now deleted, paste that URL directly into Google. If Google cached it, the search result will show a small green arrow next to the URL. Click that arrow and select “Cached.” Google displays the stored version of the page as it appeared on the day it was crawled. The deleted content is visible.
If You do not have the URL but know the username and a likely keyword, use this dork:
site:reddit.com “wrench_rider_77” “keyword”Then, for any result that looks relevant but returns a deleted or removed page on Reddit, click the cached version instead. Google preserves what Reddit discards.
Finding Subreddit-Specific Intelligence
If you are interested in what a target posts within a specific subreddit, narrow the dork to that subreddit:
site:reddit.com/r/motorcycles “wrench_rider_77”
site:reddit.com/r/ukpersonalfinance “wrench_rider_77”
This returns the target’s activity within a single community, filtered by Google’s index. Combine this with keywords to find specific discussions:
site:reddit.com/r/motorcycles “wrench_rider_77” “carb tuning”This query returns only posts and comments within r/motorcycles where the target discussed carburetor tuning. You are no longer searching broadly. You are drilling into a specific topic within a specific community.
Finding Email Addresses And Contact Details
Reddit users rarely post their email addresses publicly, but it happens. Sometimes in classifieds subreddits, buy-sell-trade communities, or when offering services.
Use These Dorks:
site:reddit.com “wrench_rider_77” “gmail.com”
site:reddit.com “wrench_rider_77” “yahoo.com”
site:reddit.com “wrench_rider_77” “protonmail.com”
site:reddit.com “wrench_rider_77” “email”
site:reddit.com “wrench_rider_77” “contact”
site:reddit.com “wrench_rider_77” “discord”
Each query looks for the username paired with a contact detail. Most will return nothing. That is expected. But when one returns a result, you have a direct line of communication or a new platform to investigate. That single hit justifies running all six queries.
Cross-Referencing Reddit With Other Platforms
A Reddit username often appears on other platforms. Use Google to find these cross-platform bridges:
“wrench_rider_77” -site:reddit.comThis excludes Reddit entirely and returns every other website where that exact username appears. Forums. Blogs. Twitter. GitHub. YouTube. Each result is a new platform to add to your investigation.
Refine By Platform:
site:twitter.com “wrench_rider_77”
site:github.com “wrench_rider_77”
site:youtube.com “wrench_rider_77”
These targeted queries confirm whether the handle exists on specific platforms without manually visiting each one.
Practical Workflow For Reddit Dorking
Here is the sequence I run for every Reddit investigation:
site:reddit.com "username"— Broad search for all indexed mentions.site:reddit.com "username" -inurl:user -inurl:u— Find mentions by other users.site:reddit.com "username" "keyword"— Find specific discussions by topic.site:reddit.com/r/subredditname "username"— Drill into specific communities.site:reddit.com "username" "gmail.com"— Check for exposed contact details."username" -site:reddit.com— Cross-platform handle discovery.For any dead Reddit links found during investigation, check Google Cache for the deleted content.
Document every result. Reddit content disappears. Users delete posts. Subreddits go private or get banned. Google’s cache and index are your backup. Use them before the trail goes cold.
Quick Reference: Reddit Dorking Commands
Objective_________________Dork
All indexed mentions:
site:reddit.com "username"Mentions by other users:
site:reddit.com "username" -inurl:user -inurl:uUser activity by keyword:
site:reddit.com "username" "keyword"Activity in a specific subreddit:
site:reddit.com/r/subreddit "username"Exposed email addresses:
site:reddit.com "username" "gmail.com"Cross-platform handle search:
"username" -site:reddit.comSpecific platform check:
site:twitter.com "username"Deleted content recovery: Paste dead URL into Google → Click “Cached”
Phase 10: Practical Investigation Workflow Summary
Here is the step-by-step Reddit investigation process
Open
reddit.com/user/USERNAME. Document account creation date, karma, trophy case, and active subreddits.Run the username through Redective and Redditmetis. Save the activity patterns and sentiment analysis.
Search the username on Reveddit and PullPush. Recover every deleted post and comment.
Use Samac.io and Reddit Comment Search with specific keywords to find relevant content.
Check the Universal Scammer List if the investigation involves fraud or marketplace activity.
Map all subreddits to interest categories.
Analyze posting timestamps for timezone and schedule patterns.
Cross-reference interests, writing style, schedule, and personal details against other platforms.
Document every correlation. One is a coincidence. Five is attribution.
Preserve everything. Screenshots, timestamps, archive links. Reddit content disappears. Your evidence folder should not.
This is Reddit investigation. Not scrolling. Not guessing. Systematic extraction, recovery, and cross-platform correlation. Master this, and you can build a psychological profile from nothing but a username.
Lecture 4.5: X (Formerly Twitter) — The Real-Time Signal
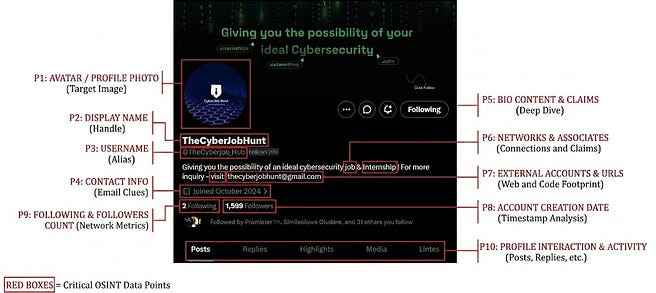
X is fast. People react to events within seconds. They argue, they share, they leak information without thinking. For an investigator, X is a live intelligence feed that never stops broadcasting.
But X is also messy. Accounts appear and disappear. Tweets get deleted. Usernames change. Content scrolls past and vanishes into the noise. Your job is to cut through that noise, extract the hard data, and preserve evidence before it disappears.
This lecture covers every technique you need, from pulling the hidden numeric ID that never changes, to extracting the exact account creation timestamp, to surgical search queries that find exactly what you are looking for, to recovering tweets someone thought they had erased.
Part 1: User ID Extraction — The Anchor That Never Changes
Every X account has two identifiers. The username, which is the @handle everyone sees, and the numeric user ID, which is the internal identifier X uses behind the scenes.
The username can change. Someone can switch from @Allen123 to @Allen3sop1 overnight. If you are tracking based on the handle alone, you lose them.
The numeric user ID never changes. It is assigned when the account is created. It stays with that account forever. If you capture the numeric ID once, you can track that account through any number of username changes, deactivations, and reactivations.
How To Extract It
Method 1: View Page Source
Open any X profile in a browser. Right-click anywhere on the page background and select “View Page Source.” This opens a new tab with the raw HTML of the page.
Press Ctrl + F to open the search bar. Type rest_id and hit Enter. You are looking for a line that looks like this:
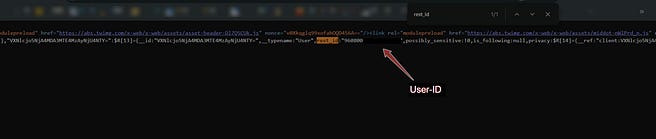
That number is the numeric user ID. It is globally unique. Copy it. Store it in your investigation file alongside the current @handle and the date of extraction.
Part 1 (Addendum): Validating the Extracted User ID
You pulled a number from the page source. You believe it is the numeric user ID. Before you build your investigation around it, validate it. Never trust a single extraction without confirmation.
Method 1: The Custom URL Validation
Construct this URL using the ID you extracted:
https://x.com/intent/user?user_id=123456789Replace 123456789 with the numeric ID you found. Paste the full URL into your browser and press Enter.
If the ID is valid, X redirects you to the account’s profile page. You will see the current @handle, display name, bio, and profile picture. The account loads. The ID is confirmed.
If the ID is invalid, X shows an error page or redirects to the home page. That means the number you extracted is not a real user ID, or the account has been permanently deleted and purged from X’s systems.
Method 2: Cross-Check with the Current @Handle
If you have both the numeric ID and the current @handle, validate by opening both URLs side by side:
https://x.com/intent/user?user_id=123456789
https://x.com/@current_handle
Both should resolve to the same profile page. If they do, you have double confirmation. The ID is valid, and it maps to the expected account.
Method 3: The API Endpoint (If You Have Access)
If you have an X developer account and API key, query the API directly:
https://api.x.com/2/users/123456789A successful response returns the full user object including the current username, display name, and creation date. An empty response means the ID is invalid or the account is gone.
Why Validation Matters
A wrong user ID leads you to the wrong person. You might attribute tweets to an innocent account. You might submit a report with incorrect evidence. Validation takes ten seconds and prevents catastrophic errors.
Documenting the Validation
When you confirm an ID is valid, document:
The numeric ID.
The current @handle it resolves to.
The date you validated it.
The method used (custom URL, API, cross-check).
This record goes in your investigation file. If the @handle changes next month, you still have the ID and proof it was correct at the time of your investigation.
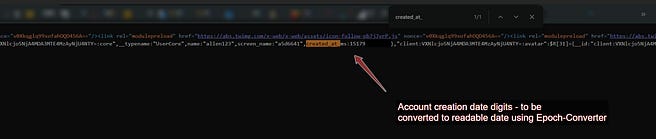
That long number is the account creation timestamp in Unix epoch format, expressed in milliseconds. It represents the exact moment the account was registered on X’s servers.
Converting Epoch To Human-Readable Date
The number you extracted is not directly readable. You need to convert it. Go to a Unix epoch converter tool. I recommend epochconverter.com. Paste the number you found into the input field. Make sure the tool is set to interpret the value in milliseconds, not seconds. If the number is 13 digits long, it is milliseconds. If it is 10 digits, it is seconds. X uses milliseconds.
Click “Timestamp to Human Date.” The tool outputs the exact date and time in UTC, your local time, and a relative format like “6 years ago.”
Example:
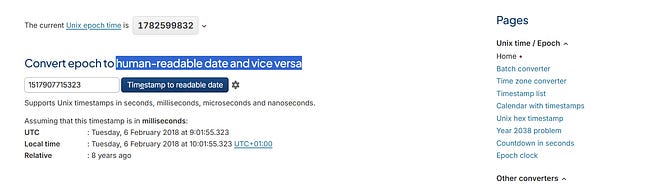
Validating The Result
Now, compare what you just extracted against the profile’s displayed “Joined” date. The profile might show “Joined March 2015.” Your extracted timestamp says March 12, 2015. These align. You are on the right track.
If the profile shows “Joined March 2015” and your extracted timestamp converts to August 2017, something is off. Either you pulled the wrong data field, or the platform is displaying inaccurate information. Always validate. Trust the source code over the displayed text.
Why This Matters
The account creation timestamp is a cross-referencing tool. If you find a Facebook account and an X account that you suspect belong to the same person, compare their creation dates. If one was created in March 2015 and the other in April 2015, that proximity is a correlation point. Most people create their social media accounts around the same period in their lives. It is not proof on its own, but combined with other evidence, it strengthens your attribution.
It is also an intent indicator. An account created the day before a major event, used to post about that event, and then abandoned was purpose-built. That tells you the operator planned their activity. An account created years ago with consistent activity is a genuine persona. The timestamp gives you context. Keep digging!
Method 2: Online Conversion Tools
If you do not want to dig through page source, use a service like commentpicker.com. Paste the @handle into the search bar. The site returns the numeric ID instantly with additional timestamp. This works for most accounts and is faster than manual extraction when you have multiple targets to process.
Method 3: API Access
If you have an X developer account and an API key, you can query the API directly. The endpoint users/by/username/:username returns the full user object including the rest_id . This is the programmatic approach for bulk lookups, but it requires authentication and is not passive.
For most investigations, Methods 1 and 2 are all you need.
Why This Matters
I want you to understand the practical application, not just the technique. Let me give you a real scenario.
You are tracking an account that posts harassment and then changes its handle every few weeks to avoid detection. You extracted the numeric ID on day one. On day thirty, the handle has changed three times, but every time you plug that numeric ID into your tracking tools, it resolves to the same account. The target thinks they are evading you. They are not. You have the anchor.
Document the numeric ID. It is the single most important piece of metadata you will collect from an X profile.
Part 3: Advanced Search Operators — The Surgical Toolkit
Most people search X by typing a word into the search bar and scrolling. That is like walking into a library and reading every book to find one sentence. The advanced search operators are your card catalog. They let you specify exactly what you want, from whom, within what timeframe, and with what type of content.
Here is every operator you need to know, explained with practical examples
from: — Tweets From a Specific Account
This restricts results to a single user.
from:Allen123Every tweet in the result set was posted by @Allen123. Use this as your base operator, then layer others on top.
to: — Tweets Directed at a Specific Account
This finds tweets that were sent as replies to a specific user.
to:Allen123Use this to see who is talking to your target, even if the target has not responded.
since: and until: — Date Range Filtering
These operators restrict results to a specific date range using the format YYYY-MM-DD.
from:Allen123 since:2025-01-01 until:2025-06-01This returns every tweet from @Allen123 posted between January 1 and June 1, 2025. You just narrowed down years of potential content to a five-month window. Use this to focus on a specific incident period, a known travel window, or any time-frame relevant to your investigation.
geocode: — Location-Based Searching
This searches for tweets posted within a radius of specific coordinates.
geocode:51.5074,-0.1278,10kmThis finds tweets posted within 10 kilometers of central London. The format is latitude, longitude, and radius with the unit (km or mi).
Combine this with other operators:
from:Allen123 geocode:40.7128,-74.0060,5km since:2025-03-01 until:2025-03-15This finds any tweet posted by @Allen123 within 5 kilometers of New York City during the first two weeks of March 2025. If the target claims they were in another country during that period, and this query returns results, you have a discrepancy.
filter:media — Tweets Containing Images or Video
from:Allen123 filter:mediaThis returns only tweets that include photos or videos. This is how you find geolocatable content without scrolling through text. Every image is a potential location clue.
filter:links — Tweets Containing URLs
from:Allen123 filter:linksThis returns only tweets that include hyperlinks. Use this to map what articles, videos, or external content the target shares. It tells you what information sources they consume and what narratives they amplify.
Combining Operators for Surgical Precision
The real power is in combining these operators into a single query that returns exactly what you need.
from:Allen123 to:SomeJournalist since:2025-04-01 until:2025-04-30 filter:mediaThis returns every image @Allen123 sent as a reply to @SomeJournalist during April 2025. You are not scrolling through a timeline. You are pulling a specific slice of data tailored to your investigation question.
Another example:
from:Allen123 geocode:34.0522,-118.2437,15km since:2025-01-01 filter:linksThis returns every link @Allen123 posted while physically in Los Angeles during 2025. If the target claims to have never visited LA, and this query returns geotagged tweets from within the city, you have evidence to the contrary.
Learn these operators. Practice combining them. The search bar is not for casual browsing. It is a query interface for a massive database. Write your queries with precision, and X will give you exactly what you ask for.
Part 4: Reconstructing Deleted Tweets
Tweets disappear for many reasons. The user deletes them. The account gets suspended. The content violates platform policy and is removed. But deletion is not erasure. The internet caches things. Your job is to find those caches.
Method 1: Google Cache
When Google indexes a tweet, it stores a snapshot. If the original tweet is deleted, the cached version may still exist.
Take the tweet URL. It looks like this:
https[:]//x.com/Allen123/status/123456789Now search that exact URL on Google. If Google cached the tweet before deletion, the search result will include a small green arrow next to the URL. Click that arrow. Select “Cached.” Google displays the stored version of the page, including the tweet text, timestamp, and sometimes the media preview.
Method 2: Wayback Machine
The Internet Archive at archive.org crawls and stores snapshots of web pages. Paste the tweet URL into the Wayback Machine search bar. If the tweet was archived, you will see a calendar of snapshots. Click any date to view the tweet as it existed at that moment.
The Wayback Machine does not capture every tweet. Popular accounts and high-engagement tweets are more likely to be archived. But when a snapshot exists, it is gold.
Method 3: Third-Party Archives
Several services aggregate and store X data at scale.
tweetdeleter is primarily a tool for users to manage their own tweet history, but it also surfaces deleted content that was indexed before removal. Search the username or tweet text.
Academic datasets like DocNow and Social Feed Manager capture large volumes of X data for research purposes. These are not always user-friendly, but if your investigation involves a high-profile account or a significant event, academic archives may have preserved what the user tried to delete.
Method 4: Screenshot Searches
If the tweet was controversial enough to get deleted, someone probably screenshotted it before it went down. Search the tweet text in quotes on Google Images. Search the username plus keywords from the tweet. Search the tweet URL on Reddit and other forums where people share and discuss posts.
The text might be gone from X, but it lives on in screenshots posted to other platforms. Find those screenshots.
Practical Workflow for Deleted Content Recovery
Start with the tweet URL. Check Google Cache.
Paste the URL into the Wayback Machine. Check for snapshots.
Search the tweet text in quotes on Google. Check cached results.
Search the username and keywords on third-party archives.
Search for screenshots of the tweet on Google Images and Reddit.
If the tweet was public for any length of time, one of these methods will surface it. The internet does not forget. It just buries things. Your job is to dig.
Part 5: Additional Tools for X Investigation
Beyond the built-in search operators, several external tools enhance your collection capabilities.
Nitter is a privacy-focused frontend for viewing X content without an account. It allows you to browse profiles, search tweets, and view media without logging in. Multiple Nitter instances exist. If one is down, find another. Use it for passive viewing when you do not want to interact with the platform directly.
Twint was a Python-based scraping tool that pulled tweet data without API authentication. It is no longer actively maintained due to X’s API changes, but forks and alternatives exist. If you need bulk historical data, explore snscrape, which scrapes social networks including X and outputs structured data.
Social Bearing at socialbearing.com provides tweet analytics, sentiment analysis, and engagement metrics for specific search queries or user timelines. Use it to visualize posting frequency and interaction patterns.
Tweet Beaver at tweetbeaver.com offers several utilities including user ID lookup, follower analysis, and conversation threading. It is useful for quick lookups without touching the X interface.
Part 6: Practical Investigation Workflow Summary
Here is your step-by-step process for every X investigation.
Navigate to the target profile. Extract the numeric user ID via page source or commentpicker.com. Document it.
Note the account creation date from the profile. Check the exact timestamp using inspect element if available.
Run a broad search using
from:USERNAMEto establish a baseline of the target’s posting behavior.Narrow the search with
since:anduntil:operators to focus on the timeframe relevant to your investigation.Use
filter:mediato pull all images and videos. Review each for geolocation clues.Use
filter:linksto identify what external content the target shares.Use
geocode:combined with date operators to find location-specific activity.Use
to:to map who the target interacts with.For any deleted tweets, run the recovery workflow: Google Cache, Wayback Machine, third-party archives, screenshot search.
Cross-reference findings with other platforms. The numeric ID, the writing style, the locations, the shared links, all of these bridge to Facebook, Instagram, Reddit, and LinkedIn.
Preserve everything. Screenshots, URLs, timestamps, extracted IDs. X content disappears. Your evidence file should not.
This is X investigation at the professional level. Not scrolling endlessly. Not guessing. Systematic extraction of hard identifiers, surgical search queries that return exactly what you need, and recovery methods that bring back what someone tried to erase. Master this, and you control the signal.
Lecture 4.6: GitHub Recon — The Developer’s Digital Shadow
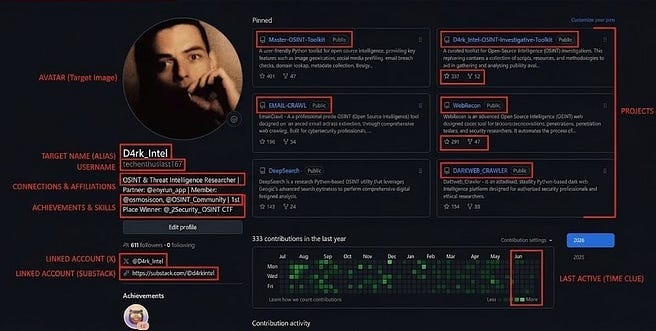
GitHub is not social media in the traditional sense. But for an investigator, it is one of the richest intelligence sources available. Developers live on GitHub. They write code, document projects, collaborate with teams, and accidentally expose things they should not. Every repository is a window into how a person or organization operates. Every commit is a timestamped action tied to an email address. Every profile is a potential attribution bridge.
This lecture is a complete walkthrough of GitHub reconnaissance. By the end, you will know how to find users, map organizations, extract hidden emails, discover leaked credentials, determine exactly when an account was created, and automate large parts of the process. No theory without practice. Every technique comes with the exact command or query you need.
Part 1: Understanding the GitHub API — Your Primary Data Source
GitHub provides a rich, public API that returns structured JSON data for users, organizations, repositories, commits, and more. This API is your primary collection tool. You do not need authentication for public data. You just need to know the endpoints.
The base URL is https://api.github.com. Every query you run builds on this.
The tool you will use most often is curl, which fetches data from a URL directly from your terminal, paired with jq, which formats the JSON output so you can read it.
If you do not have curl installed, install it. If you do not have jq installed, install it. These are non-negotiable tools for GitHub OSINT.
sudo apt install curl jqNow you are ready.
Part 2: User Profile Reconnaissance
Every GitHub user has a public profile accessible through the API. The endpoint is:
https://api.github.com/users/[username]Replace [username] with the target’s handle. Let me walk you through a real example. Suppose the target is techenthusiast167.
Open your terminal and run the first or using your browser for the second:
curl -s "https://api.github.com/users/techenthusiast167"

OR

https://api.github.com/users/techenthusiast167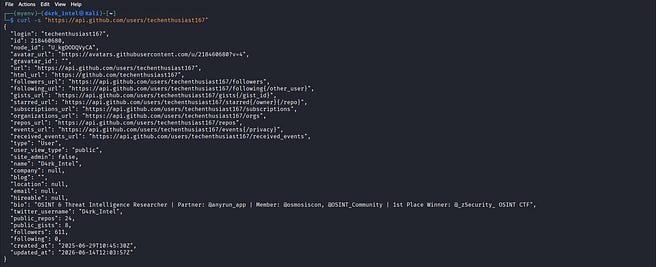
The -s flag keeps the output clean by suppressing progress bars. The command returns a JSON object. It is dense. You want to filter it to see only the fields that matter for your investigation.
Run this instead:
curl -s "https://api.github.com/users/techenthusiast167" | jq '{username: .login, name: .name, company: .company, location: .location, email: .email, blog: .blog, bio: .bio, public_repos: .public_repos, followers: .followers, following: .following, created_at: .created_at}'
This returns exactly what you need:
Username: The handle you searched.
Name: The real name the user provided.
Company: The organization they claim affiliation with.
Location: Self-reported location.
Email: Publicly listed email, if they added one.
Blog: Personal website or social media link.
Bio: Free-text description. Often contains contact details, interests, or other handles.
Public Repos: Number of public repositories.
Followers/Following: Network size indicators.
Created At: The exact account creation timestamp.
Document every field. The email, blog, company, and location are direct attribution data. The bio often contains Twitter handles, personal websites, or other platform usernames.
Part 3: GitHub User ID Extraction — The Numeric Anchor
Every GitHub account has two identifiers. The username, which is the handle everyone sees like techenthusiast167, and the numeric user ID, which is GitHub’s internal identifier.
The username can change. GitHub allows users to rename their accounts, and when they do, the old username becomes available for anyone else to claim. If you are tracking a target by username alone, a rename can break your investigation.
The numeric user ID never changes. It is assigned when the account is created and stays with that account permanently. If you capture the numeric ID, you can track that user through any number of username changes.
Method 1: API Extraction via Curl
The GitHub API returns the numeric ID in every user profile response. You have already pulled user data with curl. You just need to look at the id field.
curl -s "https://api.github.com/users/techenthusiast167" | jq '{username: .login, id: .id, created_at: .created_at}'The output looks like this:

That id field, 123456789, is the numeric user ID. It is globally unique. No other account on GitHub has that number. Copy it. Store it in your investigation file alongside the current username and the date of extraction.
To pull just the ID on its own:
curl -s "https://api.github.com/users/techenthusiast167" | jq -r '.id'This returns the raw number with no quotes, ready to use in your next query.
Method 2: Browser Extraction
If you prefer not to use the command line, you can get the numeric ID directly from your browser.
Navigate to the API endpoint directly:
https://api.github.com/users/techenthusiast167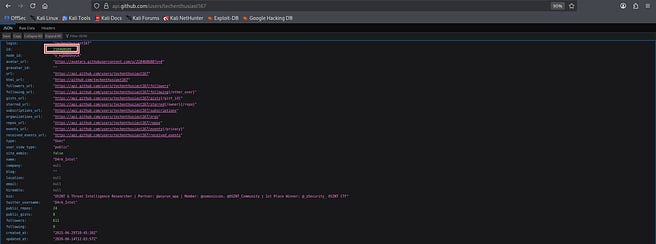
This returns the full JSON profile in your browser. Press Ctrl + F and search for "id". The first result will show the numeric ID. It is right there in plain text, no authentication required.
Use Firefox or install a JSON Formatter extension for Chrome to make the output collapsible and readable.
Method 3: Avatar URL Analysis
GitHub stores user avatars on a CDN, and the avatar URL often contains the numeric user ID. This is useful when you only have the avatar image and need to work backward to find the account.
Right-click on any GitHub user’s avatar and select “Open image in new tab.” The URL will look something like:
https://avatars.githubusercontent.com/u/123456789?v=4The number after /u/ is the numeric user ID. In this example, 123456789 is the ID. The ?v=4 parameter is just a version counter and can be ignored.
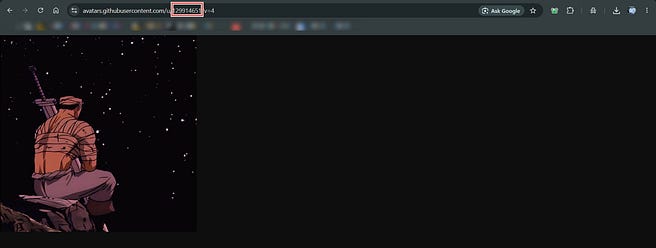
If you have a GitHub avatar URL saved from a screenshot, a forum post, or a cached page, you can extract the numeric ID directly from the URL. Then construct the API call to pull the full profile:
https://api.github.com/user/123456789This returns the complete user profile for whatever username currently holds that ID. If the user changed their username yesterday, this API call still finds them today.
Customizing the URL to Return User Data via ID
Once you have the numeric ID, you can query the GitHub API using that ID instead of the username. The endpoint is
https://api.github.com/user/[ID]Replace [ID] with the numeric ID you extracted.
Example:
curl -s "https://api.github.com/user/123456789" | jq '.'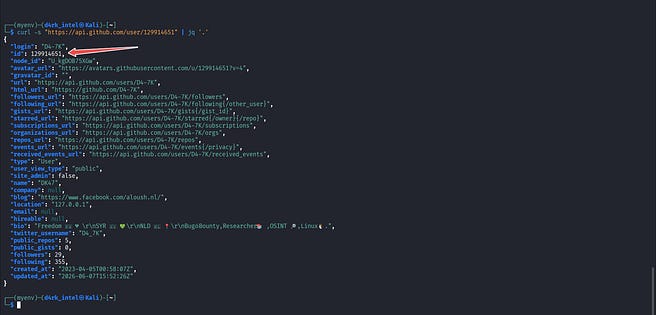
Note: you can as well do this via your browser without using the curl command:
Example:
https://api.github.com/user/123456789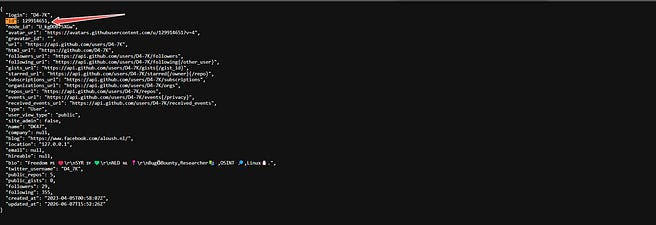
This returns the full user profile for whatever account currently owns that ID. If the user renamed their account from oldhandle to newhandle, the API returns newhandle. You have tracked them through the name change.
To combine everything into one clean command that takes a username and returns the numeric ID plus the avatar URL:
curl -s "https://api.github.com/users/techenthusiast167" | jq '{username: .login, id: .id, avatar: .avatar_url}'Output:

Why This Matters for an Investigator
The numeric user ID gives you persistence. Usernames change. People rebrand. They create new personas and abandon old ones. The numeric ID is the anchor that ties it all together.
Here is a practical scenario. You are investigating a developer who goes by @hackerx on GitHub. You extract the numeric ID: 987654321. Six months later, @hackerx no longer exists. The account was renamed to @securityresearcher. Your old notes point to a dead profile. But if you stored the numeric ID, you run:
curl -s "https://api.github.com/user/987654321" | jq '.login'And GitHub returns securityresearcher. You found them.
The avatar URL is another breadcrumb. If a target uses the same avatar on GitHub, Twitter, and a forum, the numeric ID embedded in the GitHub avatar URL connects the GitHub account to that specific image. When you run perceptual hash matching across platforms, the GitHub avatar URL becomes one more confirmed node in your attribution map.
The numeric ID also helps with breach correlation. Some data breaches and leaked databases include GitHub numeric IDs alongside email addresses and usernames. Having the ID lets you search those datasets with higher precision than a username alone.
Practical Workflow for ID Extraction
Pull the user profile:
curl -s "https://api.github.com/users/username" | jq '.'Extract the numeric ID from the
idfield.Extract the avatar URL from the
avatar_urlfield.Store both alongside the current username and the date of extraction.
Construct the ID-based API URL:
https://api.github.com/user/[ID]for future lookups.If the username ever goes dead, query the ID-based URL to find the new username.
Part 4: Account Creation Date Detection
The created_at field from the API gives you the exact timestamp the account was registered. This is not an estimate. It is the precise second.
To pull just the creation date:
curl -s "https://api.github.com/users/techenthusiast167" | jq -r '.created_at'
The Z at the end means UTC. This timestamp never changes. It is your temporal anchor for cross-referencing against other platforms.
If you want to calculate how old the account is in days:
creation_date=$(curl -s "https://api.github.com/users/techenthusiast167" | jq -r '.created_at')
account_age=$(( ($(date +%s) - $(date -d "$creation_date" +%s)) / 86400 ))
echo "Account age: $account_age days"
This tells you exactly how long this persona has existed. A new account with suspicious activity is a red flag. An old account with consistent activity is an established identity.
Part 5: Repository Enumeration
Repositories are where the intelligence lives. Every repo tells you what the user builds, what languages they know, and what problems they are working on.
To list all public repositories for a user:
curl -s "https://api.github.com/users/techenthusiast167/repos" | jq '.[].full_name'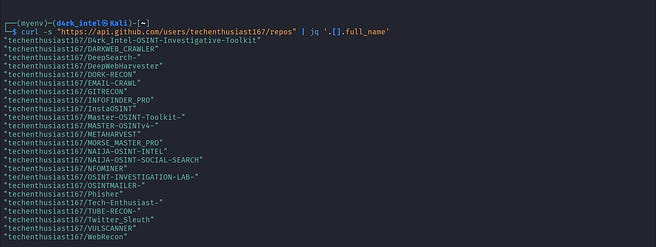
This returns the full name of each repository in owner/repo format. Pick one and drill deeper.
To get detailed information about a specific repository:
curl -s "https://api.github.com/repos/techenthusiast167/repo-name" | jq '{description: .description, language: .language, stargazers_count: .stargazers_count, forks_count: .forks_count, open_issues_count: .open_issues_count, created_at: .created_at, updated_at: .updated_at}'
This tells you what the project does, what language it is written in, how popular it is, and when it was created and last updated. An actively maintained repository indicates ongoing development. A repo created two years ago with no updates is abandoned.
For broader lookup, simply use:
https://api.github.com/repos/techenthusiast167/repo-name
Part 6: Commit Email Extraction
This is one of the most valuable techniques in GitHub OSINT, and most investigators overlook it entirely.
Every time a developer makes a commit, Git records the author’s name and email address in the commit metadata. This is how Git tracks who wrote what. GitHub displays commits on the web interface, but it hides the raw email behind a privacy relay address that looks like username@users.noreply.github.com. That relay address is useless for investigation.
The raw commit data, however, still contains the original email if the developer did not configure Git to use the private relay. Many developers never change their default Git configuration, so their personal email is embedded in every commit they have ever made. Your job is to extract it.
Here are three methods, ordered from most efficient to most surgical.
Method 1: Curl Extraction (Primary Method — Bulk Collection)
This is the most reliable approach. It pulls structured JSON directly from the GitHub API, which you can filter and save for your evidence file. It works on every public repository.
Run this command in your terminal:
curl -s "https://api.github.com/repos/[owner]/[repo]/commits" | jq '.[].commit.author.email'Replace [owner] with the username or organization name, and [repo] with the repository name.
Example:
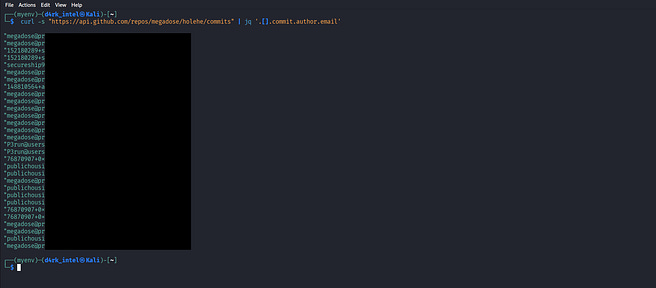
The output is a clean list of every email address associated with commits in that repository.
If the developer used multiple email addresses across different commits, you will see all of them. Each one is a pivot point for further investigation.
To get more context with each email, pull the author name alongside it:
curl -s "https://api.github.com/repos/techenthusiast167/my-project/commits" | jq '.[] | {name: .commit.author.name, email: .commit.author.email, date: .commit.author.date}'This returns:
{
  “name”: “John Doe”,
  “email”: “johndoe@gmail.com”,
  “date”: “2024-08-15T14:32:30Z”
}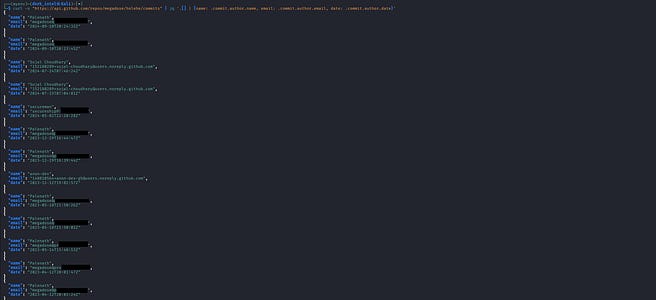
You now have the committer’s full name, their real email address, and the exact timestamp of each commit. This is attribution gold. Save this output directly into your investigation file.
Method 2: Browser Shortcut (Quick Look — No Terminal Required)
If you are not on a machine with curl installed, or you just want a fast glance without opening the command line, use your browser.
Navigate to:
https://api.github.com/repos/[owner]/[repo]/commitsReplace [owner] with the username or organization name, and [repo] with the repository name.
Example:
https://api.github.com/repos/techenthusiast167/my-project/commitsThis opens a raw JSON page containing every commit on the default branch. The page is plain text, but all the data is there.
Now, press Ctrl + F and search for "email". Every match is a commit author’s email address embedded in the JSON. You will see lines like:
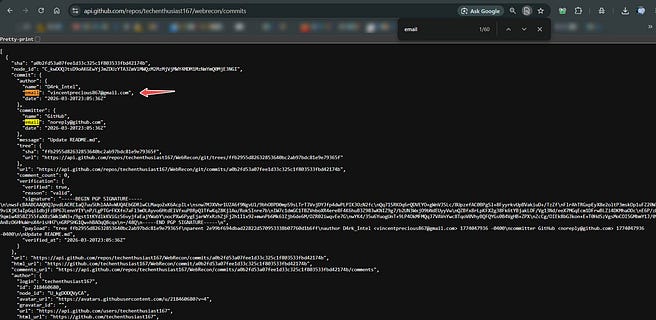
Scroll through the results. Each email is tied to a specific commit with a timestamp and a committer name. You can pull every email address ever used in that repository without cloning anything, without running a single command, just by reading the API output in your browser.
To make this even easier, use Firefox, which natively formats JSON with collapsible trees. If you are on Chrome, install a JSON Formatter extension. With formatted JSON, you can expand each commit object, navigate to commit → author → email, and the email is right there.
This method is fast, passive, and requires zero setup. Bookmark the API URL pattern. It will save you time on every GitHub investigation.
Method 3: The .patch Method (Deep Dive on a Single Commit)
If you need to preserve a single commit as evidence, or if the API is not returning the data you expect, the .patch method gives you the raw, unprocessed commit output.
First, get the SHA hash of the specific commit you want. Use Method 1 to list all commit SHAs:
curl -s "https://api.github.com/repos/techenthusiast167/my-project/commits" | jq '.[].sha'This returns a list of commit hashes. Pick one.
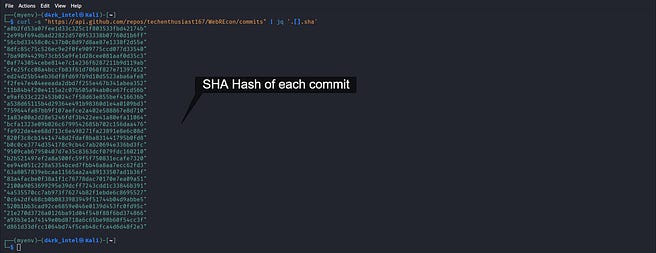
Now, append .patch to the commit URL and fetch it:
curl -s "https://github.com/techenthusiast167/my-project/commit/abc123def456.patch"The output is a raw patch file. At the very top, you will see a line like:
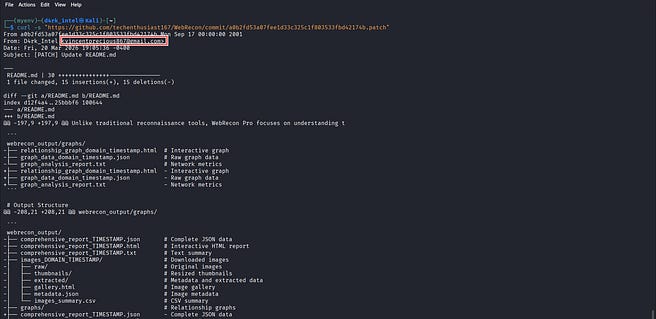
That is the committer’s real name and email address. Not the GitHub-provided noreply.github.com relay. The actual email they configured in Git.
You can also open this URL directly in your browser. Navigate to:
https://github.com/[owner]/[repo]/commit/[sha].patch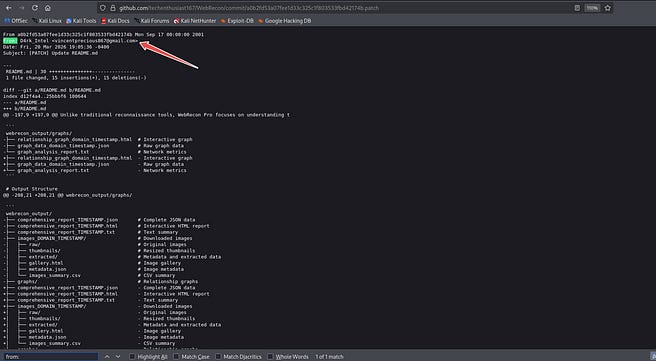
The browser displays the raw patch as plain text. Press Ctrl + F and search for From:. The email is right there. Screenshot it. Save the page as evidence.
What You Do With The Email
Every email address you extract becomes a new investigation thread. Plug it into your email intelligence workflow from Module 3. Run it through Google dorks, Epieos, Intelbase, BehindTheEmail, etc. Search it across social media platforms. Check it against breach databases like HaveIBeenPwned, DeHashed, and IntelX.
A single commit email can unravel an entire digital footprint. I have found personal Facebook accounts, LinkedIn profiles, and personal websites starting from nothing but a GitHub commit email. The developer never thought anyone would look. That is exactly why you do.
Part 7: Followers, Following, and Social Network Mapping
GitHub profiles include follower and following lists. These reveal professional relationships, team structures, and collaboration networks.
To see who a user follows:
curl -s "https://api.github.com/users/techenthusiast167/following" | jq '.[].login'

OR

curl -s "https://api.github.com/users/techenthusiast167/following?per_page=100" | jq '.[].login'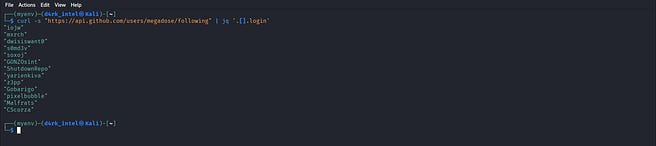
To see who follows them:
curl -s "https://api.github.com/users/techenthusiast167/followers" | jq '.[].login'

OR

curl -s "https://api.github.com/users/techenthusiast167/followers?per_page=100" | jq '.[].login'
The ?per_page=100 parameter ensures you get up to 100 results per request instead of the default 30. If the user follows more than 100 accounts, you need to handle pagination. The API includes a Link header in the response with the URL for the next page. You can check it with:
curl -s -I "https://api.github.com/users/user/following?per_page=100"Look for the Link header in the output. It contains the URL for the next page of results.
If You Still Get an Empty Response
Some users have zero followers or follow zero accounts. If the command returns nothing, that means exactly that. The user is not following anyone, or no one follows them.
Map these connections. If a target follows several employees of the same company, they likely work there or have a professional relationship with them. If multiple accounts follow each other in a small cluster, you have identified a team or a collaboration group.
Part 8: Organization Intelligence
Organizations on GitHub have their own profile pages and member lists. If your target lists a company on their profile, check if that company has a GitHub organization.
To pull organization profile data:
curl -s "https://api.github.com/orgs/companyname" | jq '{name: .name, description: .description, blog: .blog, email: .email, location: .location, public_repos: .public_repos}'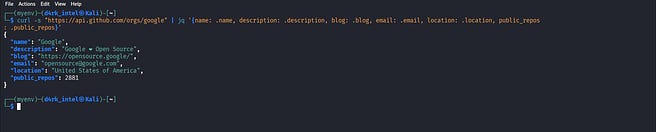
To list all public members of an organization:
curl -s "https://api.github.com/orgs/companyname/members" | jq '.[].login'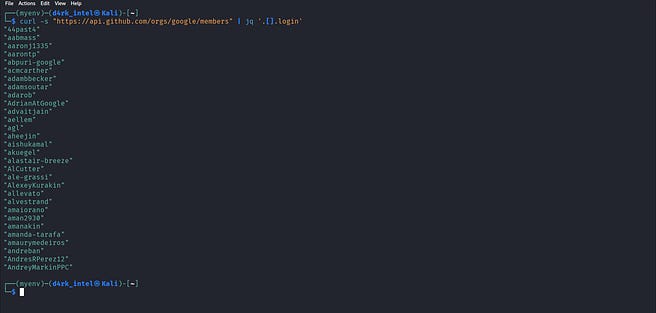
Validation of results:

This returns every GitHub user who publicly lists themselves as a member of that organization. You now have a list of potential employees. Cross-reference these handles against LinkedIn, Twitter, and other platforms to build a corporate directory from the outside.
Rate Limiting
GitHub allows 60 unauthenticated requests per hour. If you exceed that, the API returns a 403 error with a message about rate limiting. Check your current rate limit status:
curl -s "https://api.github.com/rate_limit" | jq '.rate'
This shows your remaining requests and when the limit resets. If you are hitting the limit, wait, or use a personal access token to increase your quota to 5,000 requests per hour.
Part 9: Advanced Curl: All-in-One Intelligence Extraction
You can pull a target’s entire GitHub footprint with a single command. This returns profile details, organizations, repositories, and commit emails all at once.
Replace username with the target GitHub handle and run:
echo "=== PROFILE ===" && curl -s "https://api.github.com/users/username" | jq '{username: .login, name: .name, company: .company, location: .location, email: .email, blog: .blog, bio: .bio, twitter: .twitter_username, hireable: .hireable, public_repos: .public_repos, followers: .followers, following: .following, created_at: .created_at}' && echo "=== ORGANIZATIONS ===" && curl -s "https://api.github.com/users/username/orgs" | jq '.[] | {org: .login, description: .description}' && echo "=== REPOSITORIES ===" && curl -s "https://api.github.com/users/username/repos?per_page=100&sort=pushed" | jq '.[] | {repo: .full_name, language: .language, pushed_at: .pushed_at, description: .description}' && echo "=== COMMIT EMAILS (Latest Repo) ===" && repo=$(curl -s "https://api.github.com/users/username/repos?per_page=1&sort=pushed" | jq -r '.[0].full_name') && curl -s "https://api.github.com/repos/$repo/commits?per_page=10" | jq '.[] | {author: .commit.author.name, email: .commit.author.email, date: .commit.author.date}'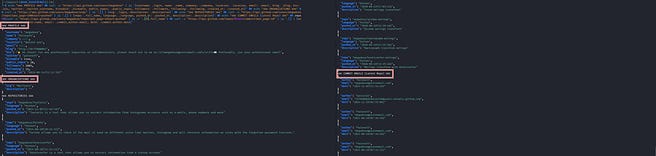
What This Returns in One Run:
Full profile: username, real name, company, location, email, blog, bio, Twitter handle, hireable status
Account creation timestamp and last update timestamp
All public organizations the user belongs to
All public repositories with language and last push date
Commit author names and real email addresses from the most recently pushed repository
Save this as a bash script. Run it on any username. The intelligence lands in your terminal in seconds. No clicking. No manual lookups. One command. Everything.
Part 10: Advanced Code Search
GitHub’s search is powerful, but you need to know the operators.
Go to https://github.com/search and type your query directly into the search bar. Use the operators you already know:
Search by User or Organization:
user:johndoe “keyword”
org:companyname “keyword”
repo:owner/repo “keyword”Example:

Search by File Extension:
extension:env “DATABASE_URL”
extension:json “password”
extension:yml “secret”
extension:pem “PRIVATE KEY”
Search by Filename:
filename:.env
filename:config.json
filename:docker-compose.yml
Search by Path:
path:.github/workflows
path:src/config
path:database
Search for Credentials and Secrets:
“api_key” org:companyname
“password” user:techenthusiast167
“AWS_ACCESS_KEY” extension:env
“ghp_” org:companyname
“xoxb-” org:companyname
These queries find API keys, tokens, passwords, and configuration files that developers accidentally committed to public repositories. The ghp_ prefix is for GitHub personal access tokens. The xoxb- prefix is for Slack bot tokens. Finding either in a public repo is a critical security exposure.
Combine operators for precision:
org:companyname extension:env “DATABASE_URL”This finds every .env file in every repository belonging to the target organization that contains a database connection string. One query, and you have the keys to their database.
Part 11: Automated Reconnaissance Tools
Manual searching works, but automated tools scale your collection.
TruffleHog scans repositories for high-entropy strings, which are often API keys and passwords.
trufflehog git https://github.com/user/repo --json --verify > scan_results.jsonThe --verify flag tests each found credential to confirm it is still active. Use this only on repositories you are authorized to investigate.
Gitleaks uses pattern-based detection to find secrets.
gitleaks detect --source=/path/to/repo -vGitRob automates organization-wide scanning.
gitrob target-organizationThese tools find what manual searching misses, but they are not a replacement for understanding the search operators. Run the tools, then verify their findings manually. Automated scanners produce false positives. Your brain is the final filter.
Part 12: Gists Investigation
Gists are code snippets that users share publicly. They are separate from repositories and are often overlooked during investigations.
To list all public gists for a user:
curl -s "https://api.github.com/users/johndoe/gists" | jq '.[].html_url'
Gists often contain configuration snippets, notes, API examples, and sometimes credentials. A developer who is careful with their repositories might be careless with their gists. Check them.
Part 13: Activity Timeline and Pattern-of-Life Analysis
The events endpoint shows a user’s recent public activity:
curl -s "https://api.github.com/users/techenthusiast167/events" | jq '.[].type'

OR

https://api.github.com/users/techenthusiast167/events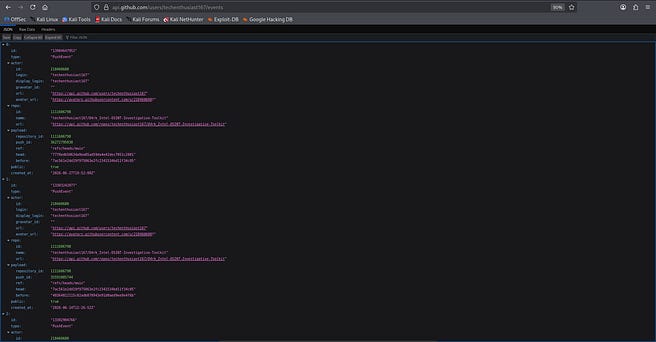
This returns event types like PushEvent, CreateEvent, WatchEvent, and ForkEvent, each with a timestamp. Analyze this timeline to understand when the user is active.
A user who pushes code every weekday between 9 AM and 5 PM UTC has a consistent work schedule in that timezone. A user who commits at 3 AM on weekends has different patterns. This is pattern-of-life intelligence.
Part 14: Practical Investigation Workflow Summary
Here is the complete GitHub investigation sequence:
Profile Pull:
curl -s "https://api.github.com/users/username" | jq '.'— Document name, ID, company, location, email, blog, bio, and creation date.Repository Enumeration:
curl -s "https://api.github.com/users/username/repos" | jq '.[].full_name'— List all public repos.Repository Analysis: For each repo, pull description, language, stars, forks, and update history.
Commit Email Extraction: For key repos, pull commits and append
.patchto commit URLs to extract real email addresses.Social Network Mapping: Pull followers and following lists. Map professional connections.
Organization Investigation: If the user lists a company, pull the org profile and member list.
Code Search: Run targeted queries for file types, credentials, and sensitive configurations.
Gists Check: List and review public gists.
Activity Analysis: Pull events to establish active hours and pattern-of-life.
Automated Scanning: Run TruffleHog or Gitleaks on high-value repositories for automated secret detection.
Cross-Platform Correlation: Take the email, location, company, and social links found on GitHub and cross-reference them against LinkedIn, Twitter, Reddit, and Instagram.
Document Everything: Save all API responses as JSON files with timestamps. Screenshot key findings. Build your evidence package.
Part 15: Quick Reference Commands
Objective___________________Command
User profile:
curl -s "https://api.github.com/users/username" | jq '.'Creation date only:
curl -s "https://api.github.com/users/username" | jq -r '.created_at'List repos:
curl -s "https://api.github.com/users/username/repos" | jq '.[].full_name'Repo details:
curl -s "https://api.github.com/repos/owner/repo" | jq '.'Extract commit emails Append :
.patchto commit URLFollowers:
curl -s "https://api.github.com/users/username/followers" | jq '.[].login'Following:
curl -s "https://api.github.com/users/username/following" | jq '.[].login'Organization profile:
curl -s "https://api.github.com/orgs/orgname" | jq '.'Org members:
curl -s "https://api.github.com/orgs/orgname/members" | jq '.[].login'List gists:
curl -s "https://api.github.com/users/username/gists" | jq '.[].html_url'User events:
curl -s "https://api.github.com/users/username/events" | jq '.[].type'Gitleaks scan:
gitleaks detect --source=/path/to/repo -v
Part 16: Legal and Ethical Boundaries
Everything covered in this lecture uses publicly available data. The GitHub API returns information that users and organizations chose to make public. You are not bypassing authentication. You are not exploiting vulnerabilities.
That said, there are lines you do not cross.
Respect rate limits: GitHub allows 60 unauthenticated requests per hour. Use authenticated requests with a personal access token for 5,000 requests per hour if you have a legitimate developer account.
Do not use found credentials: If you discover an API key or password, document it and report it through responsible disclosure. Using it is illegal.
Do not harass or dox individuals based on GitHub data: The fact that someone’s email is public in a commit does not give you the right to target them.
Store collected data securely: GitHub profiles change. Save what you need, but protect it.
Professional investigators operate within the law. Your reputation depends on it.
This is GitHub reconnaissance at the professional level. Not browsing. Not guessing. Systematic API-driven collection, targeted code search, and automated scanning where appropriate. Master this, and you add a powerful new dimension to every investigation you run.
Lecture 4.7: YouTube OSINT — The Video Investigator’s Toolkit
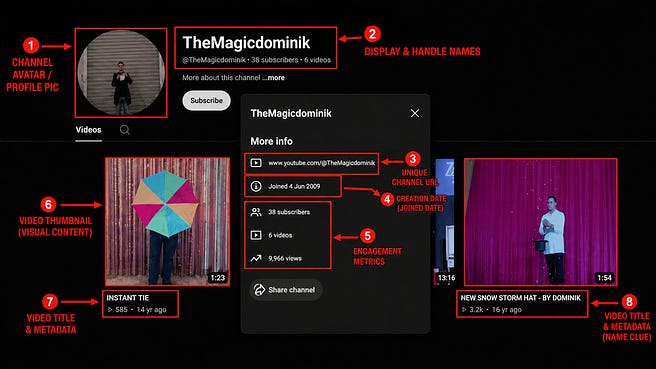
YouTube is the second largest search engine on the planet. People upload their lives, their opinions, their locations, and their skills to this platform every second of every day. For an investigator, YouTube is not just a video library. It is a behavioral archive, a geolocation goldmine, and an attribution tool all rolled into one.
Most people watch videos. You are going to dissect them. This lecture covers every practical technique you need to extract intelligence from YouTube channels, videos, and the metadata that surrounds them.
YouTube is the second largest search engine on the planet. People upload their lives, their opinions, their locations, and their skills to this platform every second of every day. For an investigator, YouTube is not just a video library. It is a behavioral archive, a geolocation goldmine, and an attribution tool all rolled into one.
Most people watch videos. You are going to dissect them. This lecture covers every practical technique you need to extract intelligence from YouTube channels, videos, and the metadata that surrounds them.
Part 1: Channel Reconnaissance — The Initial Pass
Every YouTube channel has a public face. Before you touch any tool, open the channel page and document what is visible.
Look at the channel name. This may be a real name, a pseudonym, or a brand. Note it exactly as displayed.
Look at the handle. YouTube assigns every channel a unique @handle like @JohnDoe. This handle is often reused across platforms. Document it.
Look at the channel description. Users frequently list contact emails, social media links, website URLs, and business inquiries here. Copy every link and email address. These are direct attribution bridges.
Look at the channel creation date. This is displayed under the “About” tab. An older channel with consistent uploads is an established identity. A new channel with a handful of videos is a burner or a fresh persona. Note it.
Look at the total video count, subscriber count, and view count. These numbers tell you the channel’s reach and activity level. A channel with thousands of subscribers and regular uploads is a significant online presence. A channel with three videos and ten subscribers is not.
Scroll through the video list. Note the upload frequency. Note the content themes. Note the locations visible in thumbnails. Thumbnails are often pulled directly from the video and can contain geolocatable imagery before you even click play.
Part 2: User ID Extraction — The Unchangeable Identifier
Every YouTube channel has a unique, unchangeable numeric Channel ID. The @handle can change. The channel name can change. The Channel ID stays the same forever. Extract it.
Method 1: Page Source (Manual Extraction)
Open any YouTube channel page. Right-click anywhere on the page background and select “View Page Source.” Press Ctrl + F and search for channel_id or externalId. You are looking for a line like:
“channel_id”:”UCxxxxxxxxxxxxxxxx”OR:
“externalId”:”UCxxxxxxxxxxxxxxxx”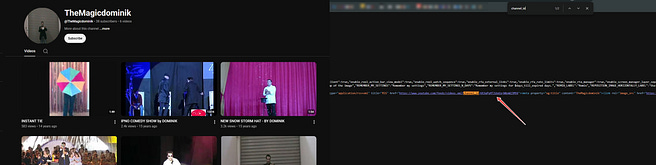
The value starting with UC is the Channel ID. It is globally unique. Copy it. Store it. This ID lets you track the channel through any rebranding.
Method 2: Browser URL Trick
If the channel has a custom URL like youtube.com/@JohnDoe, the Channel ID is hidden behind the handle. To reveal it, click on any video on the channel. Scroll down to the comments section. Right-click on the channel name in a comment left by the channel owner and select “Inspect Element.” Look for an attribute like data-channelid or a link containing /channel/UCxxxxxxxxxxxxxxxx. That is the ID.
Method 3: The Share Channel Option (Fastest Method — No Tools Required)

If you want the Channel ID without touching the page source, without opening developer tools, and without making a single API call, this is the method you use. It takes less than five seconds and works on every YouTube channel.
Open the target YouTube channel. Look at the channel banner area. On the right side, you will see a button labeled “More info” or a small arrow pointing downward next to the channel name. Click it.
A dropdown menu appears with several options. Scroll down until you see “Share channel.” It has a curved arrow icon pointing to the right. Click on it.
A small popup window appears with two options:
Share channel — This copies a link to the channel.
Copy channel ID — This copies the Channel ID directly to your clipboard.
Click “Copy channel ID.” A small confirmation message appears at the bottom of the screen: “Channel ID copied to clipboard.”
That is it. You now have the target’s unchangeable Channel ID. Open a notepad, paste it, and store it in your investigation file.
Method 4: Using the API
YouTube’s Data API returns the Channel ID directly. The endpoint is:
https://www.googleapis.com/youtube/v3/channels?part=id&forUsername=USERNAME&key=YOUR_API_KEYYou need an API key from Google Cloud Console, but the free tier allows thousands of queries per day. This method is fast and reliable for bulk lookups.
Part 2 (Addendum): Validating the YouTube Channel ID
You pulled a string from the page source that looks like a Channel ID. It starts with UC followed by a string of characters. But how do you know it is real? You validate it. Never trust a single extraction without confirmation.
YouTube Channel IDs follow a predictable URL structure. Every valid Channel ID resolves to a working channel page. Here is how to test it.
Take the Channel ID you extracted. Let us say it is UCxxxxxxxxxxxxxxxx. Construct this URL:
https://www.youtube.com/channel/UCxxxxxxxxxxxxxxxxPaste it into your browser. If the ID is valid, the page loads and displays the channel. You will see the channel name, the banner, the video grid, everything. The ID is confirmed.
If the ID is invalid, YouTube returns a 404 page with the message “This page isn’t available.” That means the string you extracted is not a real Channel ID, or the channel has been terminated. Either way, document it. A terminated channel is still intelligence. It tells you the account existed and was removed.
Part 3: Channel Metadata Deep Dive
YouTube stores extensive metadata about every channel. Most of it is visible on the About tab, but some of it is buried in the page source or accessible through third-party tools that aggregate the data for you.
The About Tab — Manual Collection
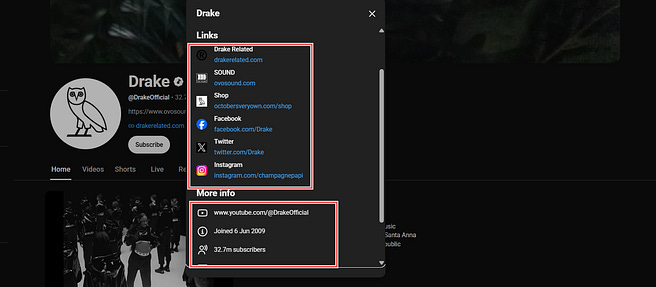
Click the “About” tab on any channel. Document the following:
Description: Copy the full text. Look for emails, URLs, other social media handles.
Details: This section sometimes includes a business inquiry email and a location. Copy both.
Links: Custom links to websites, social media, and merchandise stores. Click every one.
Join Date: The exact month and year the channel was created.
Total Views: Lifetime view count for the entire channel.
Featured Channels: Other channels the user endorses or is connected to.
Page Source Metadata Extraction
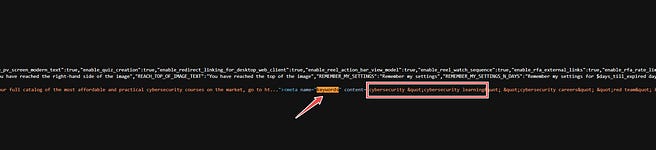
Right-click on the channel page background. Select “View Page Source.” Search for these keywords to find hidden data:
keywords— YouTube stores channel-level keywords in the metadata. These reveal what topics the channel owner thinks their content is about.description— The full description text, sometimes including older versions that were edited out of the current About tab.og:titleandog:description— Open Graph meta tags used for social sharing. These often contain clean, structured text.canonical— The canonical URL of the channel, which includes the Channel ID.image_src— The channel’s high-resolution profile image URL
Document everything you find.
Part 4: Video Metadata Analysis
Every video on YouTube carries its own metadata. This includes the upload timestamp, the title, the description, the tags, the category, and sometimes the location where the video was recorded.
Method 1: The Video Page Source

Open any video. Right-click on the page background and select “View Page Source.” Search for these fields:
publishDateordatePublished— The exact upload timestamp in ISO format.keywords— The tags the uploader assigned to the video. These reveal the topics and communities the content targets.description— The full video description, including links and text that may have been edited after upload.location— Rare, but some videos contain geolocation data embedded in the metadata if the uploader enabled it.
Method 2: The YouTube Metadata Tool
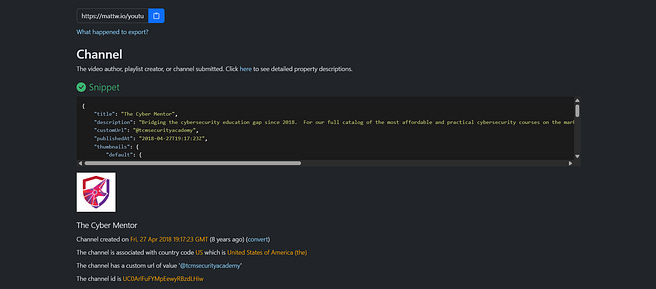
A faster, cleaner way to pull all this data is to use the free web tool at: https://mattw.io/youtube-metadata
Paste any YouTube video URL into the search bar and click Submit. The tool returns a structured page with:
Video title, description, and tags.
Exact upload timestamp.
Channel ID and channel title.
Video duration, category, and privacy status.
Thumbnail URLs at multiple resolutions.
Whether the video is unlisted, private, or public.
Caption availability and language.
This tool aggregates data from YouTube’s public APIs and page source into one readable screen. It saves you from manually digging through HTML. Use it for every video you investigate.
Part 5: Video and Image Download via Source Code, Inspect Element, Browser Extensions
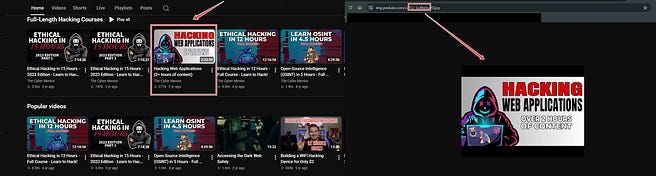
You may need to preserve a video or thumbnail as evidence. Downloading is straightforward, but there are multiple methods depending on what you need.
Downloading Thumbnails
YouTube generates thumbnails at multiple resolutions. Every video has a default thumbnail URL pattern:
https://img.youtube.com/vi/[VIDEO_ID]/0.jpg
https://img.youtube.com/vi/[VIDEO_ID]/1.jpg
https://img.youtube.com/vi/[VIDEO_ID]/2.jpg
https://img.youtube.com/vi/[VIDEO_ID]/3.jpg
https://img.youtube.com/vi/[VIDEO_ID]/maxresdefault.jpg
Replace [VIDEO_ID] with the video ID from the URL. For example, if the video URL is youtube.com/watch?v=abc123def45, the video ID is abc123def45.
0.jpgis the auto-generated thumbnail, usually showing a frame from the video.1.jpg,2.jpg,3.jpgare alternate auto-generated frames.maxresdefault.jpgis the highest resolution custom thumbnail the uploader provided.
Open any of these URLs in your browser. Right-click and save the image. These URLs are public and require no authentication.
Downloading Videos via Inspect Element
YouTube does not provide a direct download link on the video page, but the video file URL is embedded in the page source.
Open the video page. Right-click and select “Inspect Element.” Go to the Network tab in the developer tools panel. Refresh the page. In the filter bar, type videoplayback. Look for requests to URLs containing videoplayback in the domain. These are the direct video stream URLs.
Click on one of these requests. In the Headers tab, copy the full Request URL. Open that URL in a new tab. The video file plays directly. Right-click and select “Save video as” to download it.
Alternatively, use command-line tools like yt-dlp:

You may need to preserve a video or thumbnail as evidence. Downloading is straightforward, but there are multiple methods depending on what you need.
sudo apt install yt-dlp

yt-dlp -h

Proceed:

yt-dlp https[:]//www.youtube.com/watch?v=abc123def45
This downloads the highest quality version available. yt-dlp is the successor to youtube-dl and is actively maintained. Install it and keep it updated.
This downloads the highest quality version available. yt-dlp is the successor to youtube-dl and is actively maintained. Install it and keep it updated.
Downloading Subtitles and Closed Captions
Subtitles are a goldmine for text analysis. YouTube auto-generates captions for most videos, and uploaders sometimes provide their own.
To download subtitles using yt-dlp:
yt-dlp --write-subs --sub-langs all https[:]//www.youtube.com/watch?v=abc123def45This saves all available subtitle tracks. The resulting text files contain every word spoken in the video, which you can search, analyze, and cross-reference against other platforms.
Downloading Videos via Browser Extensions (Quick Alternative)
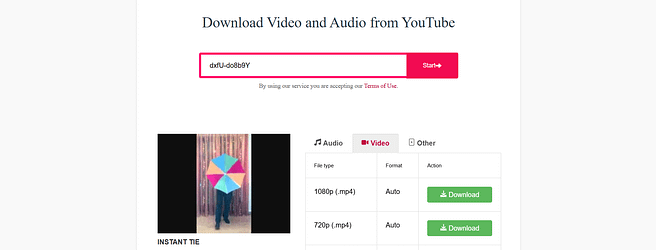
If you prefer a graphical interface, browser extensions handle the download process for you. Install one of these:
Video DownloadHelper — Available for Firefox and Chrome. Detects video streams on the page and offers one-click download.
SaveFrom.net Helper — Adds a download button directly below the YouTube video player.
These extensions work by intercepting the video streams as the page loads. They are simpler than command-line tools, but they can break when YouTube updates its delivery system. Use them for quick downloads, but keep yt-dlp as your fallback.
If you cannot install software and cannot use browser extensions, web-based services work as a last resort. Use these with caution. They are third-party sites, and you should never enter any personal credentials.
y2mate.com— Paste the video URL, select format, download.savefrom.net— Paste the URL, click download.9xbuddy.com— Similar functionality.
These sites are functional but often filled with ads and pop-ups. Use an ad blocker. Do not click anything that asks you to install software. The download link is usually a small text button after processing.
Part 6: Email Extraction from Channels
YouTube channels often list a business inquiry email in the About section. This email is public and intended for contact, but for an investigator, it is a direct attribution link.
To find it, go to the channel’s About tab. Look for a section labeled “For business inquiries” or “Details.” The email is displayed there if the channel owner added one.
Once you have the email, run it through your Module 3 email intelligence workflow. Search it on breach databases. Check social media platforms. Cross-reference it against LinkedIn, GitHub, and forums. A YouTube channel email is often the same email used to register accounts across the web.
Part 7: Geolocation from YouTube Content
YouTube videos can reveal location through intentional tags and unintentional background details.
Geotags
Some videos include a location tag set by the uploader. This is visible on the video page below the title, next to the view count. It might say something like “Recorded at Central Park, New York.” This is self-reported and may be inaccurate, but document it anyway.
Background Analysis
Apply the image geolocation techniques from Module 2. Watch the video frame by frame using the comma (,) and period (.) keys to move backward and forward one frame at a time. Look for:
Storefronts and business names.
Street signs and road markings.
License plates.
Distinctive architecture or landmarks.
Language on signs and posters.
Vegetation and climate indicators.
Screenshot key frames. Run them through reverse image search. Plot confirmed locations on a map. One video can reveal where a person lives, works, and spends their free time.
Part 8: Cross-Platform Attribution
The YouTube @handle is often reused on other platforms. Search the handle on Twitter, Instagram, Reddit, GitHub, and TikTok. Search the channel name as a plain text string in Google with quotes.
The channel description links are direct bridges. If the channel links to a Twitter profile, an Instagram account, or a personal website, each of those is a new investigation path.
The email you extracted from the About tab is a pivot point. Search it everywhere.
The visual content of the videos themselves can bridge platforms. If a YouTube video shows the same room, same face, or same event as an Instagram post, you have a connection. Screenshot both. Document the correlation.
Part 9: Practical Investigation Workflow Summary
Open the channel. Document the name, handle, description, creation date, and subscriber count.
Extract the Channel ID from the page source or using the API.
Click the About tab. Copy the description, business email, location, and external links.
Run the channel through
https://mattw.io/youtube-metadata/for structured data.Open individual videos. Extract the video ID, upload timestamp, tags, and description.
Download thumbnails using the
img.youtube.com/vi/[VIDEO_ID]/pattern.Download subtitles using
yt-dlp --write-subsfor text analysis.Analyze video frames for geolocation clues.
Extract emails from the About tab and page source.
Cross-reference the handle, email, and external links across all other platforms.
Preserve everything. Screenshots, downloaded videos, metadata exports, and your investigation notes.
Part 10: Quick Reference
Objective________________Method
Channel ID extraction: View Page Source → search for
externalIdorchannelIdStructured metadata:
https://mattw.io/youtube-metadata/Thumbnail download:
https://img.youtube.com/vi/[VIDEO_ID]/maxresdefault.jpgVideo download:
yt-dlp [URL]Subtitle download:
yt-dlp --write-subs --sub-langs all [URL]Email extraction: About tab → Details section → or search page source for
@gmail.comGeolocation analysis: Frame-by-frame review, reverse image search on screenshots
Cross-platform search: Search @handle and email on Twitter, Instagram, Reddit, GitHub
This is YouTube investigation. Not just watching videos. Extracting hard data, mapping connections, and building attribution from the content people publish to the world. Master this, and every YouTube channel becomes an intelligence source.
Lecture 4.8: Telegram OSINT — Investigating the Encrypted Messenger
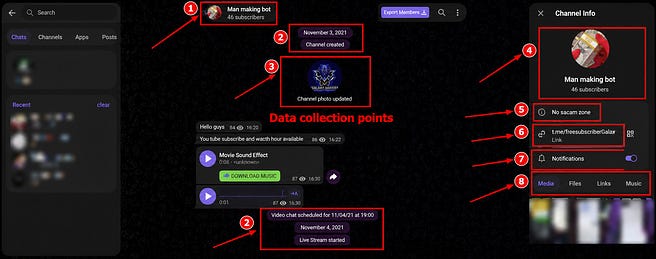
Telegram is not just a messaging app. It is a massive ecosystem of public channels, groups, and bots. People share files, discuss topics openly, run businesses, and build communities, all on a platform that most investigators ignore because they think it is too private.
Yes, Telegram offers end-to-end encryption for secret chats. But public channels and groups are not encrypted. They are open. They are indexed. They are searchable. And they contain a staggering amount of intelligence for anyone who knows how to look.
This lecture covers every practical technique you need to find channels, extract user data, map networks, recover deleted content, and use Telegram’s own infrastructure against itself for intelligence collection.
Part 1: Understanding Telegram’s Structure
Before you start any investigation, you need to understand how Telegram organizes its content. There are four types of entities you will encounter.
Users are individual accounts. Each has a unique numeric ID, a username (optional), a display name, and a phone number (hidden unless shared). The username, if set, is public and searchable.
Groups are private or public chat spaces. Public groups have a username and can be joined freely. Private groups require an invite link. Group members are visible to all members.
Channels are one-way broadcast tools. The channel owner posts content. Subscribers read it. Channels can be public (searchable, joinable) or private (invite only). Public channels are indexed by Telegram’s search and external tools.
Bots are automated accounts that perform functions. Investigative bots can pull user data, download channel content, generate invite links, and more.
The key insight is this: public channels and groups are not private. They are broadcast platforms and open forums. Treat them as such.
Part 2: Account and User Reconnaissance
You encounter a Telegram username. It looks like @targetuser. Before you do anything else, document what is visible.
Open Telegram. In the search bar at the top, type the username. If the account is public, the profile appears. You will see:
Display Name: The name the user chose. This may be real or fake. Document it either way.
Username: The @handle. This is your primary identifier.
Bio: Free-text description. Users often list other social media handles, contact emails, or personal details here. Copy every word.
Phone Number Visibility: If the user has chosen to make their number visible, it appears here. This is rare, but when it happens, it is gold.
If the account does not appear in search, the user has either set their account to private, hidden their username from search, or blocked you. That is intelligence in itself.
Part 3: User ID Extraction — The Permanent Anchor
Every Telegram account is assigned a permanent numeric User ID at creation. This ID never changes. The username can change. The display name can change. The phone number can change. The User ID remains the same for the life of the account.
For an investigator, this is the anchor. If a target changes their @handle from @targetuser to @newhandle, you lose them if you are tracking by username alone. But if you extracted the numeric ID, you can verify the new handle belongs to the same account.
The User ID also appears in message metadata, forwarded messages, and bot responses. When you scrape a channel and see the same numeric ID appearing across different usernames over time, you know it is the same person operating under different aliases.
Here are the methods to extract it.
Method 1: @userinfobot
Search for @userinfobot in Telegram. Start a chat. Forward any message from the target user to the bot. It responds with:
User ID: 123456789
First Name: John
Username: @targetuser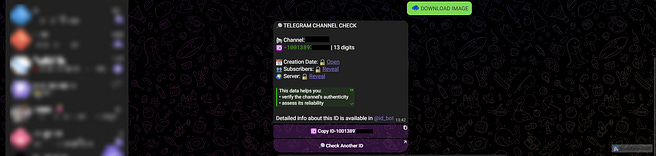
The numeric User ID is now yours. Copy it. Store it.
Method 2: Get Chat_ID & User_ID
This bot returns the raw JSON data for any message, user, or channel you forward to it. Search for Get Chat_ID & User_ID. Forward a message from the target. The bot replies with a JSON dump that includes the sender’s full profile data.
Look for:
“from”: {
    “id”: 123456789,
    “first_name”: “John”,
    “last_name”: “Doe”,
    “username”: “@targetuser”
}
The id field is the numeric User ID. This is the most complete user data you can pull from a single bot interaction.
Method 3: @getidsbot
Search for @getidsbot. Start a chat. Forward a message from the target. The bot returns the User ID, chat ID, and message ID in one clean response. It is fast and straightforward.
Why the User ID Matters
Here is exactly how the User ID adds value in real investigations.
Tracking Through Username Changes: A target uses
@hackerx. You extract the User ID:987654321. Three months later,@hackerxdisappears. The account now goes by@securityresearcher. You forward a message from the new handle to@userinfobot. The bot returns the same User ID:987654321. Confirmed. Same account. Same person. The name change did not fool you.Cross-Referencing Across Groups: A user appears in multiple public groups under different usernames. You extract the User ID from messages in each group. The IDs match. You now know these separate personas belong to one individual. The usernames were a distraction. The ID told the truth.
Linking to Other Data Sources: Some data breaches and leaked databases include Telegram User IDs alongside email addresses and phone numbers. Having the numeric ID lets you search those datasets with precision. If a breach contains User ID
123456789tied tojohndoe@gmail.com, you just linked an anonymous Telegram account to a real email address.Automated Monitoring: You can write scripts using Telethon that monitor a User ID for activity. Even if the username changes, the script tracks the ID. When the target joins a new group, posts in a channel, or changes their profile, you get an alert. The ID is the constant that makes long-term monitoring possible.
Workflow Rule: Every time you encounter a new Telegram account, extract the numeric User ID immediately. Store it alongside the current username and the date of extraction. The username is temporary. The ID is forever.
Part 4: Phone Number Discovery
Telegram accounts are tied to phone numbers. The number is private by default, but several techniques can reveal it or confirm it.
Method 1: Contact Sync Exploitation
This is the most well-known technique. Telegram allows users to sync their phone contacts with the app. If you add a phone number to your phone’s contacts and that number is registered on Telegram, the account appears in your Telegram contacts list.
Create a sock puppet Telegram account. Save the target phone number to your device contacts under a fake name. Open Telegram. Navigate to Contacts. If the number is registered on Telegram, the account appears with its display name, username, and profile picture. You just confirmed the phone number is tied to that account.
This does not notify the target. It is passive. But do this only from a properly maintained sock puppet, never from your personal device.
Method 2: WHOIS Lookup on Linked Domains
If the target lists a website in their Telegram bio, run a WHOIS lookup on that domain. The registrant’s phone number may be in the WHOIS record. Cross-reference it using Method 1.
Method 3: Cross-Platform Leakage
Many users link their Telegram account to other platforms. Check the target’s Twitter bio, Instagram bio, Facebook About section, and personal website for a Telegram link. If they publicly connect their Telegram to a named account elsewhere, they have just bridged the anonymity gap.
Part 5: Channel and Group Intelligence

Public channels and groups are searchable. You can find them through Telegram’s internal search, Google dorks, and specialized indexing services.
Telegram Internal Search
Open Telegram. Tap the search bar. Type a keyword. Telegram returns matching users, groups, and channels. This is the most direct method. It is limited to what Telegram chooses to show you, but it is fast.
Google Dorks for Telegram
Telegram channels have public web previews. Google indexes these pages.
Use these dorks to find channels and groups by keyword:
site:t.me “keyword”
site:t.me “gmail.com”
site:t.me “location”
site:t.me “phone”
To find channels related to a specific topic:
site:t.me “osint” channel
site:t.me “cybersecurity” channel
To find invite links shared publicly:
site:t.me “joinchat”
site:t.me “+”
The t.me/+ prefix is used for private group invite links. If someone shared a private invite link publicly on a website, forum, or social media, Google indexes it. This is how you find supposedly private groups.
Specialized Telegram Search Engines
Several third-party services index Telegram channels and make them searchable outside the app.
Telegago:
https://cse.google.com/cse?cx=006368593537057042503:efxu7xprihg— A Google Custom Search Engine specifically for Telegram.Telemetr.io: https://telemetr.io — Channel analytics, search, and statistics. Find channels by keyword, see subscriber growth, and view top posts.
TGStat: https://tgstat.com — Another channel analytics platform with search, rankings, and post discovery.
TelegramDB: https://telegramdb.org — A searchable database of public Telegram channels and groups.
Use these tools when Telegram’s internal search is insufficient or when you need to discover channels by topic rather than exact username.
Part 6: Message and Content Scraping
Once you find a channel or group, you need to collect its content. Manual scrolling is slow. Automated tools are faster.
Method 1: Telethon (Python Library)
Telethon is a Python library that interacts with Telegram’s API. It requires a Telegram account and an API key from my.telegram.org. Set up a sock puppet account, get your API credentials, and install Telethon:
pip install telethonThen use a simple script to download messages from a channel:
from telethon import TelegramClient

api_id = YOUR_API_ID
api_hash = ‘YOUR_API_HASH’

client = TelegramClient(’session_name’, api_id, api_hash)

async def main():
    channel = await client.get_entity(’@channelname’)
    messages = await client.get_messages(channel, limit=1000)
    for message in messages:
        print(message.sender_id, message.date, message.text)

with client:
    client.loop.run_until_complete(main())
This downloads the last 1,000 messages from the channel, including sender IDs, timestamps, and message text. Adjust the limit as needed. The sender_id is the numeric User ID discussed in Part 3, which means you can track users across username changes directly from your scraped data.
If you are new to Telethon and want a full walkthrough from setup to execution, John Hammond has a practical video guide that covers everything step by step:
Quick Help: How to Scrape Telegram with Python:
Watch it. Follow along. You will have a working scraper in under thirty minutes.
Method 2: Export Chat via Telegram Desktop
If you have access to a group or channel, Telegram Desktop allows you to export the entire chat history. Open Telegram Desktop. Go to the channel or group. Click the three-dot menu. Select “Export chat history.” Choose the data you want to export (messages, photos, videos). Telegram generates a JSON or HTML file with the complete history.
This is useful for preserving evidence from a group you have already infiltrated.
Part 7: Bot-Assisted Investigation
Telegram bots are automated tools built into the platform. Many are designed for investigation.
User Information Bots
@userinfobot: Returns user ID, first name, last name, and username.
@Get Chat_ID & User_ID: Returns full JSON profile data for any forwarded message.
@getidsbot: Returns user ID, chat ID, and message ID.
@tgscan_bot: Takes a username and returns related accounts, shared groups, and profile history.
Channel and Group Analysis Bots
@ChannelActivityBot: Analyzes channel engagement and subscriber activity.
@telebrezebot: Checks if a specific username appears in any public channel or group.
@TgStatBot: Provides channel statistics, growth trends, and post analytics.
Search and Discovery Bots
@telescoper_bot: Searches for users across Telegram by username, name, or phone number (if public).
@SangMataInfo_bot: Tracks username changes. Enter a username, and the bot shows previous usernames associated with that account. This is how you discover a target’s old handles.
Email and Data Leak Bots
@mailsearcher_bot: Searches for an email address across Telegram’s public channels and groups. If the email appears in any message, the bot finds it.
@UniversalSearchBot: General keyword search across Telegram’s public content.
Use these bots from your sock puppet account. Never from your personal account.
Part 8: Browser Extensions for Telegram Investigation
Telegago Custom Search Engine
Telegago is a Google CSE that indexes Telegram content. Add it to your browser as a custom search engine, or visit the link directly. Use it to search Telegram without opening the app.
URL: https://cse.google.com/cse?cx=006368593537057042503:efxu7xprihg
Save Telegram (Extension)
The Save Telegram browser extension adds a download button to Telegram Web for photos, videos, and documents. Install it, open Telegram Web, and download channel media with one click.
Chrome: https://chromewebstore.google.com/detail/save-telegram
Firefox: https://addons.mozilla.org/en-US/firefox/addon/save-telegram/
TG Content Downloader — Telegram Downloader
This browser extension is specifically designed for bulk downloading content from Telegram channels and groups. Unlike Save Telegram which handles individual files, TG Content Downloader allows you to select multiple messages and download all attached media at once.
Install the extension from your browser’s extension store. Open Telegram Web. Navigate to the target channel or group. The extension adds download buttons next to each message containing media. Click to download individual files, or use the bulk selection feature to queue multiple downloads. Photos, videos, documents, voice messages. All saved to your local machine with original filenames and timestamps.
Chrome: https://chromewebstore.google.com/detail/tg-content-downloader
Important Note on Operational Security
All browser extensions for Telegram Web require you to be logged into a Telegram account. Use your sock puppet account for this. Never log into Telegram Web with your personal account while running investigative extensions. Keep your investigation environment separate, just as you would for any other platform.
Part 9: Geolocation from Telegram Content
Telegram allows users to share their live location or static location pins. In public groups and channels, these are visible to all members.
When you encounter a location pin, click it. Telegram opens a map view. The coordinates are visible in the URL when opened in Telegram Web or by inspecting the element.
Users also post geolocatable images. Apply the techniques from Module 2. Look for background landmarks, street signs, and business names in photos shared on channels. Screenshot them. Run reverse image search. Cross-reference with satellite imagery.
Part 10: Practical Investigation Workflow Summary
Search the target username in Telegram. Document the display name, bio, and any linked accounts.
Forward a message from the target to
@userinfobotor@GetChatID&UserIDBotto extract the numeric User ID.Run the username through
@SangMataInfo_botto discover previous usernames.Search the username on Google with
site:t.me "username"to find public mentions.Use Telemetr.io and TGStat to find channels the target owns or participates in.
Use Telegago to search for the target’s username, email, or phone number across indexed Telegram content.
If the target lists a website, run a WHOIS lookup for contact details.
Scrape relevant channels using Telethon or snscrape to collect message history.
Download shared media. Analyze images for geolocation clues.
Cross-reference the username, email, and phone number against other platforms.
Document everything. Save screenshots, exported chat histories, and bot responses.
Part 11: Quick Reference
Objective_______________Method/Tool
Extract User ID:
@userinfobot,@GetChatID&UserIDBot,@getidsbotFind previous usernames:
@SangMataInfo_botSearch Telegram via Google@:
site:t.me "keyword"Custom search engine: Telegago CSE
Channel analytics:
telemetr.io,tgstat.comMessage scraping: Telethon (Python)
Email search in channels:
@mailsearcher_botPhone number confirmation: Contact sync technique via sock puppet
Channel export: Telegram Desktop → Export chat history
Username cross-reference:
@tgscan_bot,@telebrezebot
Lecture 4.9: TikTok OSINT — Investigating Short-Form Content
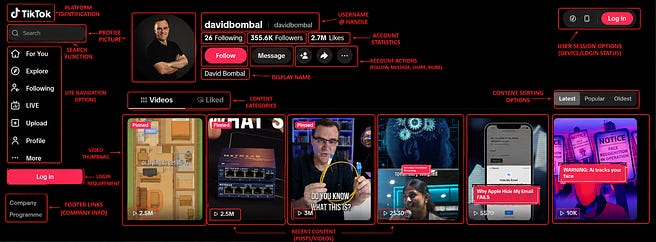
TikTok has over a billion active users. It is not just dance videos. People post their locations, their homes, their workplaces, their opinions, and their relationships. They do it in short, digestible clips that most investigators scroll past without a second thought.
That is a mistake.
TikTok videos contain geolocatable backgrounds, exposed personal details, and links to other platforms. TikTok profiles carry usernames that are often reused across Instagram, Twitter, and YouTube. TikTok bios include email addresses and external links. Ignoring TikTok means leaving a massive source of behavioral data untouched.
This lecture walks you through every practical technique for investigating TikTok profiles and content. No theory. Just what works.
Part 1: TikTok Profile Structure — What Is Publicly Visible
Before you touch any tool, understand what TikTok gives you for free on any public profile.
Open a TikTok profile in your browser. No login required for public accounts. You will see:
Username: The @handle. Often reused across platforms. Your first pivot point.
Display Name: Can be different from the username. May contain a real name or alias.
Bio: Up to 80 characters. Users frequently list other social media handles, contact emails, or personal details here. Copy every word.
Profile Picture: The circular avatar. You can open it in a new tab and save the full-resolution version for reverse image search.
Following Count: Number of accounts this profile follows.
Follower Count: Number of accounts following this profile.
Like Count: Total likes across all videos. This is public even if individual liked videos are private.
Video Count: Total number of videos posted.
Pinned Video: The video the user chose to feature at the top of their profile. This is what they want you to see first.
External Links: Any URL in the bio. This may lead to a Linktree, personal website, YouTube channel, or Instagram profile. Each is a new investigation path.
Document all of this before you go deeper. Screenshot the profile. Save the profile picture. Copy the bio. This is your baseline.
Part 2: Extracting the Numeric TikTok User ID using View Page Source
Every TikTok account has a unique, unchangeable numeric User ID. The username can change. The display name can change. The User ID stays the same forever.
Open the target TikTok profile. Right-click on the page background and select “View Page Source.” Press Ctrl + F and search for “userInfo”: . You are looking for a line that looks like:
“userInfo”:{”user”:{”id”:”6345820253489857518”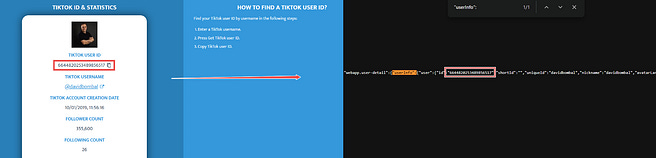
That number is the numeric User ID. It is globally unique. Copy it. Store it.
Part 2 (Addendum): Finding a TikTok User-ID with Comment Picker — No Source Code Required
If you want the User ID without touching the page source, use Comment Picker’s TikTok ID tool.
Go to: https://commentpicker.com/tiktok-id.php
Enter the target TikTok @username. Click the button. The tool returns the numeric User ID instantly.
This is the fastest method. No page source. No inspect element. No console. Just type the username and get the ID. Use this when you need quick results across multiple profiles without the technical overhead.
Part 3 (Addendum): Resolving the Numeric User ID to a Username — The URL Pivot
You extracted a numeric User ID. Now you need to know what username it currently belongs to. TikTok does not let you search by ID in the app, but the platform resolves IDs internally. Here is how to use that.
TikTok structures its sharing URLs to accept either the username or the numeric ID. Paste this directly into your browser:
https://www.tiktok.com/share/user/target_user_idReplace the target_user_id with the User-ID you extracted.
If the account is active and public, TikTok’s web server automatically redirects this URL to the target’s current handle. Your address bar will change to:
https://www.tiktok.com/@usernameYou now have the current username. If the account has changed handles multiple times, this URL still resolves to the latest one. The numeric ID is the anchor. This URL proves it.
Why This Matters
If you stored a numeric User ID from an investigation months ago and the target has changed their username, these methods still find them. The handle changes. The ID does not. This is how you track a TikTok account through rebranding.
Part 3: Finding the Account Creation Date

TikTok does not display the account creation date publicly. But you can find it.
Method 1: First Video Upload Date
Scroll to the very bottom of the profile’s video list. The oldest video gives you an approximate creation date. If the first video was posted in March 2020, the account was created around that time. This is not exact but it is a solid estimate.
Method 2: Comment Picker — Instant Creation Timestamp
Comment Picker, the same tool used for User ID extraction, also returns the exact account creation timestamp. No source code required.
Go to: https://commentpicker.com/tiktok-id.php
Enter the target TikTok @username. Click the button. Alongside the numeric User ID, the tool displays the account creation date in a readable format.
This is the fastest method. You get the User ID and the creation date in one step. Document both. The creation timestamp is a temporal anchor. You can cross-reference it against account creation dates on other platforms to build correlation. An account created on TikTok in March 2020 and an Instagram account with the same handle created in February 2020 is a strong link.
Part 4: Downloading Videos Without Watermarks
TikTok stamps every video with a watermark showing the username. For investigation, you want the clean version. Several methods work.
Method 1: yt-dlp (Recommended)

yt-dlp downloads TikTok videos without watermarks in the highest available quality.
Install:
pip install yt-dlpDownload a single video:
yt-dlp https[:]//www.tiktok.com/@username/video/123456789Download all videos from a profile:
yt-dlp https://www.tiktok.com/@usernameDownload with metadata:
yt-dlp --write-info-json https://www.tiktok.com/@usernameEach video saves alongside a JSON file containing the caption, hashtags, upload timestamp, and music used.
Method 2: Online Downloaders

If you cannot install yt-dlp, use a web-based tool:
snaptik.app— Paste the video URL. Downloads without watermark.ttdownloader.com— Similar functionality.https://tikinsights.com/tools/parse — Similar functionality.
These work for individual videos. For bulk collection, yt-dlp is the only practical option.
Part 5: Extracting Video Thumbnails via Inspect Element
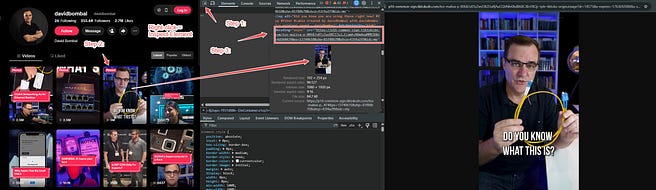
Every TikTok video has a thumbnail image. You can extract it without any third-party tools.
Step 1: Open the Target Profile
Navigate to the TikTok profile you are investigating. Scroll until you find the video whose thumbnail you want.
Step 2: Open Inspect Element
Right-click on the page background, away from any video or button. Select “Inspect” or “Inspect Element” from the menu. The browser’s Developer Tools panel opens.
Step 3: Activate the Element Selector
Look at the top left corner of the Developer Tools panel. You will see a small icon that looks like a dotted square with a cursor arrow. This is the element selector tool. Click it once. Your cursor is now in inspection mode.
Step 4: Click on the Target Video
Move your cursor over the video whose thumbnail you want. Click on the video. The Developer Tools panel jumps to the specific line of HTML that renders that video element.
Step 5: Locate the Thumbnail URL
Look for an img tag or a div element with a style attribute containing a background-image property. The thumbnail URL will be embedded there. It will look something like:
<img src=”https://p16-sign.tiktokcdn-us.com/...” alt=”...”>Or:
<div style=”background-image: url(’https://p16-sign.tiktokcdn-us.com/...’)”></div>Step 6: Copy and Open the URL
Click on the URL inside the HTML to select it fully. Copy it. Open a new browser tab. Paste the URL into the address bar. Press Enter.
The thumbnail image loads in full resolution. Right-click on the image and select “Save image as” to save it to your investigation folder.
Why Thumbnails Matter
The thumbnail is the frame the uploader chose to represent their video. It often shows the most important visual element. A face. A location. A document. A product. You can run the thumbnail through reverse image search without downloading the entire video. This saves time and bandwidth while still producing intelligence.
Part 6: Extracting Video Metadata
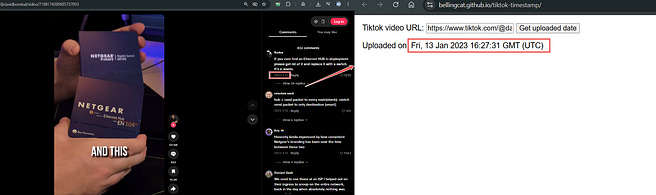
Every TikTok video carries metadata. Extracting it gives you timestamps, hashtags, and music data.
Method 1: Page Source Extraction
Open the video page. Right-click on the page background and select “View Page Source.” Press Ctrl + F and search for createTime or create_time. You will find a Unix timestamp:
“createTime”:”1692123456”Copy that number. Go to epochconverter.com. Paste the number into the input field. The tool converts it to a human-readable date and time in UTC. This is the exact moment the video was uploaded.
Method 2: Bellingcat TikTok Timestamp Tool (Works Even If the Video Is Deleted or Private)
If the page source method does not return a timestamp, or if the video has been deleted, set to private, or you are blocked by TikTok’s web firewall, use the Bellingcat tool.
TikTok embeds the Unix generation time directly into the binary bits of every Video ID using a Snowflake structure. This means the timestamp is mathematically encoded in the video URL itself. You do not need to access TikTok’s servers to extract it.
Tool: Bellingcat TikTok Date Extractor
Link: https://bellingcat.github.io/tiktok-timestamp
How to use:
Copy the full TikTok video URL from your browser. Example:
https[:]//www.tiktok.com/@username/video/72345678901234567892. Paste the URL into the input field on the Bellingcat tool.
3. Click “Get uploaded date.”
The tool mathematically decodes the bits embedded in the Video ID and returns the exact upload timestamp down to the second in UTC. No API calls. No authentication. No connection to TikTok’s servers. It works entirely in your browser.
Method 3: Manual Mathematical Breakdown — Understanding the Snowflake ID
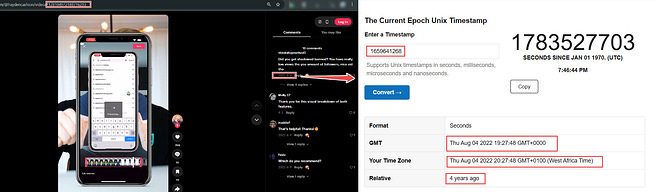
If you want to understand what the Bellingcat tool is doing under the hood, or if you want to decode a timestamp manually without any tools, here is the step-by-step mathematical process.
Every TikTok Video ID is a 64-bit Snowflake integer. The first 31 bits of that integer encode the timestamp. The remaining 33 bits encode sequence data. By isolating the first 31 bits and converting them back to decimal, you get the Unix timestamp in seconds.
Step 1: Convert the Video ID to Binary
Take the numeric Video ID from the URL. For example:
7248147125599859971Convert this decimal number to its 64-bit binary representation using a conversion tool.
Go to: https://www.rapidtables.com/convert/number/decimal-to-binary.html
Paste the Video ID into the input field. Click “Convert.” The tool returns the binary equivalent:
0110010010010111110111000101010001101101...Step 2: Isolate the First 31 Bits
The Snowflake structure dictates that the oldest bits, the ones on the far left, hold the time data. Slice out the first 31 characters of that binary string:
Full 64-bit string: 0110010010010111110111000101010001101101...

First 31 bits extracted: 0110010010010111110111000101010
Step 3: Convert the 31-bit Binary Back to Decimal
Take that isolated 31-bit string and convert it back into a standard base-10 integer:
Binary: 0110010010010111110111000101010

Decimal Result: 1687698986
Step 4: Translate the Unix Timestamp
The resulting integer 1687698986 is a standard Unix timestamp, the number of seconds that have elapsed since January 1, 1970.
When you parse 1687698986 through a standard calendar converter like epochconverter.com, it outputs exactly:
Greenwich Mean Time (GMT): Sunday, June 25, 2023, 13:16:26 UTCWhy These Methods Matter
The timestamp is extracted from the Video ID itself, not from TikTok’s servers.
It works even if the video has been deleted.
It works even if the account is private.
It works even if TikTok’s web firewall has blocked you.
You get an exact UTC timestamp you can use in timelines and reports.
From yt-dlp JSON Output
When you use yt-dlp --write-info-json, the resulting JSON file contains additional metadata:
upload_date— Exact date in YYYYMMDD format.timestamp— Unix timestamp.description— Full video caption.hashtags— Every hashtag used.track— Music or sound used.duration— Video length in seconds.
Read the JSON file directly or parse it with a script. Every field is intelligence.
Part 7: Geolocation from TikTok Videos
TikTok does not have built-in location tags like Instagram. But videos reveal location through content.
Background Analysis
Apply the same geolocation techniques from Module 2. Look at:
Storefronts and business names visible in the background.
Street signs, license plates, and road markings.
Distinctive architecture, landmarks, and skylines.
Language on signs, posters, and product labels.
Vegetation and climate indicators.
Pause the video. Use the comma (,) and period (.) keys to move frame by frame in a browser or media player. Screenshot key frames. Run them through Google Lens and Yandex Images.
Stitching and Duet Locations
TikTok’s Stitch and Duet features let users respond to other videos. The original video may have been filmed in one location. The response may show a different one. Compare backgrounds. You may find two locations connected through a single interaction.
Location Clues in Captions and Hashtags
Users tag locations in captions even without a formal geotag. Search captions for city names, neighborhood names, and venue names. Hashtags like #LondonLife or #NYC are self-reported but still useful as leads.
Part 8: Finding Linked Accounts from TikTok Bios

TikTok bios often contain links to other platforms. These are direct attribution bridges.
Direct Links
Click any link in the bio. It may go to:
A Linktree or Beacons page listing multiple social media accounts.
A YouTube channel.
An Instagram profile.
A personal website.
A business page.
Each destination is a new platform to investigate. Document every link.
Username Cross-Reference
If the TikTok bio says “IG: @sameusername,” go to Instagram and check that handle. If it exists and the content matches, you have a cross-platform connection. Do the same for Twitter, YouTube, and Snapchat. TikTok users frequently reuse handles.
Profile Picture Reverse Search
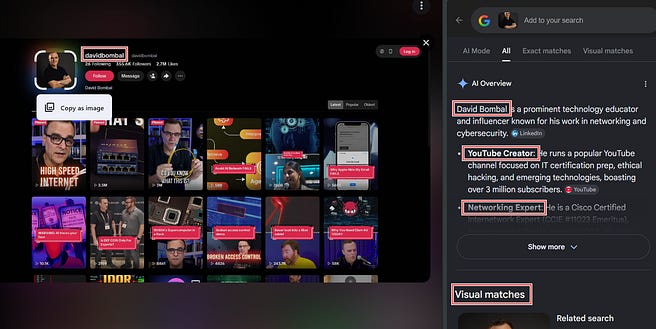
Download the TikTok profile picture. Run it through Google Lens and Yandex Images. If the same image appears on LinkedIn, Twitter, or a forum, you have another cross-platform link. This is how you connect an anonymous TikTok account to a named profile elsewhere.
Part 9: Analyzing Hashtag Participation for Network Mapping
Hashtags group content by topic. They also group people.
Finding Related Accounts
Click on a hashtag the target uses. TikTok shows all public videos with that tag. Browse the videos. Look for other accounts posting similar content. These are potential associates, collaborators, or members of the same community.
Tracking Hashtag Campaigns
If a target participates in a hashtag campaign, search that hashtag across platforms. A hashtag used on TikTok may also appear on Instagram, Twitter, and YouTube. This reveals cross-platform activity and a wider network of participants.
Part 10: TikTok-Specific Search Operators and Dorks

TikTok has an internal search bar, but Google indexes TikTok content too.
Google Dorks for TikTok
site:tiktok.com “username”

site:tiktok.com “@username”

site:tiktok.com “username” “gmail.com”

site:tiktok.com “username” “instagram”
These find TikTok profiles, mentions in video descriptions, and any email addresses or social media handles publicly listed.
TikTok Internal Search
Use TikTok’s search bar. Type a username, a hashtag, or a keyword. TikTok returns accounts, videos, sounds, and hashtags. This is the most direct way to find content by topic.
Searching by Sound
Every TikTok video uses a sound. Click on the sound from any video. TikTok shows every other video using that same audio. This is how you find all content within a trend or audio meme. If a target uses a specific sound, browse the other videos using it. You may find associates or discover additional accounts operated by the same person.
Part 11: Practical Investigation Workflow Summary
Open the TikTok profile. Document the username, display name, bio, follower count, following count, like count, and video count.
Extract the numeric User ID from the page source or console.
Estimate the account creation date from the oldest video or cross-reference with other platforms.
Download the profile picture. Save it. Run it through reverse image search.
Click every link in the bio. Document all external platforms.
Download key videos using
yt-dlp. Save metadata with--write-info-json.For bulk collection, run
yt-dlp https://www.tiktok.com/@username.Extract video metadata: upload timestamps, captions, hashtags, and music.
Analyze video frames for geolocation clues. Screenshot and reverse search key frames.
Search the username on Google with
site:tiktok.com "username".Cross-reference the username, profile picture, and linked accounts across Instagram, Twitter, YouTube, and other platforms.
Document everything. Screenshots, downloaded videos, metadata files, and your analysis.
Part 12: Quick Reference
Objective______________Method
Extract User ID: View Page Source → search for
idor usecommentpicker.com/tiktok-id.phpResolve User ID to username:
https://www.tiktok.com/share/user/[ID]Find account creation date
commentpicker.com/tiktok-id.phpor oldest video estimateDownload single video:
yt-dlp [video URL]Download all videos from profile:
yt-dlp https://www.tiktok.com/@usernameExtract video metadata:
yt-dlp --write-info-jsonExtract upload timestamp from Video IDPage source (
createTime),bellingcat.github.io/tiktok-timestamp, or Python script using>> 33Download video thumbnail: Inspect Element → element selector → click video → copy image URL
Profile picture extraction: Right-click → Open image in new tab → Save
Frame-by-frame video analysis: Period (.) forward, Comma (,) backward in browser or E key in VLC
Reverse image search: Google Lens, Yandex Images, TinEye, Bing Images
Find linked accounts: Bio links, username cross-reference across platforms
Hashtag network mapping: Click hashtag → browse videos using same hashtag
Google dork for TikTok:
site:tiktok.com "username"
This is TikTok OSINT. Not scrolling endlessly. Systematic extraction of identifiers, timestamps, thumbnails, video frames, and connections from the platform everyone underestimates. Master this, and you add a billion-user intelligence source to your toolkit.
Lecture 4.10: Bluesky OSINT — Investigating the Decentralized Network
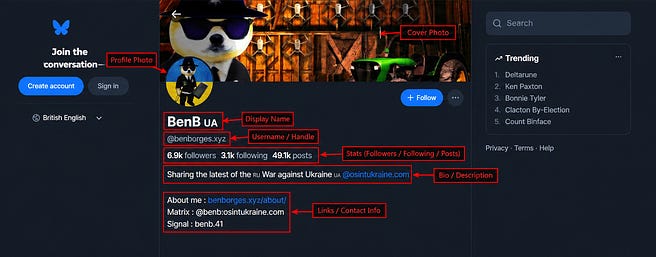
Bluesky is the new player in the social media landscape. Built on the AT Protocol, it looks like Twitter but works differently under the hood. It is decentralized. It is open. And because it is built by developers who value transparency, it exposes far more data through public APIs and page source than most platforms ever have.
For an investigator, Bluesky is a gift. User IDs are permanent and publicly accessible. Account creation dates are embedded in the page source. Posts are indexed and searchable. Images are easy to extract. The platform was designed for openness. Your job is to use that openness for intelligence gathering.
This lecture covers everything from basic profile reconnaissance to advanced image extraction. Every technique is practical. Every method works today.
Part 1: Understanding Bluesky’s Structure
Bluesky uses the AT Protocol, which is fundamentally different from Twitter’s architecture.
Key concepts:
DID (Decentralized Identifier): Every user has a unique DID that looks like
did:plc:abcdef123456. This is the permanent identifier. The handle can change. The DID never does.Handle: The username people see, like
@username.bsky.social. Users can also set custom domain handles like@username.com. Handles can change. DIDs cannot.PDS (Personal Data Server): Where user data is stored. The platform is decentralized, so data lives on different servers.
Public API: Bluesky’s API is open. No authentication required for public data. This makes automated collection straightforward.
Part 2: Profile Reconnaissance — The Surface Level
Start with what is visible on the profile page.
Open the target’s Bluesky profile in your browser:
https://bsky.app/profile/username.bsky.socialDocument everything:
Display Name: May contain a real name or alias.
Handle: The @username. Often reused across platforms.
Bio: Free-text description. Users list other social media handles, contact emails, locations, and affiliations here. Copy every word.
Banner Image: The header image at the top of the profile.
Profile Picture: The avatar.
Follower Count: Number of accounts following the target.
Following Count: Number of accounts the target follows.
Post Count: Total number of posts.
Pinned Post: The post the user chose to feature. This is what they want you to see first.
Joined Date: Sometimes displayed on the profile. If not visible, you will extract it from the page source.
Screenshot everything. This is your baseline.
Part 3: User ID Extraction — The DID
Every Bluesky account has a DID. It looks like did:plc:abcdef123456. This never changes. The handle can change. The DID is permanent. Extract it.
Method 1: Page Source

Open the target profile. Right-click on the page background. Select “View Page Source.” Press Ctrl + F and search for did:plc:. You will find a line like:
content=”did:plc:abcdef123456”That is the DID. Copy it. Store it.
Method 2: The DID Resolver

Every Bluesky DID resolves to a DID document that contains the account’s public metadata. Open your browser and navigate to:
https://plc.directory/did:plc:abcdef123456Replace the DID with the one you extracted. The page returns a JSON object containing the handle, the public signing key, and the PDS endpoint. This is the technical backbone of the account. Document everything.
Method 3: Third-Party Tools

PDSls at https://pdsls.dev is a Bluesky directory and search tool. Enter a handle or DID. It returns the account’s DID document, associated records, and metadata. Use it when you need a clean, structured view of the account’s technical profile without digging through raw JSON.
Method 4: Validating the DID via Direct Profile URL
Once you have extracted the DID, you can validate it and navigate directly to the account’s profile by pasting the DID into Bluesky’s profile URL structure:
https://bsky.app/profile/did:plc:yf6hctt2ug3qyfty4in64yobReplace the DID with the one you extracted. Open the URL in your browser.
If the DID is valid, Bluesky loads the profile page directly. You will see the display name, handle, bio, follower count, and all posts. This confirms the DID is real and resolves to an active account.
If the account has changed its handle multiple times, this URL still resolves to the current profile. The handle may change. The DID never does. This is how you track a Bluesky account through rebranding. Store the DID-based URL alongside the current handle in your investigation file.
Part 4: Account Creation Date Extraction
Bluesky embeds the account creation timestamp in the page source and in the DID document.
Method 1: Page Source

Open the target profile. View Page Source. Search for dateCreated”:. You will find:
“dateCreated”:”2023-05-15T10:30:00.000Z”This is the exact ISO 8601 timestamp of account creation. Convert it to your local time if needed. This is precise, not an estimate.
Method 2: Analyzing the DID Audit Log

Every Bluesky account is tied to a unique Decentralized Identifier (DID). For accounts using the standard did:plc format, you can uncover a permanent, tamper-proof history of the account, including its exact creation time by querying the public PLC Directory.
Step 1: Locate the DID: Extract the target account’s unique did:plc:... identifier.
Step 2: Access the Audit Log: Insert the target’s DID into the following URL format:
https://plc.directory/[TARGET_DID]/log/auditReplace [TARGET_DID] with the actual DID you extracted from the target.
Step 3: Review the JSON Payload: Opening this URL returns a public audit log. The very first entry in the JSON array represents the account’s creation (the genesis operation), which includes a server-verified createdAt ISO timestamp:
[
  {
    “type”: “plc_operation”,
    “createdAt”: “2023-05-15T10:30:00.000Z”,
    “alsoKnownAs”: [
      “at://username.bsky.social”
    ],
    “services”: {
      “atproto_pds”: {
        “type”: “AtprotoPersonalDataServer”,
        “endpoint”: “https://bsky.social”
      }
    }
  }
]
This is the same timestamp. It is permanent. It never changes. Document it.
Why This Matters
The creation timestamp is a temporal anchor. Cross-reference it against account creation dates on Twitter, Instagram, GitHub, and other platforms. An account created on Bluesky in May 2023 and a Twitter account created in April 2023 with the same handle is a correlation point. The timestamp builds your attribution case.
OSINT Tip: Because the PLC Directory operates as a public transparency log, this timestamp is cryptographically validated on the server side. It provides an indisputable timeline for when the account was initialized, making it impossible for a user to spoof or hide their true creation date.
Part 5: Bio Analysis and Cross-Platform Attribution
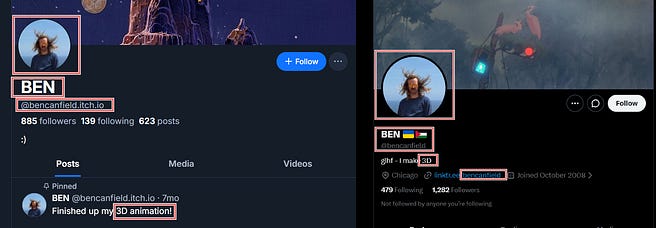
The Bluesky bio is a text field. Users often list other social media handles, contact emails, and personal details here.
What to Look For:
Other platform handles: “IG: @username”, “Twitter: @username”, “GitHub: username”
Email addresses: Rare but sometimes included for business inquiries
Locations: “London”, “NYC”, “Berlin”
Occupations: “Security Researcher”, “Journalist”, “Developer”
Pronouns and personal details
Cross-Referencing the Handle
Take the Bluesky handle. Search it on Twitter, Instagram, TikTok, GitHub, and Reddit. Users who migrate to Bluesky often bring their existing handles with them. A match is a direct platform bridge.
Cross-Referencing the Display Name
Some users use their real name as their display name. Search it on LinkedIn, Facebook, and Google. Cross-reference with other platforms.
Part 6: Banner and Profile Image Extraction
Bluesky stores the banner image and profile picture as publicly accessible URLs embedded in the page source.
Method 1: Page Source

Open the target profile. View Page Source. Search for og:image. You will find:
<meta property=”og:image” content=”https://cdn.bsky.app/img/avatar/plain/did:plc:abcdef123456/avatar@jpeg”>The content attribute contains the direct URL to the profile banner. Open the URL in a new tab. The full-resolution image loads. Right-click and save.
Method 2: Inspect Element
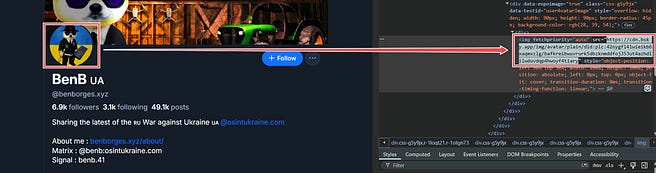
Right-click on the profile picture or banner image on the profile page. Select “Inspect” or “Inspect Element.” The Developer Tools panel opens, highlighting the HTML that renders that image.
Look for the src attribute within the img tag. It will look like:
<img src=”https://cdn.bsky.app/img/avatar/plain/did:plc:abcdef123456/avatar@jpeg”>Copy the full URL. Open it in a new tab. Save the image at full resolution.
Alternatively, use the element selector tool. Click the dotted square icon at the top left of the Developer Tools panel (Ctrl + Shift + C). Move your cursor over the profile picture or banner. Click on it. The HTML jumps to the correct line. Copy the URL.
Method 3: PDSls
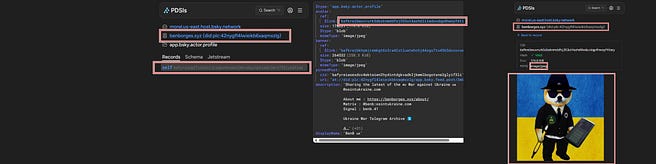
Search the handle on https://pdsls.dev. The tool displays the avatar and banner URLs directly in the profile view. Copy them from there without touching the page source.
What You Do With the Images
Run the profile picture and banner through Google Lens, Yandex Images, and TinEye. If the same image appears on Twitter, Instagram, or LinkedIn, you have a cross-platform attribution bridge. The banner image often contains additional intelligence. A banner showing a city skyline is a location clue. A banner with text may contain contact details or affiliations.
Part 7: Post Analysis — Extracting Timestamps
Every Bluesky post has an exact timestamp. The interface shows relative time (“7mo” for seven months ago). You need the exact timestamp.

Navigate to the target’s profile. Scroll to the post you want to analyze. Click on the relative timestamp, such as “7mo” or “2d.” The page expands to show the exact date and time in a tooltip or by navigating to the post’s detail view. The URL changes to something like:
22:02 · 30 Dec 2025The full timestamp is displayed on this page. Document it.
Part 8: Extracting Posted Images via Network Tab and Chrome Extension
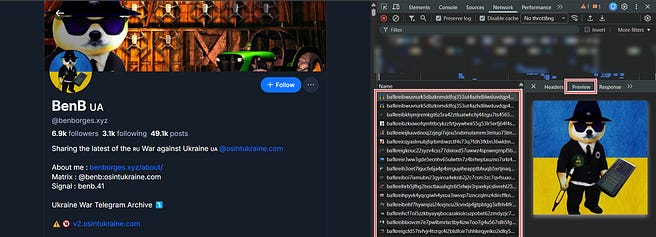
This technique extracts every image posted by the user in bulk using the browser’s Network tab.
Step 1: Navigate to the target’s Bluesky profile page.
Step 2: Open Developer Tools (F12 or Ctrl + Shift + I). Click the Network tab.
Step 3: In the filter bar, type img to show only image-related network requests.
Step 4: Refresh the page (F5). The Network tab populates with requests.
Step 5: Look for requests to URLs containing cdn.bsky.app/img. These are the user’s posted images. Each image the user has posted that loads on the page appears as a separate request.
Step 6: Scroll down the profile to load more posts. As new posts load, new image requests appear in the Network tab. The more you scroll, the more images populate.
Step 7: To download an image, you can double click on the image request line and it will pop up the image in a new tab. Or simply click on the request line, navigate to “preview” and right-click on the image to save it.
Extracting All Loaded Images at Once
To extract every image currently loaded in the Network tab without downloading them one by one:
Method 1: HAR Export
Step 1: After scrolling to load the desired posts, right-click anywhere inside the Network tab.
Step 2: Select “Save all as HAR with content.” This saves a HAR (HTTP Archive) file containing every request, including all loaded images, as base64-encoded data.
Step 3: Use a HAR viewer or a Python script to extract the images from the HAR file. Save the HAR file and process it offline. Every image that loaded during your session is recoverable.
Method 2: Chrome Extensions for One-Click Downloads
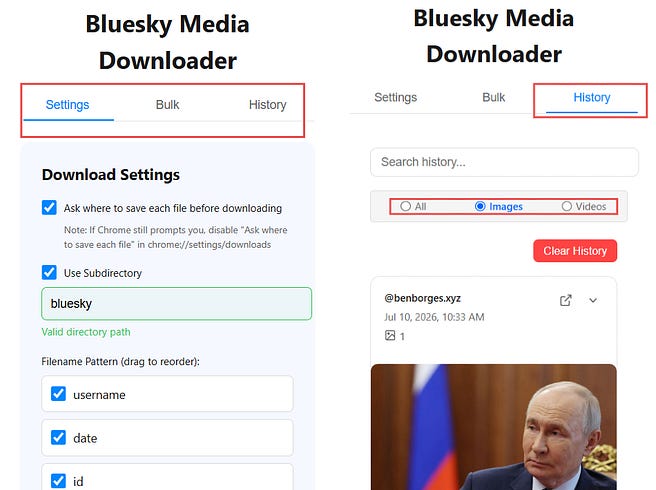
If you prefer a graphical approach without touching the Network tab or console, use a dedicated Bluesky scraper extension.
Bluesky Media Downloader
Install from the Chrome Web Store:
https://chromewebstore.google.com/detail/bluesky-media-downloader/odebdafkpnmipmdangfpfbhdamhdocdbNavigate to the target profile, click the extension icon, customize your settings, switch to bulk mode, set your max posts per run, and click “Start Bulk Download” — every image saves directly to your machine with no Network tab, no console, and no command line.
Install, click, download. Use this when speed and simplicity are the priority.
Part 9: Using PDSls for Deeper Intelligence

PDSls at https://pdsls.dev is a directory and inspection tool for the AT Protocol. It gives you structured access to account data without touching the page source.
Search by Handle or DID
Enter a Bluesky handle or DID. The tool returns:
The full DID document
Avatar and banner URLs
Associated PDS endpoint
Public records and collections
Browse Account Records
PDSls lets you browse the account’s public records, including posts, likes, and follows. This is API-level access through a clean web interface. No coding required.
Find Related Accounts
Some accounts link to other DIDs through their records. PDSls surfaces these connections. If the target has linked a website domain to their Bluesky account, PDSls shows the verification record. This is a direct bridge to the domain’s WHOIS data and ownership information.
Part 10: Google Dorking for Bluesky

Bluesky profiles and posts are indexed by Google. You can use dorks to find profiles, posts, and public mentions without touching the Bluesky app.
Find Bluesky Profiles by Username or Display Name
site:bsky.app “username”
site:bsky.app “display name”
Find Bluesky Profiles with Specific Keywords in Bio
site:bsky.app “security researcher”
site:bsky.app “osint”
site:bsky.app “investigator”
Find Posts Containing Specific Keywords
site:bsky.app “keyword”
site:bsky.app “email”
site:bsky.app “@gmail.com”
Find Posts from a Specific User
site:bsky.app “username” “keyword”Find Bluesky Handles Mentioned on Other Websites
“bsky.app” “username”
“@username.bsky.social”
“did:plc:”
This last dork finds pages outside Bluesky where a DID or handle is referenced. It surfaces forum posts, blog comments, and social media bios where the target listed their Bluesky account.
Cross-Engine Search
Run the same dorks on Yandex and Bing. Google indexes Bluesky well, but different engines catch different results. A post invisible to Google may appear on Bing.
Part 11: Practical Investigation Workflow Summary
Open the target Bluesky profile. Document the display name, handle, bio, follower and following counts, and post count.
Google dork the handle and display name. Run
site:bsky.app "username"and"@username.bsky.social"across Google, Yandex, and Bing. Find external mentions and indexed posts.Extract the DID from the page source or PDSls. This is the permanent identifier.
Pull the account creation timestamp from the page source or DID document.
Save the profile picture and banner image. Run them through reverse image search.
Analyze the bio for other platform handles, locations, and contact details.
Cross-reference the handle and display name across Twitter, Instagram, TikTok, GitHub, and LinkedIn.
Click on relative post timestamps to reveal exact dates. Or extract timestamps from the page source.
Use the Network tab to extract all posted images in bulk. Save as HAR for offline processing.
Use Inspect Element to extract individual images with precision.
Run PDSls searches for structured account data and related records.
Document everything. Screenshots, extracted IDs, timestamps, and your analysis.
Part 12: Quick Reference
Objective__________Method
Extract DID (User ID): Page Source → search for
did:plc:Resolve DID to metadata:
https://plc.directory/did:plc:...Account creation timestamp: Page Source →
createdAtor DID documentBanner image extraction: Page Source →
og:imageor Inspect ElementPost timestamp extraction: Click relative time or Inspect Element →
datetimeBulk image extraction: Network tab → filter
img→ Save as HARStructured account data: https://pdsls.dev
Google dork for Bluesky:
site:bsky.app "username"Find external mentions:
"@username.bsky.social"or"did:plc:"Cross-platform handle search: Search handle on Twitter, Instagram, TikTok, GitHub
Reverse image search: Google Lens, Yandex, TinEye
This is Bluesky OSINT. The platform was built for transparency. It gives you permanent identifiers, public APIs, and page source metadata that other platforms hide. Use that openness. Extract the DID. Pull the timestamps. Download the images. Cross-reference everything.
A quick note: nearly every piece of intelligence you gather via View Page Source can also be gathered via Inspect Element. The same data is there. The same URLs. The same timestamps. The same DIDs. If you prefer the visual element selector over searching raw HTML, use Inspect Element. If you prefer scanning the full source at once, use View Page Source. Both paths lead to the same intelligence. Choose whichever works faster for you.
This is what investigation looks like when the platform does not fight back.
Lecture 4.11: Discord OSINT — Investigating the Chat Platform
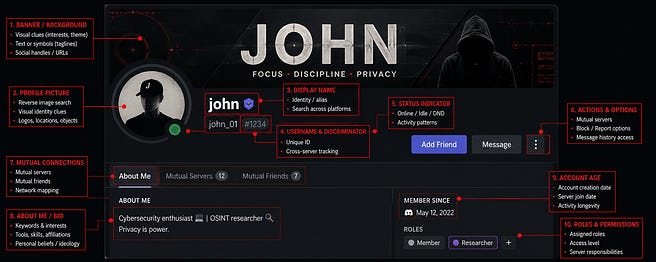
Discord is not just a chat app for gamers. It is where communities form, where developers collaborate, where activists organize, and where threat actors operate. Servers dedicated to everything from cryptocurrency trading to open source intelligence exist alongside private invite-only groups. People share files, link their other social accounts, and post messages they assume are semi-private.
Most investigators ignore Discord because it feels closed. It is not. Public servers are accessible. User IDs are permanent. Connected accounts are visible. Invite links are indexed. There is intelligence on Discord for anyone willing to look.
This lecture covers every practical technique for investigating Discord users and servers. No theory. Just what works.
Part 1: Understanding Discord’s Structure
Discord is organized differently from other platforms. You need to understand the architecture before you investigate.
Users: Individual accounts. Each has a username, a display name, a numeric User ID, a profile picture, and optional connected accounts.
Servers: Communities that contain channels. Servers can be public (anyone can join via invite link) or private (invite only).
Channels: Text or voice spaces within a server. Messages in public channels are visible to all server members.
Messages: Text, images, files, and links posted in channels. Messages in public servers can be viewed by anyone who joins.
Direct Messages (DMs): Private conversations between users. You cannot access these without compromising an account. Do not try.
The key insight is this: public servers and the users within them leave traces that are visible without authentication.
Part 2: Extracting the Permanent Discord User ID
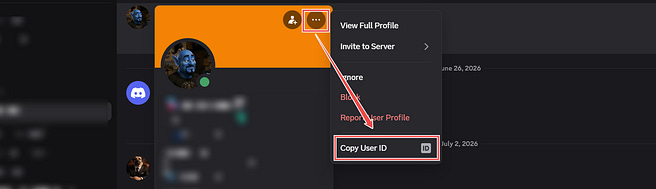
Every Discord user has a permanent numeric User ID. The username can change. The display name can change. The User ID never does. This is your anchor.
Step 1: Enable Developer Mode
Open Discord. Go to User Settings (the gear icon next to your username). Scroll down to Advanced in the left sidebar. Toggle Developer Mode to ON. This unlocks the ability to copy IDs.
Step 2: Copy the User ID
Navigate to the target user’s profile. You can do this by clicking their name in a server, in a direct message list, or in a friend list. Once on their profile, click the three-dot menu in the top right. Select Copy User ID.
The ID is now on your clipboard. It looks like:
123456789012345678This is the permanent identifier. Store it.
Step 3: Validate the User ID
Discord has a native URL format that targets a specific User ID. Construct a direct link to the user profile using the web URL format:
https://discord.com/users/USER_ID_HEREReplace the USER_ID_HERE with the User ID you extracted. Open this URL in your browser.
If the ID is valid, Discord loads a profile card showing the user’s public information: current username, display name, avatar, and badges. You have confirmed the ID is real and resolves to an active account.
If the ID is invalid or the account has been deleted, Discord shows an error or a blank profile.
Alternative: Deep-Link for the Discord App
Using Discord-id-lookup

To open the profile directly in the Discord desktop app instead of a browser:
discord://-/users/USER_ID_HEREThis forces the Discord app to open and display the target’s profile card.
Alternative: Third-Party Lookup
If you want to fetch publicly available profile data outside of Discord entirely, use:
https://discord.id — Set your bot token, paste the User ID. Returns avatar URL, banner URL, creation date, and public flags without opening Discord.
https://www.nicheprowler.com/tools/discord/discord-id-lookup — paste the User ID. Returns avatar URL, banner URL, creation date, and public flags without opening Discord.
Part 3: Finding the Account Creation Date via Snowflake ID
Discord uses the same Snowflake ID structure as TikTok. The User ID encodes the account creation timestamp in its first bits.
Method 1: Discord Lookup Websites
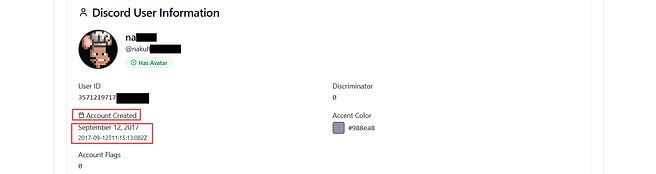
Several websites decode Discord Snowflakes automatically.
Go to https://www.nicheprowler.com/tools/discord/discord-id-lookup — Paste the User ID. The site returns:
Account creation date and time in UTC.
The exact timestamp down to the second.
This is the fastest method. No math required.
Method 2: Manual Snowflake Decoding

Discord Snowflakes do store the time elapsed since Discord’s epoch (January 1, 2015), shifted by 22 bits. To get the exact Unix timestamp in seconds, the mathematically correct formula is:

Step-by-Step How to Do It Properly:
Bit-shift the ID: Right-shift the Discord User ID by 22 bits (or divide it by 4194304 and discard the remainder/decimal). This extracts the milliseconds since Discord’s epoch.
Add the Epoch: Add
1420070400000(Discord’s epoch in milliseconds) to that number. This gives you the Unix timestamp in milliseconds.Convert to Seconds: Divide the total by
1000to get the timestamp in seconds, which you can then paste into EpochConverter.
Let us do this with an actual Discord User-ID:
The Math Breakdown:
Discord Snowflake ID:
357121971798016000Bitwise Right-Shift ( >> 22): Shifting the binary bits to the right by 22 is mathematically equivalent to dividing the number by 2 raise to power 22 (which is 4,194,304) and discarding any remainder.
357121971798016000 / 4194304 = 85144512061
Add Discord’s Epoch: Now we add Discord’s custom epoch offset (
1420070400000milliseconds).85144512061 + 1420070400000 = 1505214912061
Convert to Seconds: Divide the resulting Unix millisecond timestamp by 1,000.
1505214912061 / 1000 = 1505214912.061 seconds
The Result:
If you take the integer part — 1505214912—and paste it into epochconverter.com, it will output the exact second the account was created:
GMT: Tuesday, September 12, 2017 11:15:12 AM
Relative Time: September 12, 2017
Method 3: Python Script

You can automate the Snowflake decoding with a simple Python script. No dependencies required.
from datetime import datetime, timezone

snowflake = 123456789012345678
timestamp_ms = (snowflake >> 22) + 1420070400000
timestamp_s = timestamp_ms / 1000
utc_date = datetime.fromtimestamp(timestamp_s, tz=timezone.utc)
print(f”Account created: {utc_date.strftime(’%Y-%m-%d %H:%M:%S UTC’)}”)
Replace “123456789012345678” with the real Discord User ID. The script prints the exact account creation timestamp. This is the permanent temporal anchor for your investigation.
Part 4: Finding Connected Accounts
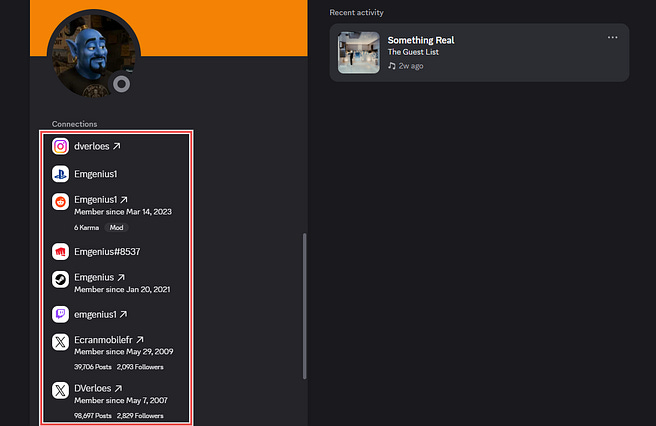
Discord allows users to link external accounts to their profile. These are visible to anyone who shares a server with the user, and sometimes to anyone who can view the profile.
What Can Be Connected:
Spotify (shows what the user is listening to)
Xbox
Steam
GitHub
Twitter (X)
Reddit
YouTube
Twitch
Battle.net
League of Legends
Epic Games
PayPal (rare)
How to View Connected Accounts
Click on the target’s profile in Discord. Look for linked accounts displayed as icons near their username. Click each icon. Discord opens the connected profile.
A linked Steam account shows their Steam profile URL. A linked GitHub shows their GitHub username. A linked Twitter shows their Twitter handle. Each of these is a direct cross-platform attribution bridge.
Document every connected account. Cross-reference the handles against other platforms.
Part 5: Finding Public Server Invite Links

Public Discord servers are accessible via invite links. These links are shared on social media, forums, Reddit, and websites. Google indexes them.
Public Discord servers are accessible via invite links. These links are shared on social media, forums, Reddit, and websites. Google indexes them.
Google Dorks for Discord Servers
site:discord.gg “keyword”
site:discord.gg “osint”
site:discord.gg “cybersecurity”
site:discord.gg “ukraine”
site:discord.gg “crypto”
Replace keyword with the topic or community you are investigating. Each result is an invite link to a public server.
Find Servers by Username Mentions
“username” site:discord.com
“username#0000” site:discord.com
“@username” site:discord.gg
These find forum posts, blog comments, and social media bios where the target listed their Discord username or a server invite link.
Discord Server Listing Sites
Several websites index public Discord servers:
https://disboard.org — Search by keyword or category. Largest public server directory.
https://discordservers.com — Curated server listings.
https://top.gg — Server discovery with search.
Search for keywords, topics, or community names. Each listing includes an invite link.
Part 6: Server Reconnaissance — What You Can See
Once you join a public server with your sock puppet account, document what is visible.
Server Information
Click the server name at the top. You see:
Server name and description.
Server rules.
Member count (online and total).
Server boost level.
Creation date (visible in the server settings for some servers).
Channel Listing
The left sidebar shows every channel in the server. Channels are organized into categories. Read the channel names and descriptions. They tell you what the community discusses and where sensitive conversations might happen.
Member List
The right sidebar shows all members currently online, organized by role. Roles tell you the server hierarchy. Look for:
Administrators and Moderators: These users control the server.
Custom Roles: Roles with names like “VIP,” “Verified,” “Staff,” or “Contributor” reveal the server’s structure.
Bots: Servers use bots for moderation, music, and automation. Note the bots present. Some bots log messages or provide lookup functionality you can use.
Messages
Scroll through public text channels. Read what people post. Look for:
Personal details shared casually (locations, occupations, relationships).
Links to external profiles (Twitter, GitHub, Instagram).
Files and images that can be downloaded and analyzed.
Pinned messages (important announcements or resources).
Part 7: Extracting Profile Pictures and Banners
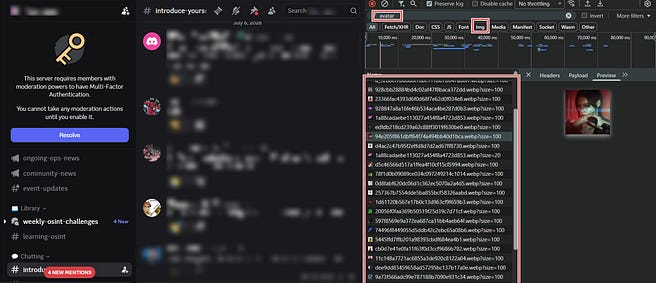
Discord profile pictures and server icons are accessible, but right-clicking and copying the image URL no longer works reliably. Discord now loads images dynamically. You need to extract them through the browser’s Developer Tools.
Extracting a User’s Profile Picture
Step 1: Open Discord in your browser at https://discord.com. Log into your sock puppet account. Navigate to the target user’s profile by clicking their name in a server or friend list.
Step 2: Open Developer Tools (F12 or Ctrl + Shift + I). Click the Network tab.
Step 3: In the filter bar, type avatar to show only avatar-related requests.
Step 4: Refresh the page (F5). The Network tab populates with requests.
Step 5: Look for requests to URLs containing cdn.discordapp.com/avatars/. These are the user’s profile pictures. Discord loads multiple sizes. Find the one ending in .png or .webp with the largest file size. That is the full-resolution version.
Step 6: Click on the request. In the Headers tab, copy the full Request URL. Open it in a new browser tab. Right-click and save the image.
Alternative: Filter by Image Type
If filtering by avatar returns too many results, switch to the Img filter instead. This shows only image files. Scroll through the loaded images. Find the ones from cdn.discordapp.com/avatars/. Click and save.
Extracting a Server Icon
The process is identical for server icons.
Step 1: Navigate to the target server in Discord.
Step 2: Open Developer Tools. Go to the Network tab.
Step 3: In the filter bar, type icon or cdn.discordapp.com/icons/.
Step 4: Refresh the page. Discord loads the server icon.
Step 5: Look for requests to URLs containing cdn.discordapp.com/icons/. Click the request. Copy the full URL. Open in a new tab. Save the image.
Alternative: Img Filter
Switch to the Img filter in the Network tab. Every image Discord loaded for that page appears. Find the server icon from the list. Download it.
What You Do With the Images
Once saved, run the profile picture or server icon through:
Google Lens: https://lens.google.com
Yandex Images:
https://yandex.com/imagesTinEye: https://tineye.com
If the same image appears on Twitter, Instagram, GitHub, or a forum, you have a cross-platform attribution bridge. A server icon that matches a website’s logo links the Discord server to that domain.
Part 8: Google Dorks for Discord Users and Servers
site:discord.com “username”
site:discord.gg “servername”
site:disboard.org “keyword”
“username#0000”
“discord.gg” “keyword”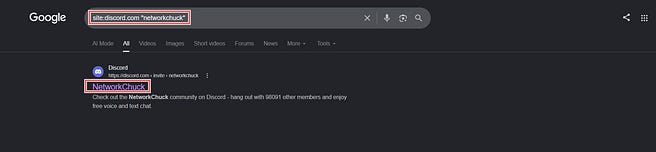
Run these across Google, Yandex, and Bing. Find forum posts, social media bios, and public server listings where the target’s Discord presence is mentioned.
Part 9: Ethical Boundaries
Discord is a semi-private platform. Many servers are invite-only. Some content is behind authentication walls.
What Is Acceptable:
Viewing public server listings and joining public servers.
Extracting User IDs and profile pictures from public profiles.
Decoding Snowflake IDs for creation timestamps.
Viewing linked accounts that the user chose to display publicly.
Documenting messages in public channels you legitimately joined.
What Is Not Acceptable:
Using compromised accounts to access private servers.
Attempting to view direct messages.
Scraping messages at scale from servers without permission.
Impersonating another user to gain access.
Using bots to automate data collection in violation of Discord’s Terms of Service.
If a server requires an invite you were not given, you stop. If a user has set their profile to private, you respect that boundary. Discord’s platform rules prohibit unauthorized scraping. Operate within the terms.
Part 10: Practical Investigation Workflow Summary
Enable Developer Mode in Discord.
Copy the target’s User ID from their profile.
Decode the creation timestamp using
discord.idor the Snowflake formula.Document all connected accounts visible on the profile. Cross-reference each to other platforms.
Save the profile picture. Run reverse image search.
Google dork the username and any known server names.
Search
disboard.organddiscordservers.comfor servers related to the target’s interests.Join relevant public servers with a sock puppet account.
Document server information, member roles, and visible messages.
Extract server icons and reverse image search them.
Cross-reference every username, handle, and connected account across platforms.
Document everything. Screenshots, User IDs, timestamps, and your analysis.
Part 11: Quick Reference
Objective______________Method
Enable Developer Mode: User Settings → Advanced → Developer Mode
Extract User ID: Profile → three-dot menu → Copy User ID
Decode creation timestamp:
discord.idor Snowflake formulaFind connected accounts: View target profile → linked icons
Find public servers:
site:discord.gg "keyword",disboard.orgExtract profile picture: Right-click → Copy Image URL
Reverse image search: Google Lens, Yandex, TinEye
Server reconnaissance: Join public server → document channels, roles, messages
Google dork for Discord:
site:discord.com "username",site:discord.gg "keyword"
This is Discord OSINT. The platform wants you to think everything is private. It is not. User IDs are permanent. Connected accounts bridge to other platforms. Public servers are open. Invite links are indexed. Extract what is visible, cross-reference everything, and build your attribution from the fragments people leave behind.
END OF VOLUME 1
You have successfully completed the core identity, geospatial, and social media footprint frameworks. The curriculum continues immediately with infrastructure targeting, dark web enumeration, automated scripting, and intelligence reporting.
CLICK HERE TO ACCESS VOLUME 2: TECHNICAL INTELLIGENCE & ATTRIBUTION:
The Professional OSINT Practitioner: From Foundations to Advanced Attribution
·This is not a theoretical course. It is a practical, hands-on deep dive into the mindset and methodologies of a professional OSINT investigator. Every module is designed to answer not just the “what,” but the “how” and the “why,” with a strict focus on legal, ethical, and operational security (OPSEC) considerations. The goal is to transform a student fr…
